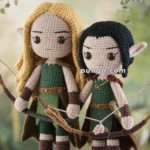
Step into a world of woodland whimsy with the Amigurumi Forest Elf, a magical crochet companion who’s ready to bring enchantment to your handmade collection! 🍃🧝♂️ With pointy ears, leafy accents, and a mischievous twinkle in their embroidered eyes, this little elf looks like they’ve just wandered out of a fairy tale. Whether perched on a shelf, tucked into a gift basket, or guarding your yarn stash, they’re sure to add a sprinkle of forest charm to any space.
This pattern is perfect for crocheters who love crafting characters with personality and flair. You can customize your elf’s outfit with earthy tones, add tiny accessories like a satchel or staff, or even stitch up a whole woodland crew to keep the magic flowing. Whether you’re creating a fantasy scene or gifting a touch of nature-inspired joy, the Forest Elf is a delightful way to celebrate storytelling, creativity, and the magic of crochet—one enchanted stitch at a time! 🧶✨
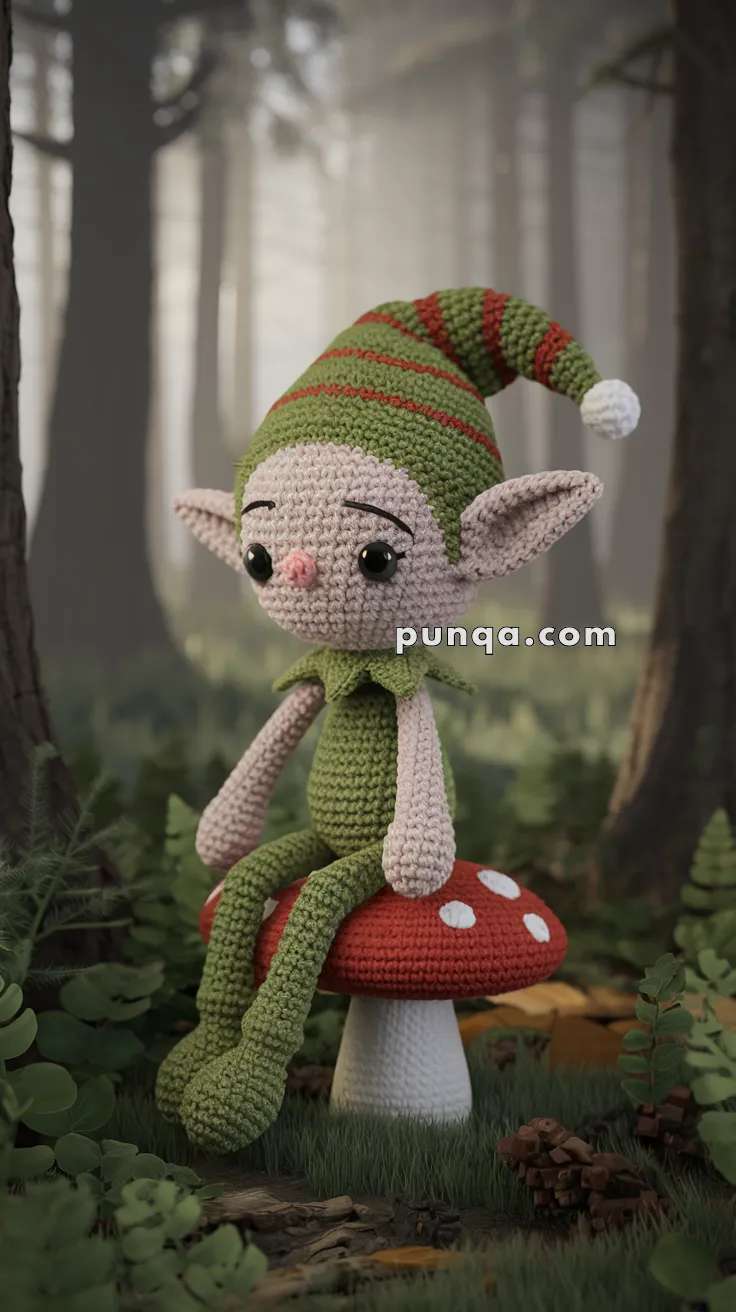
🌲 Amigurumi Forest Elf Crochet Pattern
Bring a touch of woodland magic into your home with this enchanting Forest Elf Amigurumi! With his long striped hat, oversized ears, and leafy collar, he’s the perfect fairy-tale companion. This updated version refines limb thickness, proportions, and facial shaping for a more authentic woodland elf look.
✨ Skill Level
Intermediate – includes shaping, color changes, and structural attachment.
📏 Finished Size
Approx. 25 cm (10 in) tall including hat, when using worsted-weight yarn.
🧶 Materials
Worsted weight cotton yarn:
- Beige (skin)
- Pale pink (nose)
- Olive green (body, hat, shoes)
- Red (hat stripes & mushroom cap)
- White (pom-pom, mushroom spots, stem)
- Black (eyebrows, mouth)
Other materials:
- 2.5 mm crochet hook
- 10 mm black safety eyes
- Polyfill stuffing
- Yarn needle
- Thin wire (optional for mushroom stem)
🧵 Abbreviations (US)
MR – Magic Ring
sc – Single Crochet
inc – Increase (2 sc in same st)
dec – Decrease (sc2tog)
ch – Chain
sl st – Slip Stitch
BLO – Back Loop Only
FO – Fasten Off
🧚 Forest Elf Pattern
Head (Beige)
R1 MR 6
R2 inc ×6 (12)
R3 (sc 1, inc) ×6 (18)
R4 (sc 2, inc) ×6 (24)
R5 (sc 3, inc) ×6 (30)
R6–R12 sc around (30)
R13 (sc 3, dec) ×6 (24)
R14 (sc 2, dec) ×6 (18)
R15 (sc 1, dec) ×6 (12)
Stuff firmly, FO.
Eyes: Place 10 mm eyes between R6–R7, 4–5 sts apart.
Eyelids (required): ch 8, sc in 2nd ch from hook, sc 5, hdc 1. Curve over eyes, attach covering top 2/3 for dreamy look.
Eyebrows: Embroider with 2–3 passes of black yarn in soft arcs above eyes.
Nose (Pink):
R1 MR 6
R2 inc ×6 (12)
R3 sc around (12)
Lightly stuff and attach just below eyes.
Ears (Make 2 – Beige, Long & Pointed)
R1 MR 4
R2 (sc 1, inc) ×2 (6)
R3 (sc 2, inc) ×2 (8)
R4 (sc 3, inc) ×2 (10)
R5 (sc 4, inc) ×2 (12)
R6 (sc 5, inc) ×2 (14)
R7 (sc 6, inc) ×2 (16)
R8 (sc 7, inc) ×2 (18)
R9–R11 sc around (18)
R12 (sc 4, dec) ×3 (15)
R13 (sc 3, dec) ×3 (12)
R14 (sc 2, dec) ×3 (9)
Flatten, pinch into point, and sew slightly above eye level, angled outward.
Hat (Green & Red Striped)
Alternate 2 rounds green / 2 rounds red.
R1 MR 4 (green)
R2 inc ×4 (8)
R3 sc around (8)
R4 (sc 1, inc) ×4 (12)
R5–R6 sc around (red)
R7 (sc 2, inc) ×4 (16) (green)
Continue alternating colors and increasing every few rounds until ~50 sts.
Work to R65–R68 for full length.
Set hat curve: fold at R35–R40, stitch through both layers several times to lock bend. Add 2–3 small tacks to shape the backward flop.
Pom-pom: MR 6, inc ×6 (12), sc 2 rounds, dec ×6 (6), FO and sew.
Collar (Leafy)
Attach green yarn around neck base.
(ch 5–6, sl st in next st, skip 1) repeat around 6–8 times for defined leaves. Tug ends to sharpen points.
Body (Green)
Compact torso for balanced proportion.
R1 MR 6
R2 inc ×6 (12)
R3 (sc 1, inc) ×6 (18)
R4–R9 sc around (18)
Stuff firmly, FO.
Arms (2 – Beige → Green)
R1 MR 6
R2 inc ×6 (12)
R3–R8 sc around (12) beige
R9 change to green
R9–R18 sc around (12)
Lightly stuff, attach below collar.
Legs (2 – Beige → Green)
R1 MR 6
R2 inc ×6 (12)
R3–R6 sc around (12) beige
R7 change to green
R7–R45 sc around (12)
Stuff moderately to keep shape. Attach with legs hanging naturally over mushroom edge.
🍄 Mushroom Seat
Stem (White):
R1 MR 6
R2 inc ×6 (12)
R3 (sc 1, inc) ×6 (18)
R4–R18 sc around (18)
R19 (sc 1, dec) ×6 (12), FO.
Insert wire or dowel for rigidity, stuff firmly.
Cap (Red):
R1 MR 6
R2 inc ×6 (12)
R3 (sc 1, inc) ×6 (18)
R4 (sc 2, inc) ×6 (24)
R5 (sc 3, inc) ×6 (30)
R6 (sc 4, inc) ×6 (36)
R7 (sc 5, inc) ×6 (42)
R8 (sc 6, inc) ×6 (48)
R9–R11 sc around (48)
R12 (sc 6, dec) ×6 (42)
R13 (sc 5, dec) ×6 (36)
R14 sc around (36), FO.
Spots (White):
Small: MR 6; Large: MR 8.
Attach 3 front, 2–3 back for even distribution.
🪡 Assembly
1️⃣ Sew head to body securely.
2️⃣ Attach arms and long legs symmetrically.
3️⃣ Stitch elf’s body to mushroom cap, centered, with legs draped naturally.
4️⃣ Position hat backward and sew in place.
5️⃣ Add subtle blush and embroidered mouth.
6️⃣ Ensure mushroom sits flat and stable.
✨ Finishing Touches
- Brush cheeks lightly with pink yarn or pastel.
- Bend hat and limbs gently for lifelike posture.
- Display your elf sitting quietly on his mushroom throne, surrounded by forest charm. 🌿🍄🧝♂️