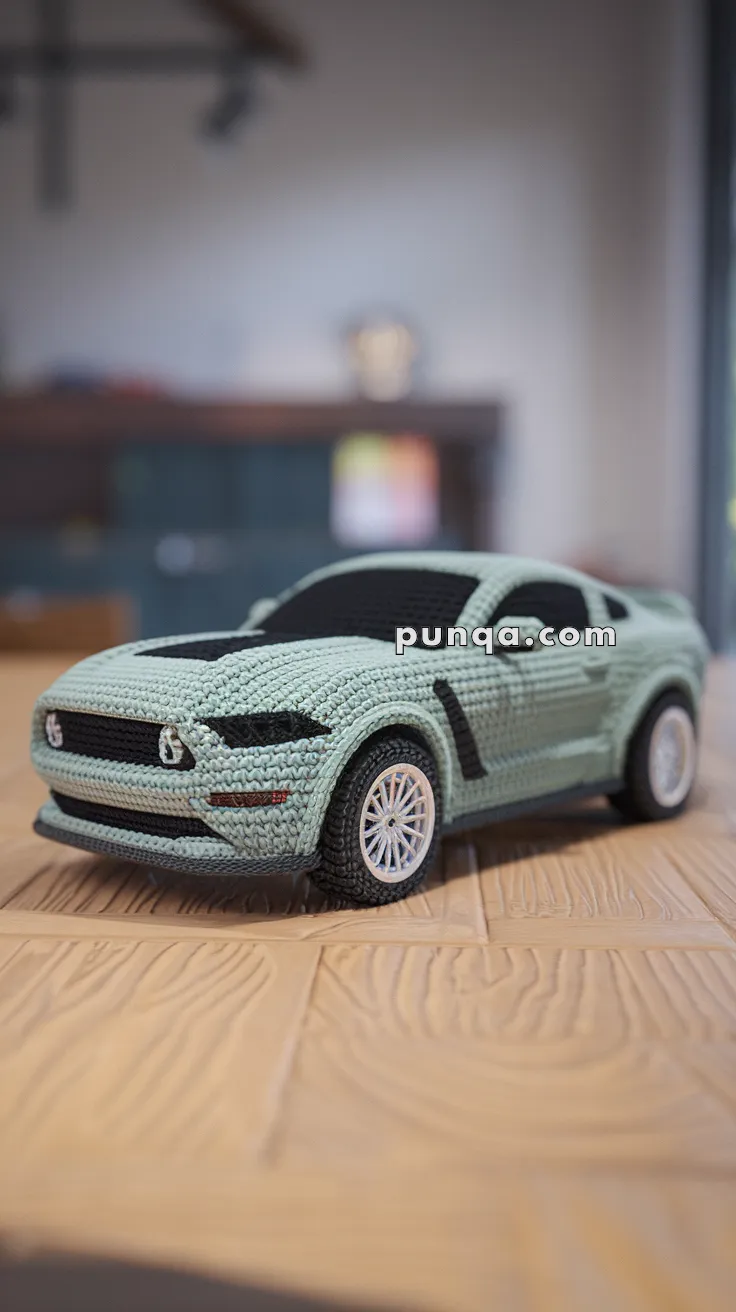
Rev up your crochet skills with this Amigurumi Ford Mustang pattern! 🚗✨ With its sleek design, iconic grille, and detailed wheels, this project brings the legendary muscle car to life in yarn form. Whether you’re crafting for a car enthusiast, a unique décor piece, or simply love vehicle-inspired amigurumi, this FREE pattern is a thrilling addition to your collection.
Designed for advanced crocheters, this pattern allows for customization in body colors, tire details, and even tiny accessories like racing stripes or headlights to enhance its authenticity. Choose classic reds and blacks for a traditional Mustang look or experiment with bold hues for a creative twist! Whether displayed as part of a collector’s setup or gifted to a fellow crochet enthusiast, this amigurumi Ford Mustang is sure to impress. Grab your hook, select your favorite yarn, and let’s bring this iconic speedster to life—one stitch at a time! 🧶✨
🚗 Amigurumi Ford Mustang Crochet Pattern
Rev up your creativity with this highly detailed amigurumi Ford Mustang! This iconic muscle car design is captured in crochet form with a sporty body, signature grille, aerodynamic lines, and even realistic wheels and lights. A perfect project for car lovers and intermediate to advanced crafters looking for a challenge and a showpiece!
✨ Skill Level
Advanced
This pattern includes tight shaping, color changes, embedded details, and structured assembly.
📏 Finished Size
Approx. 18–20 cm (7–8 in) long
Approx. 7 cm (2.75 in) wide
Using worsted yarn and a 2.75–3.0 mm hook
(The photographed model is compact and shelf-sized.)
🧶 Materials
Yarn (worsted / category 4):
-
Light mint green – main body
-
Black – windows, grille, tires, hood details
-
White – wheel rims
-
Small amount of dark gray or silver – emblem accents
Other:
-
2.75–3.0 mm crochet hook
-
Fiberfill stuffing
-
Thin cardboard or plastic canvas (base support)
-
Tapestry needle
-
Stitch markers
-
Scissors
🪡 Abbreviations (US)
MR – magic ring
sc – single crochet
inc – increase
dec – decrease
sl st – slip stitch
ch – chain
BLO – back loop only
FO – fasten off
Work in continuous rounds unless stated otherwise.
🚘 Car Body (One Piece)
Worked from front bumper to rear, forming hood, cabin, and trunk in sequence.
Front & Hood
With mint green yarn:
R1: MR 6
R2: inc x6 (12)
R3: (sc, inc) x6 (18)
R4: (2 sc, inc) x6 (24)
R5: (3 sc, inc) x6 (30)
R6–9: sc around (30)
This creates the rounded front nose.
Hood Slope
R10: sc 24, dec x3 (27)
R11: sc 24, dec x1 (26)
R12–13: sc around (26)
Insert a thin cardboard base now for firmness.
🪟 Windshield & Roof
Switch to black yarn:
R14: sc around (26)
R15: sc 12, ch 2, skip 2, sc 12 (window gap)
R16: sc around, working 2 sc into ch space (26)
R17–18: sc around (26)
Switch back to mint green.
🚗 Cabin & Rear Deck
R19–22: sc around (26)
R23: (4 sc, dec) x4, sc 2 (22)
R24–26: sc around (22)
Stuff firmly but keep sides straight.
Rear Taper
R27: (3 sc, dec) x4, sc 2 (18)
R28: (2 sc, dec) x4, sc 2 (14)
R29: dec x7 (7)
FO and close.
🪟 Side Windows (Inset Panels)
With black yarn, make 2 identical panels:
Ch 7
Row 1: sc in 2nd ch and across (6)
Rows 2–4: sc across (6)
FO.
Sew flat onto the sloped side sections where the roof meets the body.
🚘 Front Grille & Details
Grille Insert (Black)
Ch 9
Row 1: sc across (8)
Rows 2–3: sc across (8)
FO.
Sew centered on the front bumper.
Embroider two small vertical silver stitches for the emblem accents.
🛞 Wheels (Make 4)
Tires (Black)
R1: MR 6
R2: inc x6 (12)
R3: (sc, inc) x6 (18)
R4–5: sc around (18)
R6: (sc, dec) x6 (12)
FO, stuff lightly.
Rims (White)
R1: MR 6
R2: inc x6 (12)
R3: sc around (12)
Embroider thin spoke lines from center outward.
Sew rims onto tire faces.
Attach wheels to body sides — slightly recessed, not protruding.
🪞 Hood & Side Accents
-
Use black yarn to surface-embroider:
-
narrow hood vents
-
vertical side intake details behind front wheels
-
-
Keep all lines minimal and flat (no raised appliqués).
✂️ Final Assembly & Shaping
-
Shape the roof gently downward toward the windshield
-
Ensure wheels sit level so the car rests evenly
-
Light steam blocking helps straighten body lines
-
Do not overstuff — firmness comes from tension, not bulk
🌟 Closing Notes
This crochet Mustang-style car is all about clean geometry, balanced proportions, and subtle detailing. With its smooth body, compact scale, and carefully placed accents, it makes a striking decorative piece for shelves, desks, or gift displays — especially for car enthusiasts who appreciate craftsmanship in miniature form.


Muy bellos amigurumis