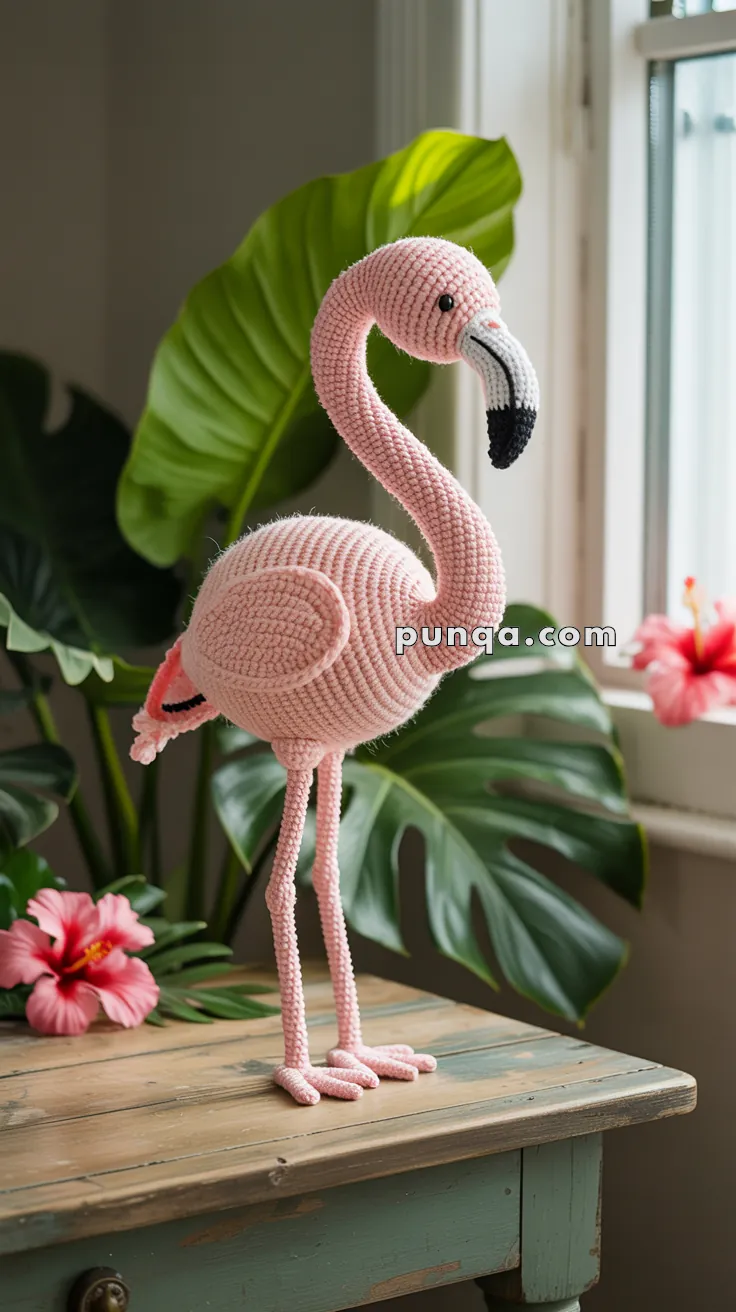
Strut into your next crochet adventure with the Amigurumi Flamingo, a fabulous feathered friend full of flair and personality! 🦩💖 With its long legs, curved neck, and signature pink plumage, this tropical cutie is ready to add a splash of sunshine to your handmade collection. Whether perched on a shelf, gifted to a flamingo fan, or joining a flock of other amigurumi animals, this stylish bird brings a playful twist to your crafting lineup.
This pattern is perfect for crocheters who love bold colors and expressive shapes. You can customize your flamingo with a flower crown, sparkly wings, or even a tiny beach towel for extra vacation vibes. Whether you’re dreaming of summer or just looking to brighten your day, the Amigurumi Flamingo is a joyful way to stitch up some tropical charm—one fabulous loop at a time! 🧶🌴
🦩 Amigurumi Flamingo Crochet Pattern
This elegant Amigurumi Flamingo will add a touch of tropical charm to your home. With its plump oval body, gracefully curved neck, embroidered eyes, long teardrop wings, skinny legs, and tiny tail tuft, it looks just like the real bird — with a kawaii twist.
✨ Skill Level
Intermediate – shaping, color changes, and wire reinforcement for legs/neck.
📏 Finished Size
- ~28–30 cm tall (standing).
🧶 Materials
- Light pink yarn (main body, head, wings, legs)
- White yarn (upper beak)
- Black yarn (beak tip + embroidered eyes)
- Crochet hook: 3.0–3.5 mm
- Polyester fiberfill stuffing
- Yarn needle
- Scissors
- Thin craft wire or pipe cleaners (for legs + neck support)
- Stitch markers
🪡 Abbreviations (US Terms)
MR – Magic Ring
sc – Single crochet
inc – Increase (2 sc in same st)
dec – Decrease (sc2tog)
ch – Chain
sl st – Slip stitch
st(s) – Stitch(es)
🧵 Pattern Instructions
🐦 Head & Neck (pink, worked as one piece)
- MR 6 (6)
- inc ×6 (12)
- (sc, inc) ×6 (18)
4–8. sc around (18) → head roundness. - (sc, dec) ×6 (12)
- sc around (12)
👉 Embroider small black eyes at this stage, positioned symmetrically.
Neck:
11–40. sc around (8–10 sts only for slim tube).
👉 Insert thin wire inside. Lightly stuff around it (don’t overstuff).
👉 Shape gently into S-curve. FO, leave tail for sewing to body.
🐦 Beak (white → black)
- With white yarn: MR 4 (4)
- inc ×4 (8)
- (sc, inc) ×4 (12)
4–5. sc around (12)
6–9. switch to black, sc around (12) - (sc, dec) ×4 (8)
- sc around (8). FO.
👉 Lightly stuff. Sew to head. Beak should taper smoothly and angle slightly downward.
🐦 Body (pink, oval)
- MR 6 (6)
- inc ×6 (12)
- (sc, inc) ×6 (18)
- (2 sc, inc) ×6 (24)
- (3 sc, inc) ×6 (30)
- (4 sc, inc) ×6 (36)
- (5 sc, inc) ×6 (42)
8–16. sc around (42) → elongates into oval. - (5 sc, dec) ×6 (36)
- (4 sc, dec) ×6 (30)
- (3 sc, dec) ×6 (24)
- (2 sc, dec) ×6 (18)
- (sc, dec) ×6 (12)
- dec ×6 (6). FO.
Stuff firmly into plump oval.
🐦 Wings (make 2, pink, teardrop shape)
- Ch 13.
- Row 1: sc in 2nd ch and across (12).
3–4. sc across (12). - dec, sc 8, dec (10).
6–7. sc across (10). - dec, sc 6, dec (8).
9–10. sc across (8). - dec, sc 4, dec (6).
- sc across (6). FO.
Sew flat against body sides, pointing backward.
🦵 Legs (make 2, pink)
- MR 4 (4)
2–35. sc around (4). FO.
👉 Insert stiff wire inside, cut to desired length. Cover wire fully with crochet tube. No stuffing needed.
🦶 Feet (make 2, pink)
Each foot has 3 toes.
Toe (make 3 per foot):
- MR 4 (4)
- sc around (4) for 8–10 rows. FO.
Join toes side by side. Crochet/sc a few stitches across bases to form flat pad. Attach leg at center back of foot pad.
👉 Toes should be longer and slightly spread, not stubby.
🪶 Tail Tuft
- Ch 6.
- Row 1: sc in 2nd ch and across (5). FO.
Make 2–3 of these narrow feathers. Sew together and attach at back of body.
🧩 Assembly
- Attach neck securely to top of body, shaping into curve.
- Sew beak to head front.
- Sew wings flat onto body sides.
- Attach legs to underside of body.
- Sew feet flat so flamingo stands balanced.
- Attach tail tuft at back.
🌟 Finishing Touches
- For extra stability, glue wire ends inside a cardboard foot sole before covering with crochet.
- Slightly bend toes for realism.
- Add embroidered feather lines on wings if desired.
🎉 Final Words
Your Amigurumi Flamingo is complete! With its slender curved neck, oval body, graceful wings, long wired legs, spread toes, and tiny tail tuft, this flamingo looks ready to stroll through a tropical garden. A delightful statement piece for your crochet collection.