Make a splash with your crochet skills using this Amigurumi Fish Bag pattern! With its playful shape, fin-tastic details, and roomy interior, this quirky bag is both a statement piece and a functional accessory. Whether you’re heading to the beach, adding a whimsical touch to your outfit, or crafting a fun gift for a sea-loving friend, this pattern lets you stitch up a fishy friend that’s sure to turn heads and spark smiles. It’s a delightful way to combine creativity and practicality in one adorable project. 🐟👜🌊
Designed for customization, this pattern invites you to play with bold colors, textured stitches, and fun embellishments like scales, bubbles, or even a little fishy grin. Add a strap for easy carrying, a zipper or drawstring for closure, or line it with fabric for extra durability. Whether you go for a tropical palette or a soft pastel look, this Amigurumi Fish Bag is a joyful and imaginative project—perfect for bringing a splash of handmade charm to every stitch! 🧶💖🐠
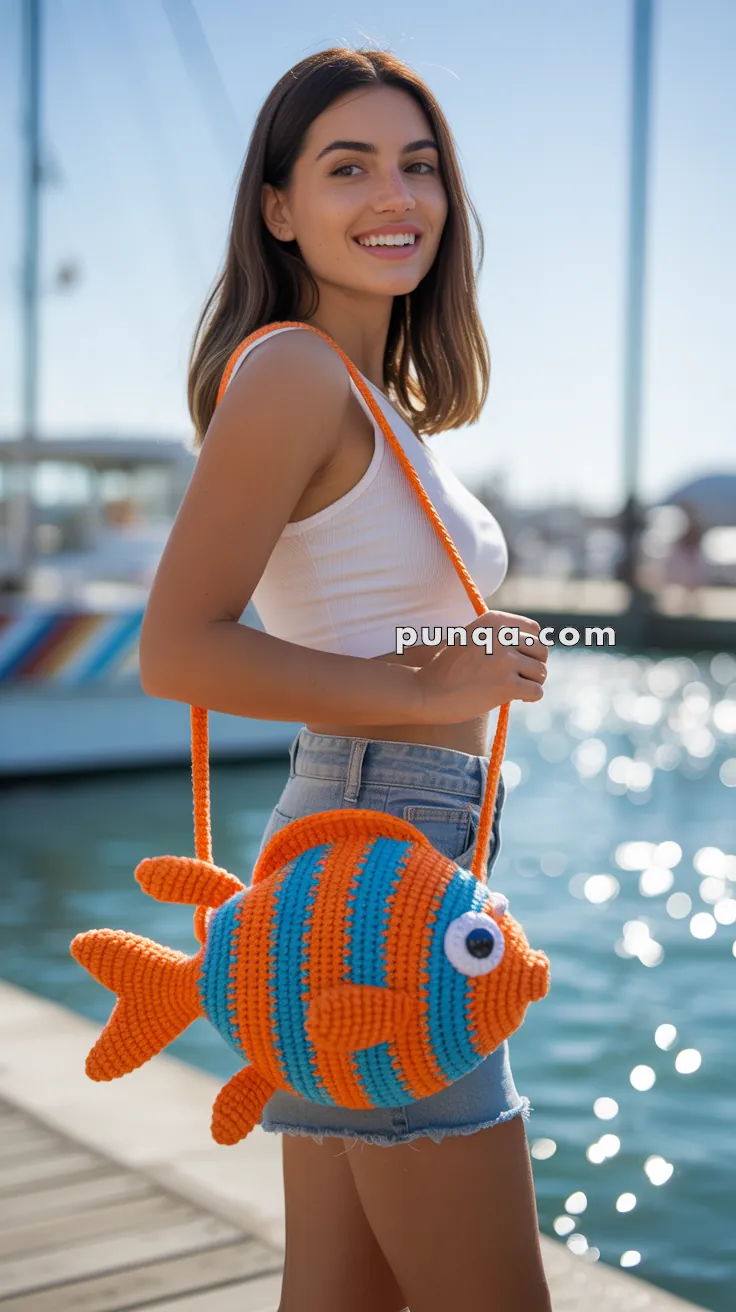
🐠 Amigurumi Fish Bag Crochet Pattern
Make a splash with this adorable and vibrant amigurumi fish-shaped shoulder bag – perfect for summer outings, beach days, or as a whimsical gift for kids and adults alike!
✨ Skill Level
Intermediate – includes color changes, shaping, and attaching multiple parts.
📏 Finished Size
Approx. 10–12 inches (25–30 cm) in diameter (excluding fins), depending on yarn used.
🧶 Materials
- Yarn (worsted weight):
- Orange (main color)
- Turquoise blue (contrast stripes)
- White and black (eyes)
- Crochet hook: 3.5 mm (E)
- Zipper or button (for bag closure – instructions below)
- Tapestry needle
- Stitch marker
- Lining fabric (optional, for inside of bag)
- Polyester stuffing (for fins and optional shaping)
🧵 Abbreviations (US Terms)
- MR – Magic Ring
- ch – Chain
- sc – Single Crochet
- inc – Increase (2 sc in same stitch)
- dec – Decrease (sc 2 together)
- sl st – Slip Stitch
- FO – Fasten Off
- BLO – Back Loop Only
🐟 Bag Body (Make 2 Panels – Front & Back)
Start with orange, alternating every 2 rows with blue.
- MR, 6 sc (6)
- inc x6 (12)
- (1 sc, inc) x6 (18)
- (2 sc, inc) x6 (24)
- (3 sc, inc) x6 (30)
- (4 sc, inc) x6 (36)
- (5 sc, inc) x6 (42)
- (6 sc, inc) x6 (48)
- (7 sc, inc) x6 (54)
- (8 sc, inc) x6 (60)
- (9 sc, inc) x6 (66)
12–16. sc around (66) – continue alternating orange/blue
FO and weave in ends.
Optional: Stitch a circle of fabric as lining for each side of the bag to give structure.
🐟 Fins (Make 4 – 2 Top/Bottom, 2 Side)
Using orange:
- MR, 6 sc
- inc x6 (12)
- (1 sc, inc) x6 (18)
- sc around (18)
- dec x6, sc 6 (12)
- dec x6 (6)
FO, lightly stuff, flatten and sew top/bottom fins centered on bag body.
🐟 Tail Fin (Make 2)
Using orange:
- ch 6
- sc in 2nd ch from hook and across (5)
3–5. ch 1, turn, sc across (5) - dec, sc 1, dec (3)
- dec, sc 1 (2)
- dec (1)
Repeat to make second side, then sew both together and attach to bag’s back panel.
🐟 Side Gusset / Strap Panel
Using orange:
- ch 10
- sc across, ch 1, turn (9)
3–60. sc across (or until long enough to wrap around front panel + bottom half only)
Leave ends unstitched at the top to insert zipper or button panel.
FO and pin along edges of one body circle (front or back) and sew.
Then sew other body circle to the gusset.
🧵 Assembly
- Attach fins, tail, and side fins to each side of the body.
- Add plastic eyes or crochet them (see below).
- Attach strap by chaining the desired length and attaching both ends securely to the side gusset.
👁️ Eyes (Make 2)
White:
- MR, 6 sc
- inc x6 (12)
FO and sew.
Black:
- MR, 4 sc
FO and sew onto white circle.
Attach entire eye piece to the body.
🔒 Bag Closure Options
Option 1: Zipper
- Sew a zipper to the top opening between the two bag panels.
- Use fabric glue or hand-sew lining to make it neat.
- Optional: use zipper ends to stop the fish mouth from opening too far.
Option 2: Button + Loop
- Attach a loop of chain stitches to the top center of one body panel.
- Sew a large button to the opposite panel.
- Hook the loop over the button to close.
💡 Optional Lining
To prevent stretch and give a clean interior, line the inside with fabric cut to the same fish shape, and hand-stitch it to the crocheted panels before joining.
This cute fish bag is perfect for showing off your fun style or giving as a quirky handmade gift. The colors can be easily customized – try yellow and purple, or rainbow stripes for extra fun! 🎣🧶