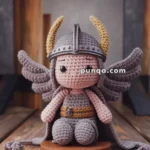
There’s something truly enchanting about creating an amigurumi fairy dragon. 🐉✨ As someone who loves crafting adorable creatures with yarn, I find the process both rewarding and magical. It combines the whimsical allure of fantasy with the tactile joy of crocheting. Each stitch brings the dragon to life, infusing it with personality and charm. From selecting the perfect yarn colors to adding the final touches with tiny details like wings and expressive eyes, every step feels like a delightful journey into a world of imagination. The excitement of watching a mythical creature emerge from a simple ball of yarn never gets old!
The process of crafting an amigurumi fairy dragon involves a beautiful blend of creativity and technique. First, I choose my yarn, often opting for bright, cheerful colors that evoke the magical nature of these mythical beings. 🧶💖 Then, it’s all about getting into the rhythm of crocheting, with each round building upon the last to create the dragon’s body, limbs, and head. The best part is designing the wings—tiny, delicate structures that give the dragon its fairy-like appearance. Finally, I add embellishments, like sequins or embroidery, to make each dragon unique. It’s not just about creating a toy; it’s about crafting a little piece of joy!
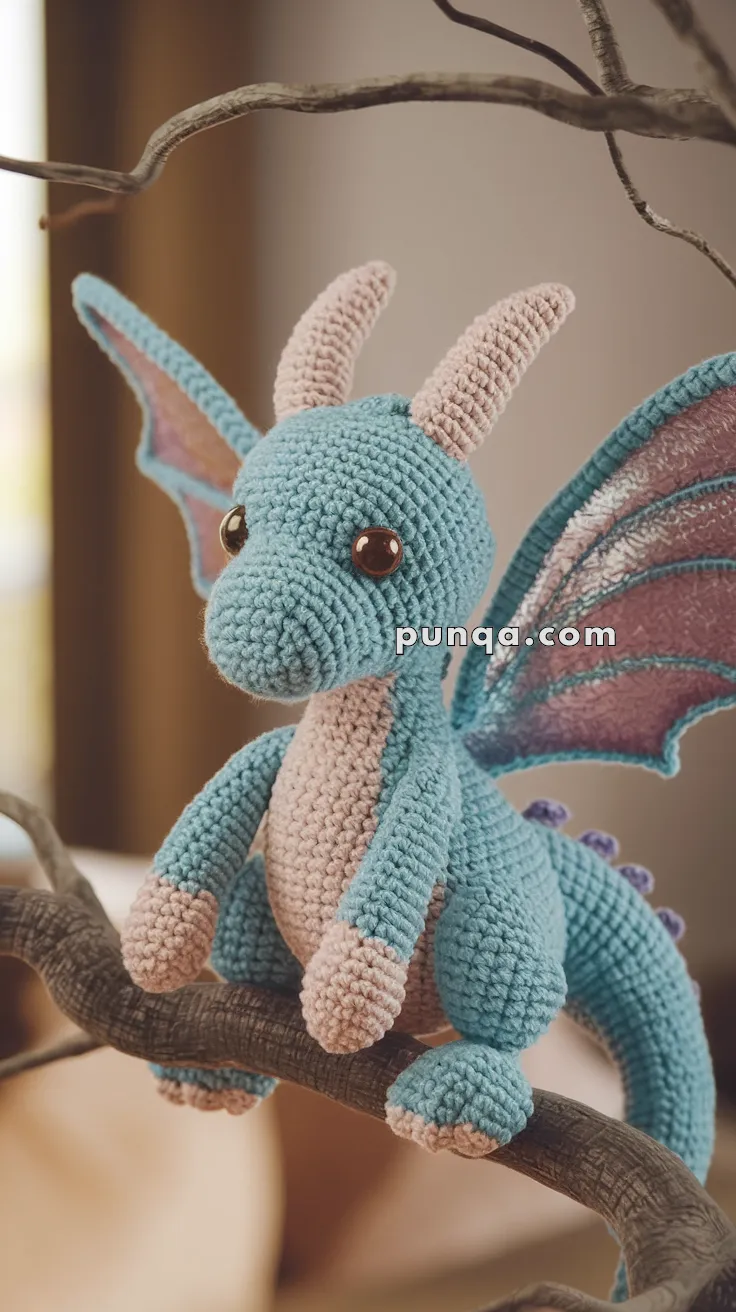
🐉 Amigurumi Fairy Dragon Crochet Pattern
This sweet Fairy Dragon combines magical details with soft pastel colors, making it the perfect whimsical companion. With shimmering wings, a long snout, rounded paw pads, and tiny back spikes, this dragon is gentle-looking and full of charm. Whether perched on a shelf, a branch, or nestled among your other fantasy amigurumi, this dragon is sure to delight!
✨ Skill Level
Intermediate – involves shaping, sewing multiple parts, color changes, and mixed-media wing details.
📏 Finished Size
Approx. 10–12 inches (25–30 cm) seated using DK yarn and a 2.5–3 mm hook.
🧶 Materials
-
DK or sport weight yarn:
-
Light blue (main body, wings outline)
-
Soft pink (belly, ears, paw/foot pads)
-
Purple/lavender (back spikes)
-
-
Shimmer thread, felt, or mesh (wing panels)
-
2.5–3 mm crochet hook
-
12 mm safety eyes (brown or black)
-
Fiberfill stuffing
-
Tapestry needle
-
Stitch markers
-
Hot glue (optional, for attaching wings)
🧵 Abbreviations (US Terms)
-
MR – Magic Ring
-
sc – Single Crochet
-
inc – Increase (2 sc in same st)
-
dec – Decrease (sc2tog)
-
sl st – Slip Stitch
-
ch – Chain
-
FO – Fasten Off
-
BLO/FLO – Back/Front Loop Only
🐉 Crochet Pattern Instructions
Head (Light Blue)
-
MR, 6 sc [6]
-
inc x6 [12]
-
(sc, inc) x6 [18]
-
(2 sc, inc) x6 [24]
-
(3 sc, inc) x6 [30]
-
(4 sc, inc) x6 [36]
7–16. sc around [36] -
(4 sc, dec) x6 [30]
-
(3 sc, dec) x6 [24]
– Place eyes between rounds 9–10, approx. 6 sts apart. -
(2 sc, dec) x6 [18]
-
(sc, dec) x6 [12]
-
dec x6 [6]
FO, stuff firmly, close hole.
Muzzle (Light Blue – Extended Snout)
-
MR, 6 sc [6]
-
inc x6 [12]
-
(sc, inc) x6 [18]
4–12. sc around [18] → creates a long snout (about half the head length).
FO, stuff lightly, sew under eyes centered on face.
Ears (Make 2 – Soft Pink)
-
MR, 4 sc [4]
-
(sc, inc) x2 [6]
-
(2 sc, inc) x2 [8]
-
(3 sc, inc) x2 [10]
-
(4 sc, inc) x2 [12]
6–10. sc around [12]
Flatten, curve slightly back, and sew upright on head.
Body (Light Blue)
-
MR, 6 sc [6]
-
inc x6 [12]
-
(sc, inc) x6 [18]
-
(2 sc, inc) x6 [24]
-
(3 sc, inc) x6 [30]
6–12. sc around [30] -
(4 sc, dec) x5 [25]
14–16. sc around [25] -
(3 sc, dec) x5 [20]
18–20. sc around [20]
FO, stuff firmly.
Belly Patch (Soft Pink):
-
Crochet a flat oval: start with MR 6 sc, work in rounds, increasing at both ends until it matches the body length.
-
Sew from chest down to the belly base.
Arms (Make 2 – Blue + Pink Pads)
Start with pink (paw pad):
-
MR, 6 sc [6]
-
inc x6 [12]
-
sc around [12]
Switch to light blue:
4–12. sc around [12]
FO, stuff lightly.
Sew slightly forward on body sides.
Legs (Make 2 – Blue + Pink Feet)
Start with pink (foot pad):
-
MR, 6 sc [6]
-
inc x6 [12]
-
(sc, inc) x6 [18]
-
sc around [18]
Switch to light blue:
5–12. sc around [18]
FO, stuff firmly.
Sew to bottom sides of body in seated pose.
Tail (Light Blue)
-
MR, 6 sc [6]
-
inc x6 [12]
-
sc around [12]
-
(2 sc, dec) x3 [9]
5–20. sc around [9]
FO, stuff lightly. Curve slightly and sew to body back.
Back Spikes (Purple – Rounded Bumps)
Make 5–6 small bumps:
-
MR, 5 sc [5]
2–3. sc around [5]
FO, stuff lightly.
Sew along spine and tail.
Wings (2 Pieces Each)
Outer Frame (Light Blue):
-
ch 20
-
sc in 2nd ch from hook, sc across [19]
3–5. sc across, dec at both ends for curve.
FO, shape into wing frame.
Inner Panel (Pink Shimmer – Required):
-
Cut felt, mesh, or organza in matching wing shape.
-
Embroider veins with shimmer thread (silver, lavender, or metallic).
-
Sew or glue inside blue frame.
Attach wings to back, angled outward.
🧷 Assembly
-
Sew head firmly onto body.
-
Attach arms forward on body.
-
Sew legs to base so dragon sits upright.
-
Sew tail to back, curving slightly.
-
Attach ears upright on head.
-
Position wings at back, angled outward and slightly back.
-
Sew purple bumps along spine and tail.
-
Lightly embroider blush or nostrils if desired.
✨ Final Touches
-
Curve tongue tip slightly for playfulness (optional).
-
Add shimmer thread highlights to wings for sparkle.
-
Pose dragon perched on a branch, bookshelf, or fantasy diorama!
🎉 Your Amigurumi Fairy Dragon is complete! With its long snout, shimmering wings, and pastel body, this dragon is the perfect magical friend for fantasy lovers and amigurumi collectors.