Oh, I just love diving into the whimsical world of amigurumi! 🌟 Have you ever tried crafting these adorable little creatures? Amigurumi, which hails from the Japanese art of knitting or crocheting small stuffed toys, brings so much joy and creativity into my life. The charm of these creations lies in their cuteness and the endless possibilities they offer. Whether it’s a tiny elephant, a playful panda, or even a miniature piece of sushi, there’s something utterly magical about seeing a ball of yarn transform into an endearing character that seems to have a personality of its own. What’s better is that you can personalize each piece with different colors and embellishments, making them perfect gifts for yourself or your loved ones. 🎁
Now, let me tell you about the delightful process of creating an amigurumi pattern. 🎨 It all begins with a spark of inspiration, often from things I see around me or cute ideas shared by others. From there, I grab my trusty crochet hook and some colorful yarn, and the adventure begins. The process involves a series of simple stitches, all combined to build shapes that will form the body, limbs, and other features of my little creation. Of course, a good pattern is a must, serving as a roadmap to guide me through each step. It’s like piecing together a puzzle, and every stitch brings me closer to seeing my idea come alive. 🧩 Plus, there’s something incredibly satisfying about the rhythmic motion of crocheting—it’s almost meditative. Before I know it, I’m looking at a finished piece, bursting with character and charm! 💖
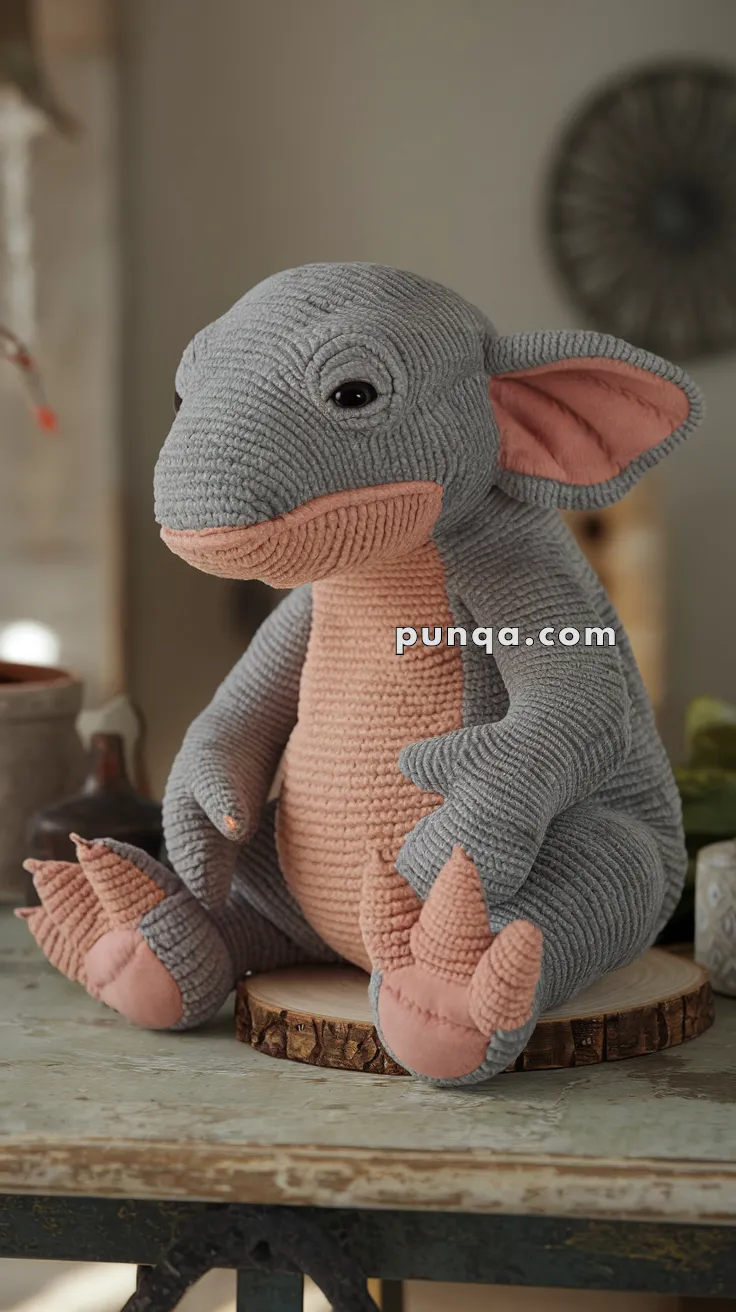
🐉 Amigurumi Ent Pattern
This snuggly, soft-bodied creature features oversized claws, adorable ears, and a gentle belly—all perfect for fantasy lovers and plush collectors.
📏 Finished Size
Approx. 28–35 cm (11–14 inches) tall when made with velvet/chenille yarn and a 4.0 mm hook.
🧵 Skill Level
Intermediate – due to shaping, multiple pieces, and sewing details.
🧰 Materials
-
Chunky velvet yarn in:
-
Gray (main color)
-
Dusty peach/pink (belly, claws, inner ears)
-
-
4.0 mm crochet hook
-
14 mm safety eyes (black)
-
Polyester fiberfill
-
Stitch marker, yarn needle, scissors
-
Optional: plastic pellets for weight
🧷 Abbreviations (US Terms)
-
MR – Magic Ring
-
sc – Single Crochet
-
inc – Increase (2 sc in same st)
-
dec – Decrease (sc 2 together)
-
ch – Chain
-
sl st – Slip Stitch
-
st(s) – Stitch(es)
-
BLO/FLO – Back/Front Loop Only
-
FO – Fasten Off
✨ Pattern Instructions
🐲 Head
With gray:
-
MR, 6 sc
-
inc x6 (12)
-
(sc, inc) x6 (18)
-
(2 sc, inc) x6 (24)
-
(3 sc, inc) x6 (30)
-
(4 sc, inc) x6 (36)
7–13. sc around (36) -
(5 sc, inc) x6 (42)
15–20. sc around (42) -
(5 sc, dec) x6 (36)
-
(4 sc, dec) x6 (30)
-
(3 sc, dec) x6 (24)
Insert safety eyes between Rounds 11–12, approx. 8 sts apart.
Stuff firmly. -
(2 sc, dec) x6 (18)
-
(sc, dec) x6 (12)
-
dec x6 (6)
FO, weave end.
🧸 Body
With peach (belly):
-
MR, 6 sc
-
inc x6 (12)
-
(sc, inc) x6 (18)
-
(2 sc, inc) x6 (24)
-
(3 sc, inc) x6 (30)
Switch to gray:
6–18. sc around (30) -
(3 sc, dec) x6 (24)
20–23. sc (24) -
(2 sc, dec) x6 (18)
-
sc around (18)
Stuff well. FO, leave long tail for sewing.
👂 Ears (Make 2)
Outer (gray):
-
MR, 6 sc
-
inc x6 (12)
-
(sc, inc) x6 (18)
4–6. sc (18)
FO
Inner (peach):
Same as above but stop at Round 4.
Sew peach inner to gray outer. Pinch bottom slightly and sew onto side of head.
🐾 Arms (Make 2)
Start with peach (palm):
-
MR, 6 sc
-
(sc, inc) x3 (9)
3–4. sc (9)
Switch to gray:
5–10. sc (9)
Stuff lightly. FO, leave long tail.
🦶 Legs (Make 2)
Start with peach (bottom):
-
MR, 6 sc
-
inc x6 (12)
-
(sc, inc) x6 (18)
4–5. sc (18)
Switch to gray:
6–12. sc (18)
Stuff well. FO, leave tail for sewing.
🦴 Belly Panel (Optional)
In peach:
-
ch 10
-
sc in 2nd ch and across (9)
3–18. sc across (9)
FO, shape to fit center of belly and sew neatly.
🦖 Claws (Make 6)
With peach:
-
MR, 4 sc
-
(sc, inc) x2 (6)
3–4. sc (6)
FO, stuff and sew three claws to each foot.
🧷 Assembly
-
Attach head to body securely.
-
Position and sew arms at sides.
-
Sew legs to bottom sides of body so creature sits.
-
Attach ears on both sides of head.
-
Sew claws to feet and optionally hands.
-
Embroider any nostrils or details with dark thread.
🧚 Optional Details
-
Add spikes or frills along the back
-
Add small wings or tail
-
Use safety nose for a 3D effect
-
Add blush with soft fabric paint or crayon