Charge up your creativity with this Amigurumi Electric Car crochet pattern! Whether you’re crafting for eco-conscious enthusiasts, futuristic decor, or simply love unique amigurumi designs, this free pattern lets you stitch up a charming electric car full of personality. With its sleek shape, detailed wheels, and modern design, this crochet car captures the essence of sustainable transportation in every stitch. Perfect for gifting to fellow electric vehicle fans, decorating a playful display, or simply celebrating the joy of crochet, this amigurumi electric car is ready to drive into your handmade collection! 🚗⚡✨
Designed for customization, this pattern allows you to experiment with different color schemes, embroidered details, or even tiny accessories like a charging cable or solar panel for extra charm. Craft a classic blue electric car, create a vibrant futuristic version, or even stitch up a fleet of tiny eco-friendly vehicles! Whether displayed as a stylish accent, gifted to a fellow crochet enthusiast, or made simply for the joy of crafting, this Amigurumi Electric Car is a fun and imaginative project—perfect for bringing the future of transportation to every stitch! 🧶🔋
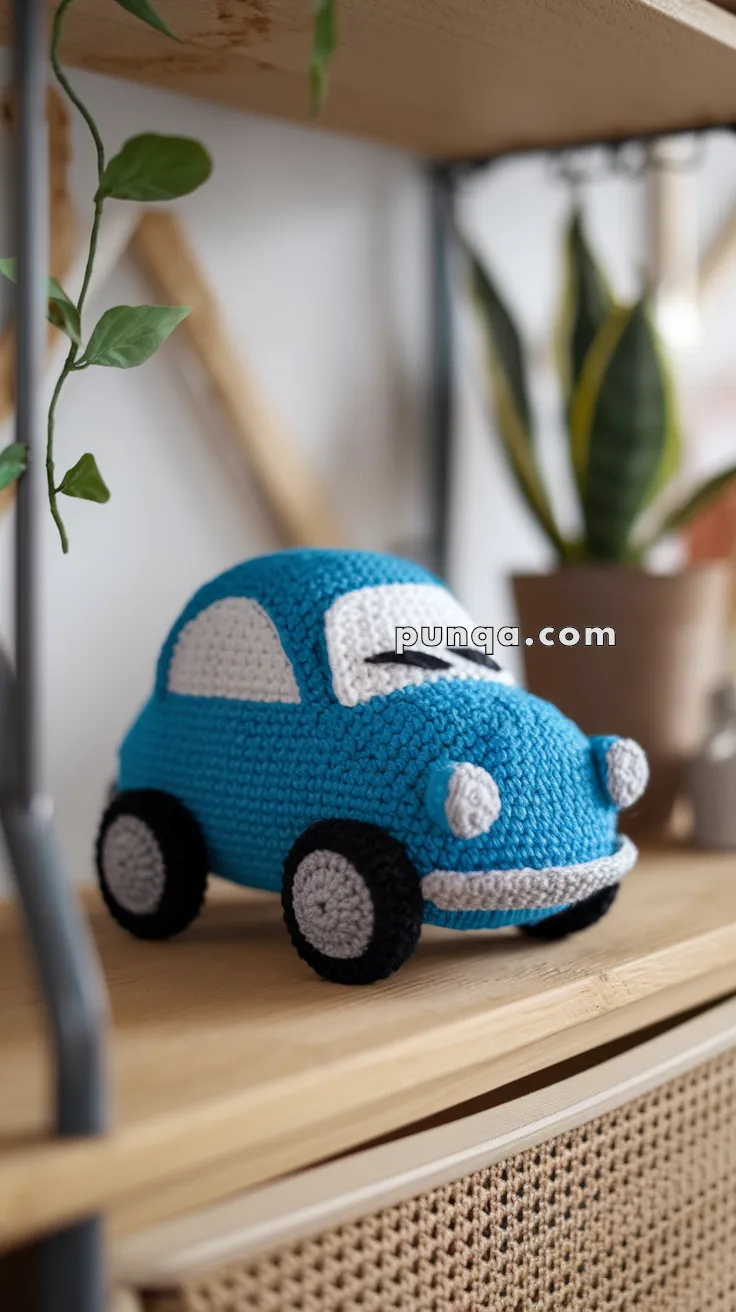
🚗 Amigurumi Electric Car – FREE Crochet Pattern
Zoom into the world of handmade toys with this adorable amigurumi electric car! With its soft curves, embroidered windows, and classic bumper-to-bumper style, this toy car makes the perfect gift for kids, display piece for shelves, or fun addition to any transportation-themed collection.
✨ Skill Level
Intermediate – Features shaping, color changes, and multi-part assembly.
📏 Finished Size
Approx. 6–7 inches (15–18 cm) long and 4 inches (10 cm) tall using worsted weight yarn and a 3.5 mm hook.
🧶 Materials
-
Yarn (Worsted weight):
-
Blue (Main body)
-
Light gray (Bumper, headlights, window outlines)
-
White (Windows, headlight centers)
-
Black (Wheels, eye details)
-
Gray (Wheel centers)
-
-
Crochet hook: 3.5 mm
-
Tapestry needle
-
Scissors
-
Stitch marker
-
Polyfill stuffing
🧵 Abbreviations (US Terms)
MR – Magic Ring
sc – Single Crochet
inc – Increase (2 sc in one stitch)
dec – Decrease (sc 2 together)
sl st – Slip Stitch
ch – Chain
FO – Fasten Off
🚘 Car Body (Blue)
Start from the base and work upward in rounds:
-
MR, 6 sc (6)
-
inc x6 (12)
-
(1 sc, inc) x6 (18)
-
(2 sc, inc) x6 (24)
-
(3 sc, inc) x6 (30)
-
(4 sc, inc) x6 (36)
7–12. sc around (36) -
(5 sc, inc) x6 (42)
14–18. sc around (42) -
(5 sc, dec) x6 (36)
-
(4 sc, dec) x6 (30)
-
(3 sc, dec) x6 (24)
-
sc around (24)
FO and stuff firmly.
🪟 Side Windows (Make 2 – White)
-
ch 8
-
sc in 2nd ch from hook and across (7)
3–5. ch 1, turn, sc across (7)
FO and shape into rounded rectangle.
Use light gray yarn to surface stitch or embroider outlines.
🪟 Front Window (White)
-
ch 10
-
sc in 2nd ch from hook and across (9)
3–5. ch 1, turn, sc across (9)
FO and trim into a slight arc shape for windshield.
Surface stitch or embroider eyelids with black.
💡 Headlights (Make 2 – Blue + White)
Base (Blue):
-
MR, 6 sc (6)
-
inc x6 (12)
FO.
Center (White):
-
MR, 6 sc (6)
FO. Sew onto blue base. Attach to front sides of car body.
🧩 Bumper (Light Gray)
-
ch 18
-
sc in 2nd ch from hook and across (17)
-
ch 1, turn, sc across
FO, sew to the front bottom edge of the car.
🔘 Wheels (Make 4 – Black + Gray)
Inner (Gray):
-
MR, 6 sc (6)
-
inc x6 (12)
FO.
Outer (Black):
Join with black yarn
3. sc around (12)
4. (1 sc, inc) x6 (18)
FO and sew inner circle to the black part.
Attach each wheel to the sides of the car near the bottom.
🧺 Assembly Instructions
-
Stuff and close the car body. Use shaping as you stuff to form smooth top and back.
-
Sew bumper and headlights onto the front of the body.
-
Attach wheels securely using strong stitches; add a bit of stuffing behind them to keep them dimensional.
-
Position and sew windows on both sides and front. Use pins to align before stitching.
-
Embroider black eyelids or cartoon-style eyes on the windshield for personality.
💡 Customization Ideas
-
Add a license plate using felt or embroidery
-
Use embroidery to add a plug or eco symbol for the electric theme
-
Stitch smiles or eyebrows above the headlights
-
Use pastels or primary colors to make a whole fleet
Your electric amigurumi car is now ready to cruise around your crochet collection! Whether for a gift, decor, or playful keepsake, this tiny eco ride is a quick and delightful make. 🚙🔋