Welcome to the wonderful world of spring-inspired amigurumi! ✨ Today, I’m thrilled to share with you my free crochet pattern for a beautiful Easter Tulip that will bring eternal blooms to your seasonal décor! 🐰 Whether you’re preparing for Easter celebrations or simply love creating charming handmade flowers, this pattern will guide you through creating your very own forever tulip complete with vibrant petals and a cheerful stem! 💐
This pattern uses classic stitches and straightforward techniques, making it perfect for crafters looking for a refreshing spring project! 🌱 I’ve broken down each step with detailed instructions to ensure your Easter Tulip turns out just right. 👌 So grab your hooks and yarn, and let’s bring this symbol of spring awakening to life one stitch at a time! 🌈 This lovely flower never needs watering and will brighten your Easter basket or home year after year! 🥚
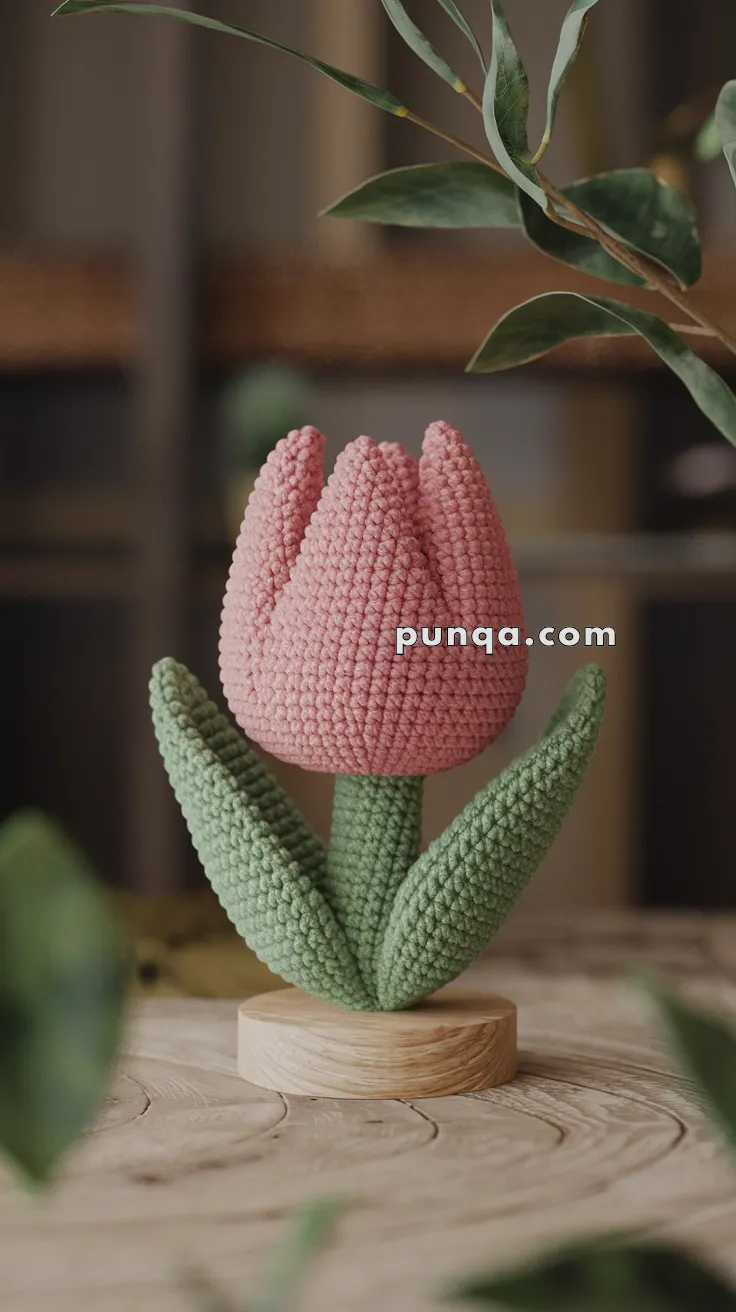
🌷 Amigurumi Easter Tulip Crochet Pattern
✨ Skill Level
Beginner to Intermediate – Basic shaping, sewing, and color changes.
📏 Finished Size
Approximately 20 cm (8 inches) tall when using worsted-weight yarn and a 3.0 mm hook.
✂️ Materials Needed
-
Worsted weight yarn:
-
Pink (Petals)
-
Light Green (Leaves + Stem)
-
-
3.0 mm crochet hook
-
Fiberfill stuffing
-
Yarn needle
-
Stitch marker
-
Optional: Wooden base + floral wire for extra stability
🧵 Abbreviations (US Terms)
-
MR – Magic ring
-
sc – Single crochet
-
inc – Increase
-
dec – Decrease
-
ch – Chain
-
sl st – Slip stitch
-
FO – Fasten off
🌸 Petals (Make 6 – Pink)
-
MR, 6 sc
-
inc x6 (12)
-
(sc, inc) x6 (18)
4–7. sc in each stitch (18) -
(4 sc, dec) x3 (15)
9–11. sc (15) -
(3 sc, dec) x3 (12)
13–14. sc (12)
FO with long tail for sewing. Lightly stuff each petal.
🌿 Leaves (Make 3 – Green)
-
ch 14
-
Starting in 2nd ch from hook: sc, hdc, dc in next 9, hdc, sc
-
ch 1, turn, repeat back on the other side of the chain
-
FO and leave a long tail. Pinch the base into a point and sew onto stem later.
🌱 Stem (Green)
-
MR, 6 sc
-
inc x6 (12)
3–25. sc in each stitch (12) – adjust height as desired
Stuff lightly as you go. FO, but don’t close the top.
🌸 Tulip Assembly
-
Sew all 6 petals together, overlapping slightly side-by-side into a flower cup.
-
Insert stem into center bottom of petals and sew securely.
-
Attach 3 leaves around the stem near the base, spacing them evenly.
-
Insert wire inside stem or glue the base into a wooden disc for standing.
🌼 Finishing Touches
-
Shape petals with fingers.
-
Lightly stuff flower head if needed.
-
Add blush or embroidery if desired.
🌷 Your soft and sweet Easter Tulip is ready to bloom forever!