Welcome to the cheerful and blossoming world of amigurumi! 🌸🐰✨ Today, I’m excited to share my free crochet pattern for an Easter Garden Scene—a delightful and colorful creation perfect for springtime celebrations, seasonal décor, or adding a touch of floral magic to your handmade collection! 🥕 Whether you love crafting intricate landscape designs, enjoy making festive holiday decorations, or simply want to stitch up a miniature garden bursting with charm, this pattern will guide you through creating a beautifully detailed Easter scene filled with flowers, bunnies, and fresh greenery! 🌿
This design embraces soft textures, vibrant colors, and playful elements to bring a joyful springtime atmosphere to life! 🧶🌷 I’ve carefully outlined each step to ensure your Easter Garden Scene turns out just right—ready to brighten up your home, serve as a seasonal centerpiece, or become a treasured handmade gift! 🎁 So grab your hooks, pick out pastel hues, fresh greens, and charming accents, and let’s stitch up a picturesque Easter garden full of life and whimsy! 🐣✨
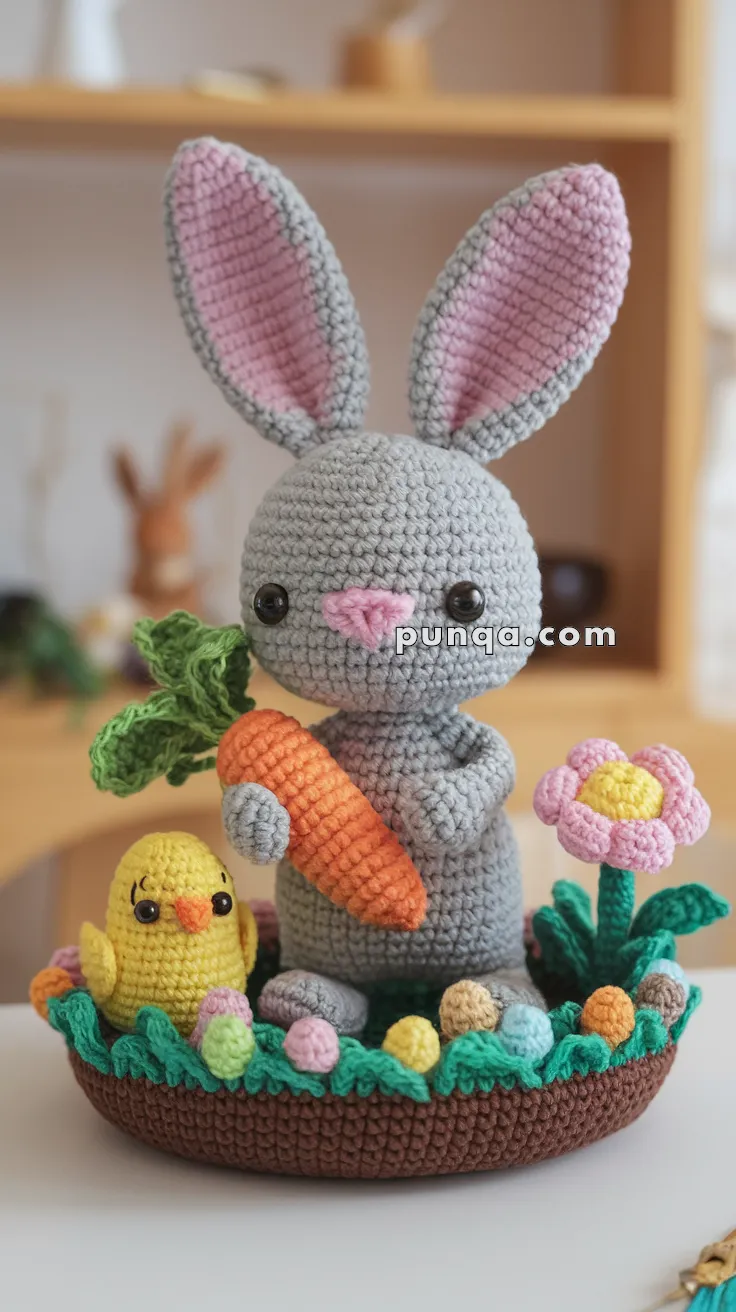
Create a cheerful springtime scene with this Amigurumi Easter Garden Set, featuring a cuddly bunny hugging a carrot, a chirpy chick, flowers, colorful eggs, and a grassy garden base. Perfect for Easter displays, centerpieces, or spring gifts!
✨ Skill Level Intermediate – This project involves basic shaping, color changes, joining parts, and some embroidery. While each individual piece is beginner-friendly, assembling the full scene and balancing proportions requires some experience with amigurumi.
🧶 Materials
Yarn (DK or worsted):
Light gray, pink, black (bunny)
Orange & green (carrot)
Yellow, orange (chick)
Brown (base), green (grass/leaves), assorted pastel colors (eggs & flowers)
2.5–3.0 mm crochet hook
Tapestry needle, stitch marker
Fiberfill stuffing
Safety eyes (6–8 mm) or black yarn for embroidery
🧵 Abbreviations (US Terms) MR – Magic Ring sc – Single Crochet inc – Increase dec – Decrease sl st – Slip Stitch ch – Chain FO – Fasten Off BLO – Back Loop Only
🧺 Garden Base
Brown yarn (bottom), Green yarn (grass edge)
MR, 6 sc
inc x6 (12)
(1 sc, inc) x6 (18)
(2 sc, inc) x6 (24)
(3 sc, inc) x6 (30)
(4 sc, inc) x6 (36)
(5 sc, inc) x6 (42)
(6 sc, inc) x6 (48)
(7 sc, inc) x6 (54)
(8 sc, inc) x6 (60) 11–14. sc around (60) Switch to green:
FLO sc around (60)
(ch 3, sl st in next st) repeat for a grassy ruffle FO and weave in ends.
🐰 Bunny
Head (Light Gray)
MR, 6 sc
inc x6 (12)
(1 sc, inc) x6 (18)
(2 sc, inc) x6 (24)
(3 sc, inc) x6 (30) 6–12. sc around (30)
(3 sc, dec) x6 (24)
(2 sc, dec) x6 (18) Insert eyes and stuff firmly
(1 sc, dec) x6 (12)
dec x6 (6) FO and close.
Body
MR, 6 sc
inc x6 (12)
(1 sc, inc) x6 (18)
(2 sc, inc) x6 (24)
(3 sc, inc) x6 (30) 6–11. sc around (30)
(3 sc, dec) x6 (24) 13–15. sc around (24)
(2 sc, dec) x6 (18) Stuff
(1 sc, dec) x6 (12) FO and sew head to body.
Arms (Make 2)
MR, 6 sc 2–6. sc around (6) FO, stuff lightly and sew to sides of body. Bend arms around carrot.
Legs (Make 2)
MR, 6 sc
inc x6 (12) 3–4. sc around (12)
(2 sc, dec) x3 (9) FO, sew to base of body.
Ears (Make 2 – Gray outer, Pink inner)
ch 9
sc in 2nd ch from hook, hdc, dc x3, hdc, sc (8)
Mirror same up other side of chain (around) Make pink piece slightly smaller. Sew pink inside gray, fold base, sew to head.
Nose (Pink)
MR, 6 sc
sl st in next, FO and shape into triangle Sew to center of face and embroider smile.
🥕 Carrot
Orange for body, green for leaves
MR, 6 sc
(1 sc, inc) x3 (9) 3–4. sc around (9)
(2 sc, inc) x3 (12) 6–7. sc around (12)
(3 sc, inc) x3 (15)
sc around (15) Stuff, FO.
Leaves:
ch 10, sl st back
Make 3–5 and attach to top Sew carrot into bunny’s arms.
🐥 Chick
Body (Yellow)
MR, 6 sc
inc x6 (12)
(1 sc, inc) x6 (18) 4–8. sc around (18)
(1 sc, dec) x6 (12) Stuff and add safety eyes
dec x6 (6) FO and close.
Wings (Make 2)
MR, 5 sc
sc around, FO Sew to sides.
Beak (Orange)
ch 3
sc across, fold in triangle Sew under eyes.
🌸 Flower
Center (Yellow)
MR, 6 sc
inc x6 (12) FO
Petals (Pink – repeat 5 times) Attach to center: ch 3, dc 3 in same st, ch 3, sl st Repeat around FO
Stem & Leaves (Green)
ch 8–10, sc back
Leaves: ch 4, sc in 2nd and back, attach to stem Sew flower to base.
🥚 Easter Eggs (Make 6–8)
Pastel colors
MR, 6 sc
inc x6 (12)
(1 sc, inc) x6 (18) 4–5. sc around
(1 sc, dec) x6 (12)
dec x6 (6) Stuff lightly, FO
✂️ Final Assembly
Position the bunny slightly to the back-center
Add carrot tucked in arms
Place chick to one side
Sew flower and eggs around front arc of garden
Optional: sew or glue down all pieces for stability