Creating amigurumi Easter eggs with a delightful polka dot pattern is such a joyful craft! 🌟 Crocheting these adorable little eggs isn’t just about the finished product; it’s about the process, too. There’s something incredibly satisfying about starting with a simple ball of yarn and a hook, then watching it transform into a vibrant, cheerful Easter egg that’s bursting with personality. The polka dots add that extra layer of fun, making each egg a little unique. Whether you’re making them as gifts, decorations, or just for your own enjoyment, these eggs bring a splash of color and a sprinkle of joy to any Easter celebration.
Getting started is easier than you might think! All you need are some basic crochet skills and a few supplies: your favorite colored yarns, a crochet hook, and some stuffing to bring your eggs to life. 🧶 The pattern typically starts with a magic ring, then you build up the shape by creating rounds of increasing and then decreasing stitches. Adding the polka dots involves changing colors strategically, which is a playful way to learn more about colorwork. Each step brings you closer to a charming amigurumi piece, and the best part is that you can customize the colors to match your style or holiday decor. Making these eggs is not just a craft project; it’s a celebration of creativity and the joy of handmade treasures. 🐣
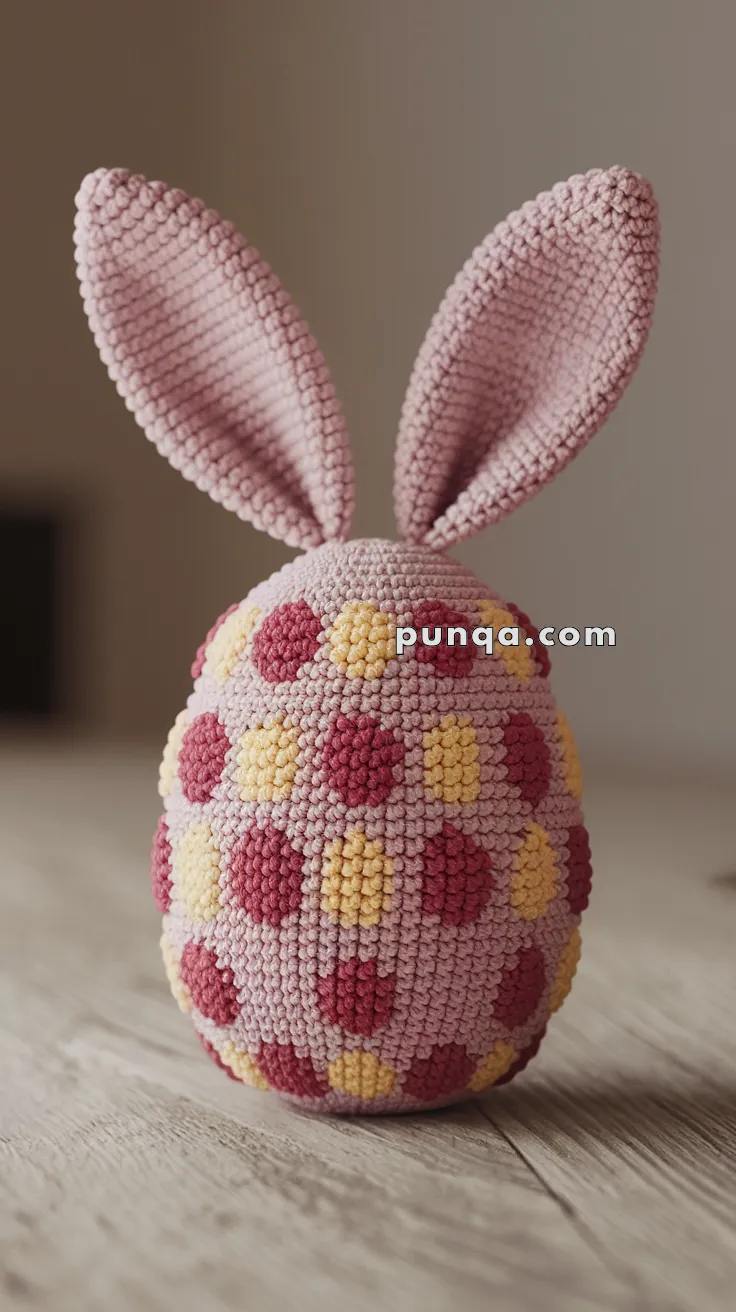
🐣 Amigurumi Easter Egg with Polka Dots & Bunny Ears – Crochet Pattern
Celebrate the season with this adorable amigurumi Easter egg! Featuring colorful polka dots and sweet floppy bunny ears, this design is perfect for spring decor, gifts, or kids’ baskets.
🧶 Skill Level
Easy to Intermediate – Simple shaping, color changes, and ear assembly.
📏 Finished Size
Approx. 6.5 inches (16 cm) tall (including ears), when using DK weight cotton yarn and a 2.5 mm hook.
✂️ Materials Needed
-
DK weight yarn in:
-
Light pink (main egg color)
-
Dark pink and yellow (polka dots)
-
Matching pink (for bunny ears)
-
-
2.5 mm crochet hook
-
Stitch marker
-
Tapestry needle
-
Fiberfill stuffing
-
Optional: pipe cleaners for ear shaping
🔁 Abbreviations (US Terminology)
-
MR – Magic Ring
-
sc – Single Crochet
-
inc – Increase (2 sc in same stitch)
-
dec – Decrease (sc 2 together)
-
sl st – Slip Stitch
-
ch – Chain
-
FO – Fasten Off
🥚 Egg Body (light pink)
-
MR, 6 sc
-
inc x6 (12)
-
[1 sc, inc] x6 (18)
-
[2 sc, inc] x6 (24)
-
[3 sc, inc] x6 (30)
-
[4 sc, inc] x6 (36)
-
[5 sc, inc] x6 (42)
-
[6 sc, inc] x6 (48)
-
[7 sc, inc] x6 (54)
10-20. sc around (54) – Add polka dots randomly using color changes (see below) -
[7 sc, dec] x6 (48)
-
[6 sc, dec] x6 (42)
-
[5 sc, dec] x6 (36)
-
[4 sc, dec] x6 (30)
-
[3 sc, dec] x6 (24)
-
[2 sc, dec] x6 (18)
-
[1 sc, dec] x6 (12)
-
dec x6 (6)
FO and close. Stuff firmly.
🎯 Polka Dots (make approx. 20–25 in red and yellow)
For each dot:
-
MR, 6 sc
-
[1 sc, inc] x3 (9)
Sl st, FO. Leave long tail for sewing or crochet directly using color changes as you build the egg body.
Tip: If you’re comfortable with tapestry crochet, you can carry the yarn and change colors mid-round for a cleaner look.
🐰 Bunny Ears (make 2 – in light pink)
Outer Ear (make 2):
-
ch 10
-
sc in 2nd ch from hook, 7 sc, 3 sc in last st
(continue on other side) 7 sc, inc (20)
3-12. sc around (20) -
[3 sc, dec] x4 (16)
-
sc around (16)
-
[2 sc, dec] x4 (12)
-
sc around (12)
FO, leave long tail for sewing. Flatten and sew base together. Insert pipe cleaner if desired.
Sew ears securely to top of the egg body.
🧵 Assembly
-
Attach polka dots if not crocheted in.
-
Position bunny ears on top and stitch in place.
-
Optional: lightly bend ears using pipe cleaner structure.
This cheerful Easter egg will be a hit at spring celebrations and makes a perfect keepsake gift. Happy stitching! 🧵💖