Celebrate the joy of spring and Easter with this Amigurumi Easter Carrot crochet pattern! Inspired by the cheerful essence of the season, this adorable design captures the bright orange body, leafy green top, and playful charm of a classic carrot in every stitch. Whether you’re crafting for Easter decorations, adding a whimsical touch to your collection, or simply enjoy making nature-inspired amigurumi designs, this pattern lets you stitch up a delightful carrot bursting with personality! Perfect for festive displays, Easter baskets, or even as a fun toy, this crochet creation brings a touch of handmade seasonal magic to your collection. 🥕✨
Designed for customization, this pattern allows you to experiment with different shades of orange, embroidered details, or even tiny accessories like a miniature bunny or Easter egg for extra flair. Craft a classic carrot with bold hues, create a pastel version for a dreamy aesthetic, or even stitch up a full set of garden-inspired amigurumi for a charming display! Whether gifted as a quirky keepsake, displayed as a cheerful accent, or made simply for the joy of crafting, this Amigurumi Easter Carrot is a fun and creative project—perfect for bringing a touch of handmade springtime magic to every stitch! 🧶💖✨
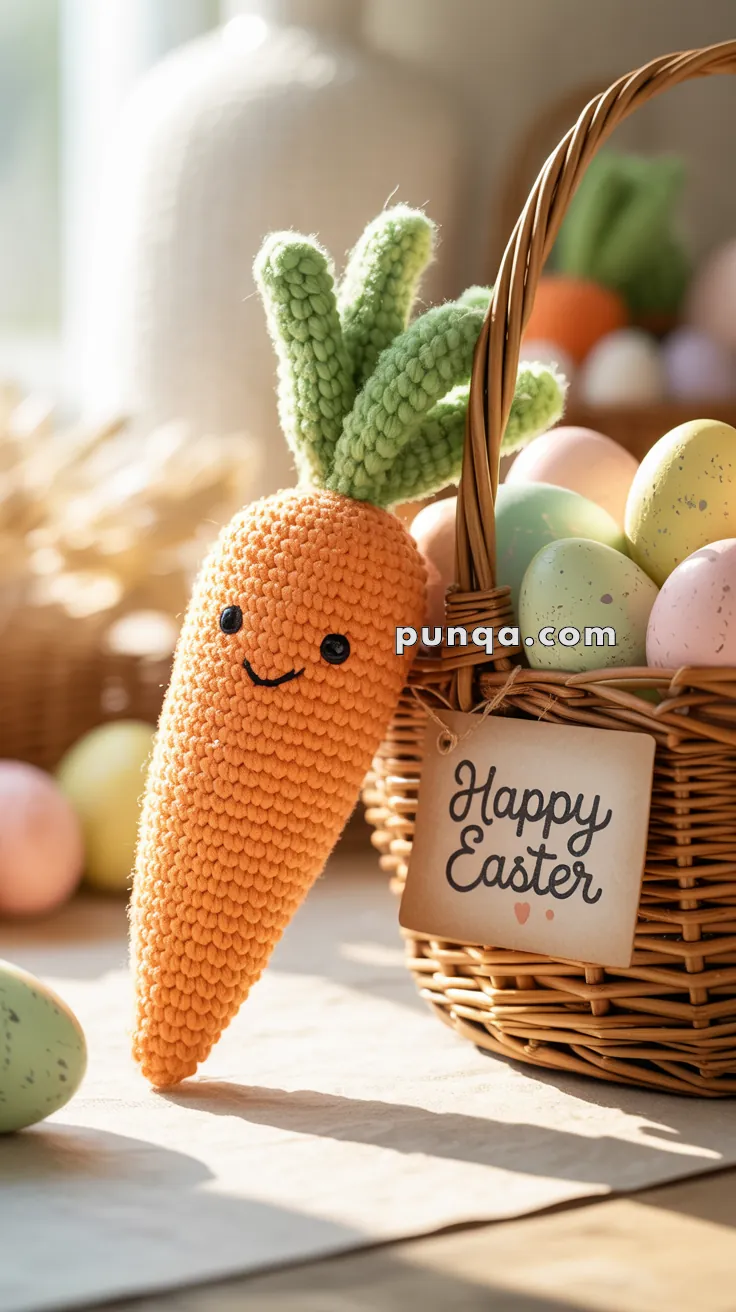
🥕 Amigurumi Easter Carrot Crochet Pattern
Bring a touch of handmade cheer to your Easter basket with this charming amigurumi carrot! With its soft greenery and sweet embroidered smile, it’s perfect for spring decor or gifting.
✨ Skill Level
Beginner – Suitable for all skill levels with basic shaping and stitching.
📏 Finished Size
Approx. 15–18 cm (6–7 inches) tall using DK weight yarn and a 2.5–3 mm hook.
🧶 Materials
- DK or worsted weight yarn in:
- Orange (carrot body)
- Light green (carrot top)
- Crochet hook: 2.5–3.5 mm
- Safety eyes (6 mm)
- Black embroidery thread (for mouth)
- Fiberfill stuffing
- Yarn needle
- Stitch marker
🧵 Abbreviations (US Terms)
- MR – Magic Ring
- sc – Single Crochet
- inc – Increase (2 sc in one stitch)
- dec – Decrease (sc two stitches together)
- sl st – Slip Stitch
- FO – Fasten Off
🥕 Carrot Body (Orange)
- MR, 6 sc
- (sc, inc) x3 (9)
- (2 sc, inc) x3 (12)
- (3 sc, inc) x3 (15)
- (4 sc, inc) x3 (18)
- (5 sc, inc) x3 (21)
- sc around
- (6 sc, inc) x3 (24)
9–20. sc around - (6 sc, dec) x3 (21)
- sc around
- (5 sc, dec) x3 (18)
- sc around
- (4 sc, dec) x3 (15)
Add safety eyes between rounds 13 and 14, approx. 6 sts apart
Embroider smile with black thread - (3 sc, dec) x3 (12)
Stuff firmly - (2 sc, dec) x3 (9)
- (sc, dec) x3 (6)
FO and close
🌿 Carrot Leaves (Make 3–5, Green)
- Ch 16
- Starting in 2nd ch from hook: sl st, sc x2, hdc x3, sc x2, sl st to end
FO and leave a long tail
👉 Assembly Tip: Sew the ends of all leaves together and attach securely to the top of the carrot. You can twist the leaves slightly for a curly effect.
😄 Final Touches
- Adjust the facial features for cuteness: center the smile just under the eyes.
- Lightly brush the greenery for extra volume (optional).
- Add a ribbon if gifting or placing in a basket!
Happy Easter crafting! 🧶