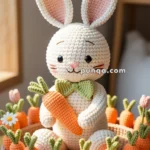
Hop into springtime joy with the Amigurumi Easter Bunny Family, a heartwarming crochet collection that’s bursting with seasonal charm! 🐰🌸 Featuring a delightful group of bunnies—each with their own personality, pastel outfits, and sweet little accessories—this pattern is perfect for Easter décor, festive gifts, or simply celebrating the arrival of sunshine and blooms. Whether they’re holding tiny eggs, wearing bonnets, or snuggling together in a basket, this bunny family brings smiles wherever they go.
Ideal for crocheters who love storytelling through stitches, this pattern invites you to mix soft colors, add embroidered details, and customize each bunny to reflect your own springtime spirit. Make one for a centerpiece or a whole family to create a handmade Easter scene that’s as cozy as it is cute. The Amigurumi Easter Bunny Family is a joyful way to stitch up love, laughter, and a whole lot of bunny cuddles—one loop at a time! 🧶💐
🐰 Amigurumi Easter Bunny Family Crochet Pattern
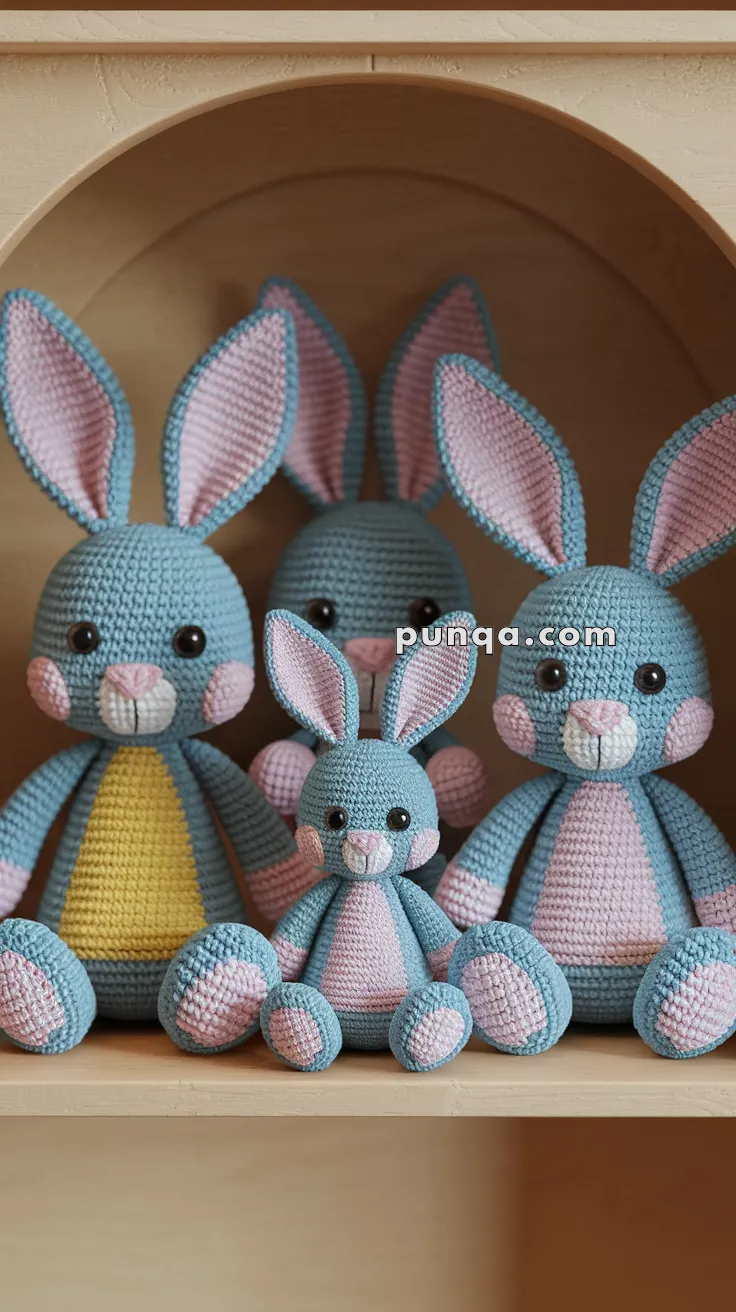
These sweet long-eared bunnies are ready to hop into your Easter celebrations! With oversized cheeks, soft pastel bellies, and a cuddly shape, this bunny family is perfect as springtime décor, gifts, or snuggly friends for little ones. The pattern includes instructions to make Papa Bunny, Mama Bunny, and Baby Bunny in different sizes.
✨ Skill Level
Beginner to Intermediate – great for practicing amigurumi basics, simple shaping, and assembly.
📏 Finished Sizes
- Papa Bunny: ~30 cm (12 in)
- Mama Bunny: ~26 cm (10 in)
- Baby Bunny: ~14 cm (5.5 in)
🧶 Materials
- DK or worsted weight yarn in:
- Blue (main body)
- Pink (inner ears, cheeks, belly, nose, paw pads)
- Yellow (optional belly for one bunny)
- White (muzzle, teeth if desired)
- Safety eyes:
- 12–14 mm for Papa & Mama
- 6–8 mm for Baby
- Crochet hook: 2.5–3.5 mm (adjust to yarn size)
- Polyester fiberfill stuffing
- Yarn needle & scissors
- Stitch markers
- Black embroidery thread for mouth & eyebrow details
🧵 Abbreviations (US Terms)
- MR = Magic Ring
- sc = single crochet
- inc = increase (2 sc in one st)
- dec = decrease (sc 2 together)
- ch = chain
- sl st = slip stitch
- FO = fasten off
🐇 Head (Blue)
- MR, 6 sc [6]
- inc x6 [12]
- (sc, inc) x6 [18]
- (2 sc, inc) x6 [24]
- (3 sc, inc) x6 [30]
- (4 sc, inc) x6 [36]
7–14. sc around [36] - (4 sc, dec) x6 [30]
- (3 sc, dec) x6 [24]
- (2 sc, dec) x6 [18]
– Place safety eyes between rounds 9–10, 7–8 sts apart. - (sc, dec) x6 [12]
- dec x6 [6], FO, close.
🐰 Ears (Make 2 Blue, 2 Pink)
Outer Ear (Blue):
- MR, 6 sc [6]
- (sc, inc) x3 [9]
3–28 (Papa), 3–24 (Mama), 3–20 (Baby): sc around [9]
FO, leave tail.
Inner Ear (Pink):
Same as outer but stop 3–4 rounds shorter. Sew pink piece on top of blue ear. Fold slightly at base and attach firmly to head.
😊 Cheeks (Pink – 2 per bunny)
- MR, 6 sc [6]
- inc x6 [12]
- (sc, inc) x6 [18] – for Papa & Mama
(Stop at 12 for Baby cheeks)
Flatten and sew under eyes.
👃 Muzzle & Nose
Muzzle (White):
- Ch 6, work sc around chain to form oval (8 sts total).
- R2: inc at ends [12].
- R3: sc around [12]. FO.
- Sew centered below eyes, between cheeks.
Nose (Pink):
- MR, 6 sc [6], FO. Sew flat oval onto top of muzzle.
🐇 Body (Blue with sewn-on belly patch)
- MR, 6 sc [6]
- inc x6 [12]
- (sc, inc) x6 [18]
- (2 sc, inc) x6 [24]
- (3 sc, inc) x6 [30]
- (4 sc, inc) x6 [36]
7–16. sc around [36] (for Papa add 2 rounds here to widen base) - (4 sc, dec) x6 [30]
- (3 sc, dec) x6 [24]
- (2 sc, dec) x6 [18]
FO, stuff firmly, sew to head.
Belly Patch (Pink or Yellow):
- Ch 8, sc around chain with inc at ends.
- Continue working in oval until ~24 sts.
- FO, flatten and sew to center of tummy.
💪 Arms (2 per bunny – Blue with small pink ends)
- MR, 6 sc [6]
- inc x6 [12]
3–5. sc around [12] - (2 sc, dec) x3 [9]
7–12. sc around [9]
FO, stuff lightly, sew to body sides.
🐾 Legs (2 per bunny – Blue with pink paw pads)
Leg:
- MR, 6 sc [6]
- inc x6 [12]
- (sc, inc) x6 [18]
4–6. sc around [18] - (sc, dec) x6 [12]
8–12. sc around [12]
Stuff, FO.
Paw Pad (Pink):
- MR, 6 sc, inc around [12].
- FO and sew to base of foot.
Attach legs at base of body.
✂️ Finishing Touches
- Sew ears upright or angled outward.
- Embroider small smile and optional eyebrows.
- Add ribbon, bow tie, or accessories if desired.
- Position arms forward or relaxed.
💡 Customization Ideas
- Make each bunny unique with pastel belly patches in pink, yellow, or lavender.
- Add embroidered initials to personalize them as gifts.
- Crochet a basket with mini Easter eggs for a festive display.
✨ Now your Easter Bunny Family is ready to hop into springtime! Whether you make Papa, Mama, or Baby Bunny, they’ll bring charm, color, and handmade love to your Easter décor. 🐣🌷