Bring a touch of inspiration to your space with this Amigurumi DREAM Wall Hanging crochet pattern! Designed to uplift and motivate, this charming wall hanging serves as a gentle reminder to chase your dreams and embrace creativity. With its soft textures, elegant lettering, and cozy handmade feel, this crochet piece adds warmth and personality to any room. Whether you’re crafting for yourself, gifting to a fellow dreamer, or decorating a special space, this amigurumi DREAM wall hanging is sure to bring positivity—one stitch at a time! ✨💭
Designed for customization, this pattern allows you to experiment with different colors, embroidered details, or even tiny embellishments like stars or tassels for extra charm. Craft a classic version with neutral tones, create a vibrant piece with bold hues, or even stitch up a full set of inspirational wall hangings for a stunning display! Whether gifted as a cherished keepsake, displayed as a motivational accent, or made simply for the joy of crafting, this Amigurumi DREAM Wall Hanging is a fun and creative project—perfect for bringing a touch of handmade inspiration to every stitch! 🧶💖
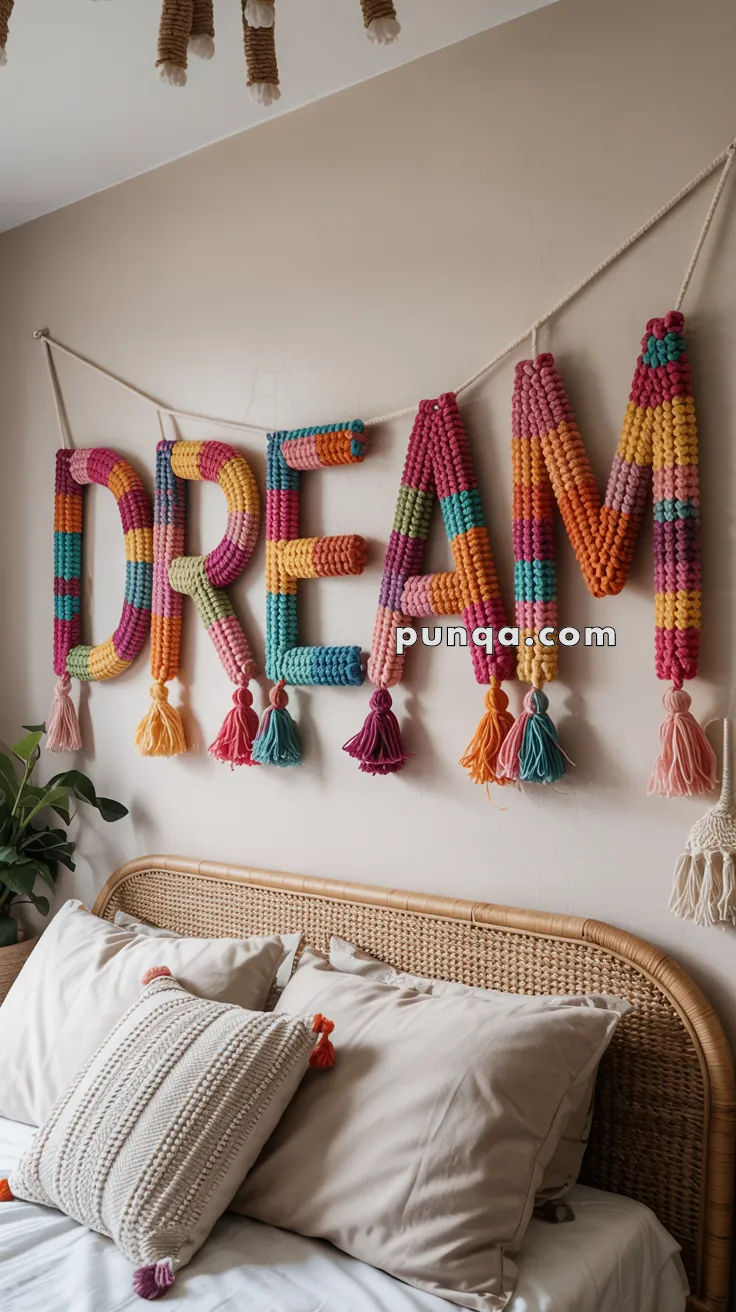
🌈 Amigurumi “DREAM” Wall Hanging Crochet Pattern
Add a splash of color and inspiration to your space with this bold Amigurumi DREAM wall hanging! Made with soft stuffed letters and bright tassels, this cheerful yarn art is perfect for nurseries, bedrooms, or boho decor lovers. This pattern includes instructions for each letter and tips for making vibrant color changes and hanging.
✨ Skill Level
Easy to Intermediate – Requires basic shaping, color changes, and simple sewing.
📏 Finished Size
Each letter approx. 8–10 in (20–25 cm) tall using super bulky or jumbo weight yarn and a 6–8 mm hook.
🧶 Materials
- Super bulky yarn in 6+ bright colors (Color A–F: pink, orange, blue, yellow, green, purple)
- 6.0–8.0 mm crochet hook
- Polyfill stuffing
- Tapestry needle
- Stitch markers
- Cotton rope (for hanging)
- Scissors
- Yarn for 5 tassels
🧵 Abbreviations (US Terms)
MR – Magic Ring
sc – Single Crochet
inc – Increase
dec – Decrease
ch – Chain
sl st – Slip Stitch
FO – Fasten Off
🌈 Color Change Tip
To change colors cleanly:
- Switch yarn on the final yarn-over of the stitch before a color change
- Crochet over the tail or weave it in securely with a needle
- Change every 3–6 rounds for striping like the photo
🔤 Letters Pattern
All letters are worked in amigurumi tube style and sewn flat into shapes. Use sc in rounds, stuff as you go.
Letter D
- Ch 16, sl st to first ch to form ring
2–30. sc around (16) – change colors as desired - FO, flatten and shape into a “D” using wire or stitch shaping
– Add tassel at bottom
Letter R
- Ch 14, sl st to form loop
2–28. sc around (14) - FO and shape into vertical spine
– For round and diagonal leg: - Ch 10, sc rows back and forth for 4 rows
– Stitch into “R” loop
– Add tassel
Letter E
- Ch 14, sl st to close
2–28. sc around
– FO, fold flat
– Create 3 bars by chaining 6–10, sc in rows, stitch perpendicular
– Add tassel
Letter A
- Make 2 long tubes (ch 18, sc 30 rounds)
– Stitch into inverted V
– Add bar: chain 6, sc rows back and forth, sew across
– Add tassel
Letter M
- Make 2 vertical tubes (ch 16, sc 28 rounds)
- Create middle “valley” with short diagonal tube (ch 10, sc 15–20 rounds)
– Sew all together to form “M”
– Add tassel
🎀 Tassels
- Wrap yarn around a book (~4 in wide) 15–20 times
- Slide off, tie top with yarn
- Cut bottom loops
- Wrap yarn around top to form tassel “head”
- Trim and attach to bottom of each letter
🧵 Assembly & Hanging
- Lay out finished letters on a table
- Cut cotton rope long enough to span wall area + 12 in extra
- Use yarn to sew or tie top loops of each letter to rope
- Hang with command hooks or nails
- Adjust spacing and shape as desired
🎉 Customization Ideas
- Spell your own word (LOVE, SMILE, PEACE…)
- Use ombré yarn for dreamy blends
- Add felt or foam inside for structure
This cozy DREAM yarn art brings comfort, positivity, and a big splash of color to your space! Perfect for a DIY bedroom makeover or handmade gift. 🧶💖