Celebrate science with a twist of yarn using this Amigurumi Double Helix DNA crochet pattern! Inspired by the iconic structure of life itself, this clever design transforms the double helix into a fun and educational piece of fiber art. Whether you’re a biology buff, a teacher looking for a classroom prop, or just love geeky crochet projects, this pattern lets you stitch up a spiraling strand of creativity that’s sure to spark curiosity and conversation. 🧬🧶✨
Designed for playful learning, this pattern invites you to experiment with colorful base pairs, twisty stitches, and clever shaping to bring your DNA strand to life. Add a keychain loop, turn it into a bracelet, or even make a giant version for display—there are so many ways to customize it! Whether you’re crafting for a science fair, a gift for a lab-loving friend, or just for the joy of making something unique, this Amigurumi Double Helix DNA is a fascinating and satisfying project—perfect for bringing a touch of handmade science to every stitch! 💖🔬🌈
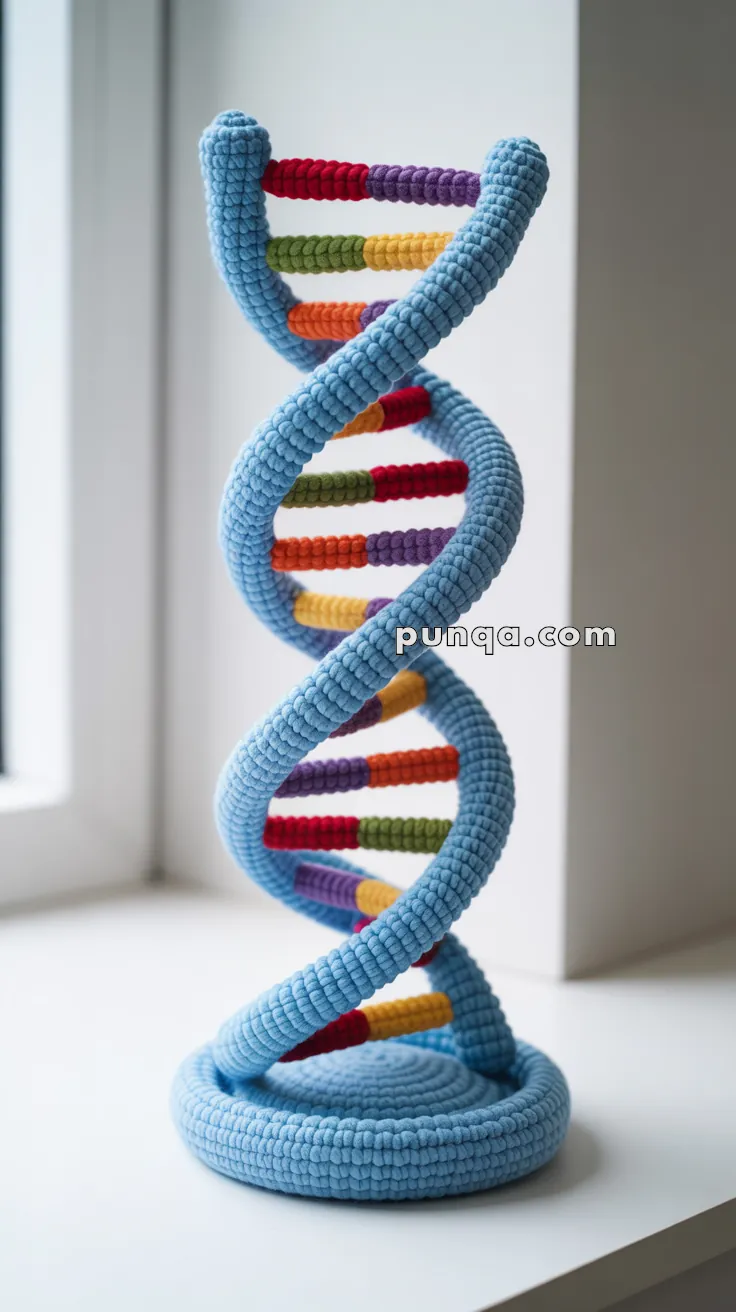
🧬 Amigurumi Double Helix DNA – Free Crochet Pattern
Celebrate science and creativity with this amigurumi DNA sculpture, featuring a beautifully twisted double helix structure with colorful base pairs. This is a stunning piece of décor for a classroom, lab, or science-lover’s shelf – soft, sturdy, and educational!
✨ Skill Level
Intermediate – Involves long tubular shaping, intentional twisting, colorwork, and structural attachment.
📏 Finished Size
Approx. 9–12 inches (23–30 cm) tall when using velvet/bulky yarn and a 4 mm hook.
🧶 Materials
- Yarn (Bulky chenille or velvet recommended for shape and body)
- Light blue (backbone strands)
- Red, orange, yellow, green, purple (base pair rungs)
- Crochet hook: 4 mm
- Fiberfill stuffing
- Pipe cleaners, wire, or floral wire (for structural twist)
- Stitch markers
- Yarn needle
- Optional: weighted base or plastic disc for stability
🧵 Abbreviations (US Terms)
MR – Magic Ring
sc – Single Crochet
inc – Increase
dec – Decrease
ch – Chain
sl st – Slip Stitch
st(s) – Stitch(es)
FO – Fasten Off
🌀 Helix Strands (Make 2)
With light blue yarn:
- MR, 6 sc
2–60. sc around (6)
Stuff very lightly as you go. Insert wire or pipe cleaner inside as you stuff to help twist and hold shape.
💡 To make it taller, continue to ~80 rows. To shorten, stop at ~50 rows.
FO, leave long tail for shaping.
Repeat for second helix strand.
🧱 Rungs (Base Pairs) – Make 12–15 Pairs
Each rung is crocheted flat in a row and connects the two helix strands.
You can either color-code each base pair with two different yarns (like A–T and C–G) or use a variety of rainbow colors as in the photo.
Basic Rung Pattern:
With any color:
- Ch 7
- Turn, sc in 2nd ch and across (6)
- FO and leave both tails long for sewing.
Make 12–15 total rungs. Each will be spaced evenly along the helix.
🪢 Base Circle Stand (Optional but Recommended)
This round base gives your DNA structure a stable platform.
With light blue yarn:
- MR, 6 sc
- inc x6 (12)
- (1 sc, inc) x6 (18)
- (2 sc, inc) x6 (24)
- (3 sc, inc) x6 (30)
- (4 sc, inc) x6 (36)
- (5 sc, inc) x6 (42)
Continue increasing to desired width (~60–70 sts)
Work 2 rounds of sc even, FO.
Optional: Insert plastic or cardboard circle inside and whipstitch bottom closed.
🔄 Assembly Instructions
- Lay out your two blue helix tubes parallel to each other, spaced 2–3″ apart.
- Begin attaching base pair rungs every 5–6 rounds using the yarn tails. Sew both ends of each rung to opposite tubes, pulling slightly to create tension.
- As you go, twist the tubes gently around each other. Secure the twist with the wire inside.
- Sew the ends of both strands into the center of your round base and secure tightly.
- Use invisible stitches to anchor any loose segments and enhance the twist.
🧷 Tips for Structure & Stability
- Insert floral wire or chenille stems inside both tubes before assembling for better control of the twist.
- Add a small beanbag or weight pouch into the base circle for extra bottom weight.
- Use a touch of hot glue inside if you’re using this as a classroom display.
💡 Customization Ideas
- Label each base pair with felt initials (A–T, C–G)
- Crochet mini faces or kawaii eyes for a cute plush version
- Add a hanging loop and use it as science-themed wall art
This crochet DNA helix is a brilliant way to combine STEM and stitches! 🧵🧬