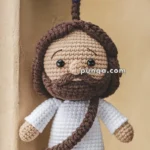
Honor a moment of deep reflection and faith with the Amigurumi Crucifixion of Jesus, a heartfelt crochet creation that carries profound spiritual significance. ✝️🧶 With its sculpted body, peaceful posture, and delicately draped blue cloth, this piece offers a quiet tribute to the story of sacrifice and redemption. Whether displayed during Easter, placed in a prayer corner, or gifted as a symbol of devotion, it’s a meaningful way to express your beliefs through the art of crochet.
Perfect for crocheters who appreciate thoughtful, symbolic designs, this pattern invites you to stitch with intention and reverence. The gentle details and serene expression make it a powerful addition to any spiritual setting, encouraging quiet contemplation and connection. The Amigurumi Crucifixion of Jesus is a beautiful way to stitch up faith, hope, and a sprinkle of handmade grace—one loop at a time. 🧵💙🙏

✝️ Amigurumi Crucifixion of Jesus Crochet Pattern
A moving and reverent crochet representation of the Crucifixion. This handmade piece expresses faith and devotion through detailed craftsmanship. With its sculpted body, draped blue cloth, and peaceful posture, it’s a meaningful project for Easter or any spiritual setting.
🧠 Skill Level
Intermediate – Includes realistic shaping, arm and leg positioning, light color changes, and assembly onto a wooden cross.
🧶 Materials
-
Light skin-tone yarn – body and head
-
Brown yarn – hair and beard
-
Dark brown yarn – hands and feet
-
Light blue yarn – waist cloth
-
Crochet hook – 2.5 mm or 3.0 mm
-
Fiberfill stuffing
-
Yarn needle
-
Stitch marker
-
(Optional) Wooden cross for display
-
Craft glue or invisible thread for mounting
✨ Abbreviations (US Terms)
MR – Magic Ring
sc – Single Crochet
inc – Increase (2 sc in same st)
dec – Decrease (sc2tog)
ch – Chain
sl st – Slip Stitch
FO – Fasten Off
🕊️ Head
With skin-tone yarn:
R1 – MR 6 sc (6)
R2 – inc ×6 (12)
R3 – (1 sc, inc) ×6 (18)
R4 – (2 sc, inc) ×6 (24)
R5 – (3 sc, inc) ×6 (30)
R6–R13 – sc around (30)
R14 – (3 sc, dec) ×6 (24)
R15 – (2 sc, dec) ×6 (18)
R16 – (1 sc, dec) ×6 (12)
Stuff firmly.
R17 – dec ×6 (6) → FO, close hole.
👉 Keep face plain or embroider a gentle, peaceful expression (eyes closed or minimal stitches).
💇 Hair & Beard
With brown yarn:
Create a fitted wig cap:
R1 – MR 6 sc (6)
R2 – inc ×6 (12)
R3 – (1 sc, inc) ×6 (18)
R4 – (2 sc, inc) ×6 (24)
R5–R8 – sc around (24) → FO.
Sew cap to head, covering top and back.
Hair Strands:
Cut 20–25 strands (8–10 cm each). Attach along the sides and back of head.
Lay strands flat — do not curl — to match the long, straight drape in the photo.
Beard & Mustache:
Make a small beard piece:
R1 – MR 6 sc (6)
R2 – (1 sc, inc) ×3 (9)
FO. Sew under chin.
Add a short, flat mustache (ch 6, sc back).
🧍 Body
With skin-tone yarn:
R1 – MR 6 sc (6)
R2 – inc ×6 (12)
R3 – (1 sc, inc) ×6 (18)
R4 – (2 sc, inc) ×6 (24)
R5–R10 – sc around (24) → torso
R11 – (3 sc, dec) ×4 (20)
R12–R14 – sc around (20)
R15 – (3 sc, dec) ×4 (16) → waist
R16–R18 – sc around (16)
Stuff lightly (not firm, for flexible arms and legs).
FO, leaving yarn tail for joining legs.
💡 The torso should be slightly elongated and slender, as seen in the image — not wide or rounded.
✋ Arms (Make 2)
Start with dark brown yarn for hands:
R1 – MR 6 sc (6)
R2 – sc around (6)
Switch to skin-tone yarn:
R3 – (1 sc, inc) ×3 (9)
R4–R13 – sc around (9)
Do not overstuff.
Flatten slightly at ends to allow for crucifixion pose.
FO, leaving long tails for sewing.
Attach arms outstretched horizontally.
💡 Arms should be straight with slight forward angle — not bent.
🦵 Legs (Make 2)
Start with dark brown yarn for feet:
R1 – MR 6 sc (6)
R2 – inc ×6 (12)
R3 – (1 sc, inc) ×6 (18)
R4 – (2 sc, dec) ×6 (12)
R5 – Switch to skin-tone, sc around (12)
R6–R18 – sc around (12)
Stuff lightly.
FO, leaving tail for sewing.
Sew legs together at knees and overlap feet one over the other (as in the photo).
🩵 Cloth Wrap (Light Blue)
With blue yarn:
ch 36
R1 – sc in 2nd ch from hook, sc across (35)
R2–R8 – sc across (35) → FO.
For realistic drape, crochet loosely or use half-double crochet for light texture.
Wrap around waist, folding one side over the other.
Secure with a few hidden stitches at the back.
💡 In the photo, the cloth is mid-length — reaching mid-thigh, with slight overlap and natural fall.
✝️ Mounting on the Cross (Optional)
If using a wooden cross:
-
Attach arms stretched wide with thin thread or glue dots under palms.
-
Position head slightly lowered forward.
-
Cross feet one over the other at the base.
-
Add a small wooden or crocheted sign labeled INRI or similar.
🪡 Assembly
1️⃣ Sew head to top of body (angled slightly downward).
2️⃣ Attach arms horizontally.
3️⃣ Sew legs to lower torso with feet crossed.
4️⃣ Wrap and secure cloth around waist.
5️⃣ Style hair downward and to one side.
6️⃣ Add small wound marks on hands and feet using short red embroidery thread.
🌟 Finishing Touches
-
Embroider a crown of thorns using dark green or brown twisted thread.
-
Add gentle shadowing to the beard and hair by brushing lightly with a toothbrush.
-
Ensure pose aligns with crucifix — arms wide, feet crossed, head tilted down.
-
For display, glue or tie figure to cross with invisible thread at palms and feet.
🙏 Final Look
Your Amigurumi Crucifixion of Jesus is now complete.
With its careful shaping, serene expression, and flowing blue cloth, it captures both the tenderness and symbolism of the moment.
This handmade piece serves as a deeply personal reminder of faith, sacrifice, and peace. ✝️🕊️