Snap into cuteness with this Amigurumi Crocodile Baby crochet pattern! With its chubby cheeks, tiny claws, and playful tail, this little reptile is more cuddly than fierce—perfect for kids, collectors, or anyone who loves turning wild creatures into soft, squishy friends. Whether you’re crafting a jungle-themed nursery buddy or just want to add a quirky critter to your amigurumi zoo, this pattern lets you stitch up a lovable hatchling that’s full of personality. 🐊🧶💚
Designed for charm and creativity, this pattern invites you to play with textured stitches, gentle greens, and sweet details like sleepy eyes or a toothy grin. Add a bow tie, a pacifier, or even a tiny egg shell for extra storytelling flair. Whether it’s a gift for a little explorer or a fun addition to your handmade menagerie, this Amigurumi Crocodile Baby is a joyful and satisfying project—perfect for bringing a touch of handmade wild wonder to every stitch! 💖🌿✨
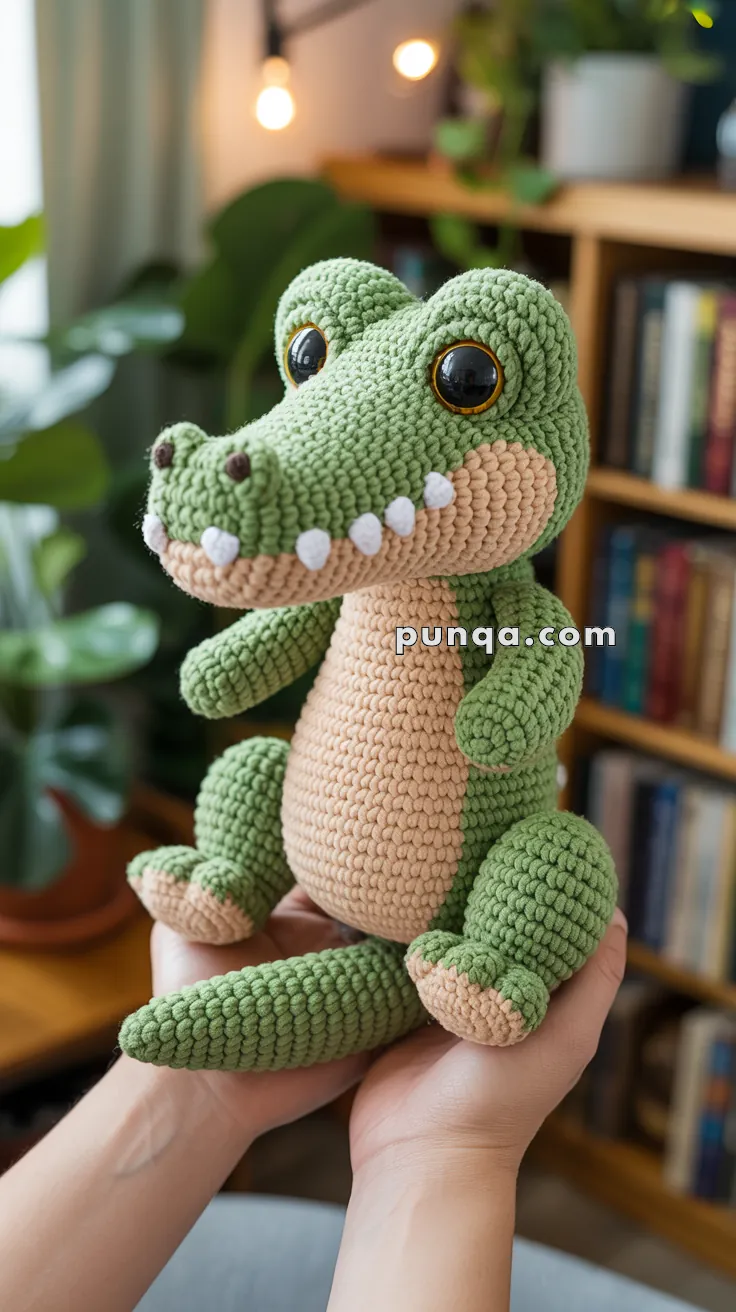
🐊 Amigurumi Crocodile Baby Crochet Pattern
Make your own huggable little crocodile! This friendly croc features large safety eyes, soft curves, tiny claws, a long tail, and a peachy belly. Perfect for baby gifts, nurseries, or jungle-themed plush collections!
✨ Skill Level
Intermediate – Involves shaping, color changing, and part assembly.
📏 Finished Size
Approx. 23–26 cm (9–10 in) tall
(using plush/velvet yarn and a 4.0 mm hook)
🧶 Materials
Plush / Velvet Yarn
- Green – main body
- Peach / Beige – belly, lower jaw, hand pads, foot pads
- White – teeth
- Brown – nostrils
Notions
- 16 mm safety eyes
- 4.0 mm crochet hook
- Polyfill stuffing
- Tapestry needle
- Stitch marker
🧵 Abbreviations (US Terms)
MR – Magic Ring
sc – Single Crochet
inc – Increase (2 sc in one stitch)
dec – Decrease (sc 2 together)
sl st – Slip Stitch
ch – Chain
BLO – Back Loop Only
🟩 HEAD & SNOUT (Worked in One Piece)
Start in green.
R1 – MR, 6 sc (6)
R2 – inc ×6 (12)
R3 – (1 sc, inc) ×6 (18)
R4 – (2 sc, inc) ×6 (24)
R5 – (3 sc, inc) ×6 (30)
R6 – (4 sc, inc) ×6 (36)
R7–10 – sc around (36)
Snout Extension
R11 – sc 18, inc ×6, sc 12 (42)
R12 – sc around (42)
Lower Jaw Colorwork
R13 – sc 20 in green, switch to peach, sc 20 (40)
R14 – sc 20 in green, sc 20 in peach (40)
R15 – (8 sc, dec) ×4 (36)
R16 – (4 sc, dec) ×6 (30)
Insert 16 mm safety eyes between R7–8, spaced 9–10 stitches apart, set high on the head.
R17 – (3 sc, dec) ×6 (24)
R18 – (2 sc, dec) ×6 (18)
Stuff firmly, shaping the snout wide and flat.
R19 – (1 sc, dec) ×6 (12)
R20 – dec ×6 (6)
FO and close.
👃 Nostrils (Brown – Make 2)
MR, 4 sc
FO
Sew on top of snout, spaced evenly and slightly forward.
🦷 Teeth (White – Make 8)
For each tooth:
Ch 2, sc in 2nd ch from hook, FO
Sew evenly along the mouth line, embedding slightly under the green edge so teeth appear to emerge naturally from the jaw.
🟩 BODY (Green with Peach Belly)
Start in green.
R1 – MR, 6 sc (6)
R2 – inc ×6 (12)
R3 – (1 sc, inc) ×6 (18)
R4 – (2 sc, inc) ×6 (24)
R5 – (3 sc, inc) ×6 (30)
R6 – (4 sc, inc) ×6 (36)
R7–10 – sc around (36)
Switch to peach (belly panel).
R11–17 – sc around (36)
Switch back to green.
R18 – (4 sc, dec) ×6 (30)
R19 – (3 sc, dec) ×6 (24)
R20 – (2 sc, dec) ×6 (18)
Stuff firmly, shaping a rounded, seated body.
R21 – (1 sc, dec) ×6 (12)
R22 – dec ×6 (6)
FO and close.
🟩 ARMS (Make 2 – Short & Stubby)
Start in peach (hand pad).
R1 – MR, 6 sc (6)
Switch to green.
R2 – inc ×6 (12)
R3–4 – sc around (12)
R5 – (1 sc, dec) ×4 (8)
R6–7 – sc around (8)
Lightly stuff.
FO and flatten slightly.
🟩 LEGS (Make 2 – Bent Sitting Legs)
Start in peach (foot pad).
R1 – MR, 6 sc (6)
R2 – inc ×6 (12)
Switch to green.
R3 – sc around (12)
R4 – (1 sc, inc) ×6 (18)
R5–7 – sc around (18)
R8 – (2 sc, dec) ×4, sc 2 (14)
R9 – sc around (14)
Stuff firmly, flatten base slightly to form a stable foot.
FO.
🟩 TAIL (Green – Thick & Supportive)
R1 – MR, 6 sc (6)
R2 – inc ×6 (12)
R3 – sc around (12)
R4 – (1 sc, inc) ×6 (18)
R5–7 – sc around (18)
R8 – (2 sc, inc) ×6 (24)
R9–12 – sc around (24)
Lightly stuff.
FO, leaving a long tail for sewing.
✂️ Assembly
1️⃣ Sew head to body with a slight upward tilt
2️⃣ Attach legs underneath the body, angled forward for a seated pose
3️⃣ Sew arms high on the sides of the torso
4️⃣ Attach tail centered on the back and curve gently for balance
5️⃣ Sew nostrils onto snout
6️⃣ Attach teeth along mouth line
🌟 Finished Baby Crocodile
Your baby crocodile is complete 🐊
With its wide snout, peachy belly, soft paw pads, and friendly seated pose, this little croc is full of charm and personality. A perfect handmade companion for nurseries, gifts, or any plush collection.