Welcome to the grand and historic world of amigurumi! 🏛️✨ Today, I’m thrilled to share my FREE crochet pattern for an Amigurumi Colosseum—a majestic miniature tribute to Rome’s legendary amphitheater! Perfect for history buffs, travel enthusiasts, or anyone who loves crafting architectural wonders in yarn, this project brings ancient grandeur to your crochet collection. Whether you’re recreating iconic landmarks, building a tiny world of wonders, or simply challenging yourself with a unique textured design, this pattern will guide you in stitching a detailed Colosseum complete with arched columns, weathered stone effects, and epic gladiator-era charm. ⚔️🌍
This design blends intricate stitching techniques with creative shaping to capture the Colosseum’s iconic layered facade while keeping it adorable in amigurumi form. I’ve included step-by-step instructions to help you achieve the perfect balance of structure and whimsy—ready to display as a conversation-starting decor piece or gift to a fellow history lover! 🎁 So grab your hooks, pick out sandy beiges and antique grays, and let’s crochet a timeless monument that’s stood the test of time—in yarn form! 🧶✨ Who knew ancient history could be so stitchably cute?
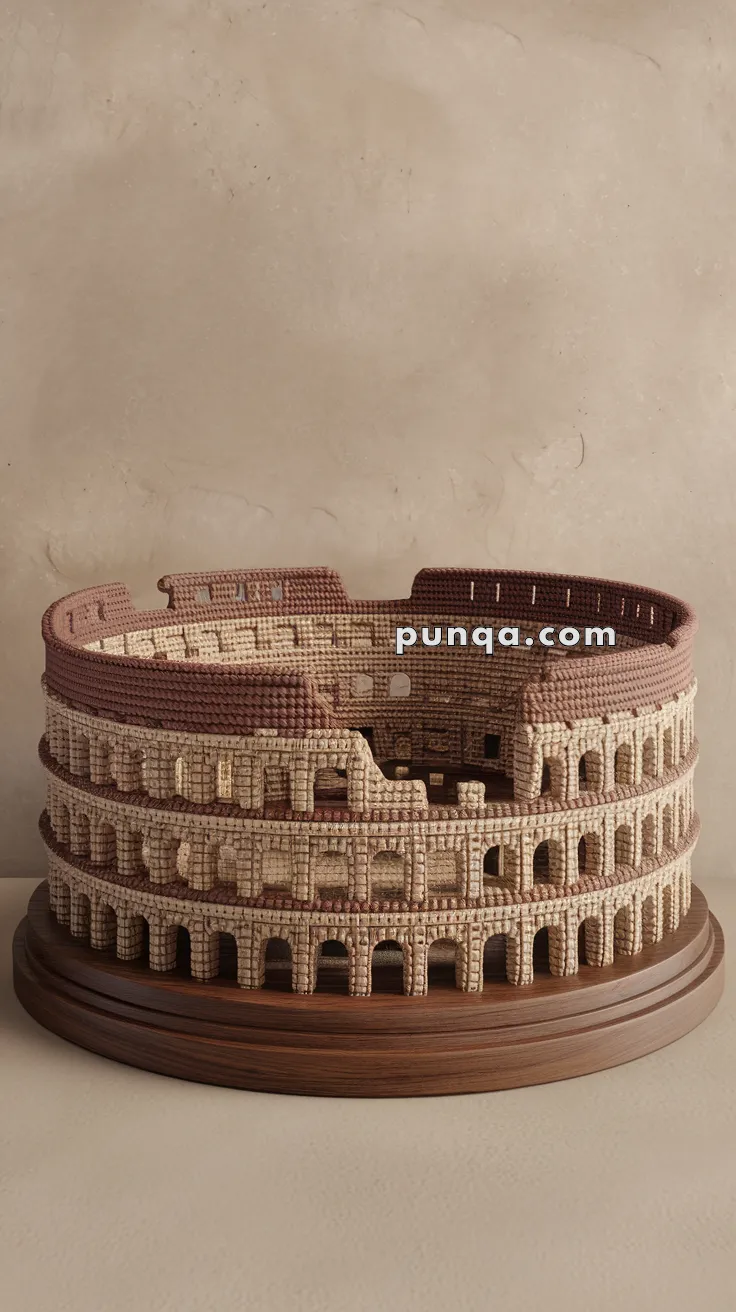
🏛️ Amigurumi Colosseum – FREE Crochet Pattern
Recreate the grandeur of ancient Rome in yarn with this stunning Amigurumi Colosseum! Designed as a layered architectural showpiece with detailed arches and open sections, this project is perfect for advanced crocheters or historic landmark collectors. A true centerpiece for any amigurumi collection!
✨ Skill Level
Advanced – Requires structural assembly, layered building, and sculptural shaping.
📏 Finished Size
Approx. 25 cm (10 in) diameter and 15–18 cm (6–7 in) tall when using worsted weight yarn and a 2.5–3.0 mm hook.
🧶 Materials
-
Worsted weight yarn in:
-
Beige or stone (walls and arches)
-
Brick red or terracotta (layer separators and inner walls)
-
-
2.5–3.0 mm crochet hook
-
Stitch markers
-
Tapestry needle
-
Thin plastic canvas or cardboard (optional for internal support)
-
Hot glue (optional for mounting to display base)
-
Fiberfill stuffing (used only in base, optional)
🧵 Abbreviations (US Terms)
MR – Magic Ring
sc – Single Crochet
inc – Increase
dec – Decrease
sl st – Slip Stitch
ch – Chain
BLO – Back Loop Only
FO – Fasten Off
🧱 Base Platform (Beige or Brown)
Foundation Disk:
MR, 6 sc
inc x6 (12)
(1 sc, inc) x6 (18)
(2 sc, inc) x6 (24)
Continue increasing evenly to form a flat circle until ~25 cm (10 in) in diameter
FO and weave in
Optional: Stitch to wooden or plastic circular base with hot glue for support
🏗️ Outer Wall Layers (Make 3 – Beige)
Each layer consists of arches + base wall
Arches Section:
Worked flat in rows
Ch 80
Row 1: sc across
Row 2: (skip 2 sts, 5 dc in next st, skip 2 sts, sc in next st) repeat around
Row 3: sc across
Roll to cylinder and stitch short ends together
Repeat 3 times for each tier
Between Layers – Terracotta Bands:
Ch 80
Row 1–2: sc across
Stitch one under each beige layer to separate tiers
🧱 Inner Wall (Top Floor Only – Brick Red)
Ch 80
Join to ring
Rounds 1–4: sc in each stitch
Cut 8–10 window spaces by chaining across gaps and skipping 3–4 sts, continuing round
Repeat another row of sc over these gaps to reinforce
🏟️ Interior Seating Ring (Optional)
Ch ~60 and form a ring inside the second tier
sc 2–3 rounds to mimic arena stands
You can leave the center open or stitch textured inner floor
🧩 Assembly
-
Stitch each layer into a stacked cylinder (bottom up)
-
Use whip stitch or invisible join to connect edges of each wall level
-
Reinforce with cardboard or plastic canvas rings inside for perfect symmetry
-
Add roof ring on top with windows visible
-
Mount onto base if desired
✂️ Final Touches
-
Use surface slip stitches to outline some arches for shadow depth
-
Embroider cracks or texture into bricks for realism
-
Use stiffer yarn or insert wire along top edge for crisp finish
Relive ancient grandeur in soft stitches — this crochet Colosseum is a feat of historical flair and crafty patience! Perfect for history buffs, display tables, or ambitious crochet challenges. 🧶🏛️