Tick-tock, it’s time for a charming crochet project with this Amigurumi Clock pattern! Whether you’re crafting for home decor, adding a whimsical touch to your handmade collection, or simply enjoy making unique amigurumi designs, this free pattern lets you stitch up a delightful clock bursting with personality. With its round shape, playful clock hands, and adorable details, this crochet clock captures the essence of timekeeping in a fun and creative way. Perfect for gifting to fellow crochet lovers, decorating a cozy space, or simply celebrating the joy of handmade creations, this amigurumi clock is sure to bring smiles—one stitch at a time! ⏰✨
Designed for customization, this pattern allows you to experiment with different colors, embroidered numbers, or even tiny accessories like a miniature pendulum or decorative frame for extra charm. Craft a classic wall clock with a vintage look, create a playful version with bright hues, or even stitch up a full set of time-themed amigurumi for a unique display! Whether gifted as a whimsical keepsake, displayed as a quirky accent, or made simply for the joy of crafting, this Amigurumi Clock is a fun and creative project—perfect for bringing a touch of handmade charm to every stitch! 🧶💖
⏰ Amigurumi Clock Crochet Pattern
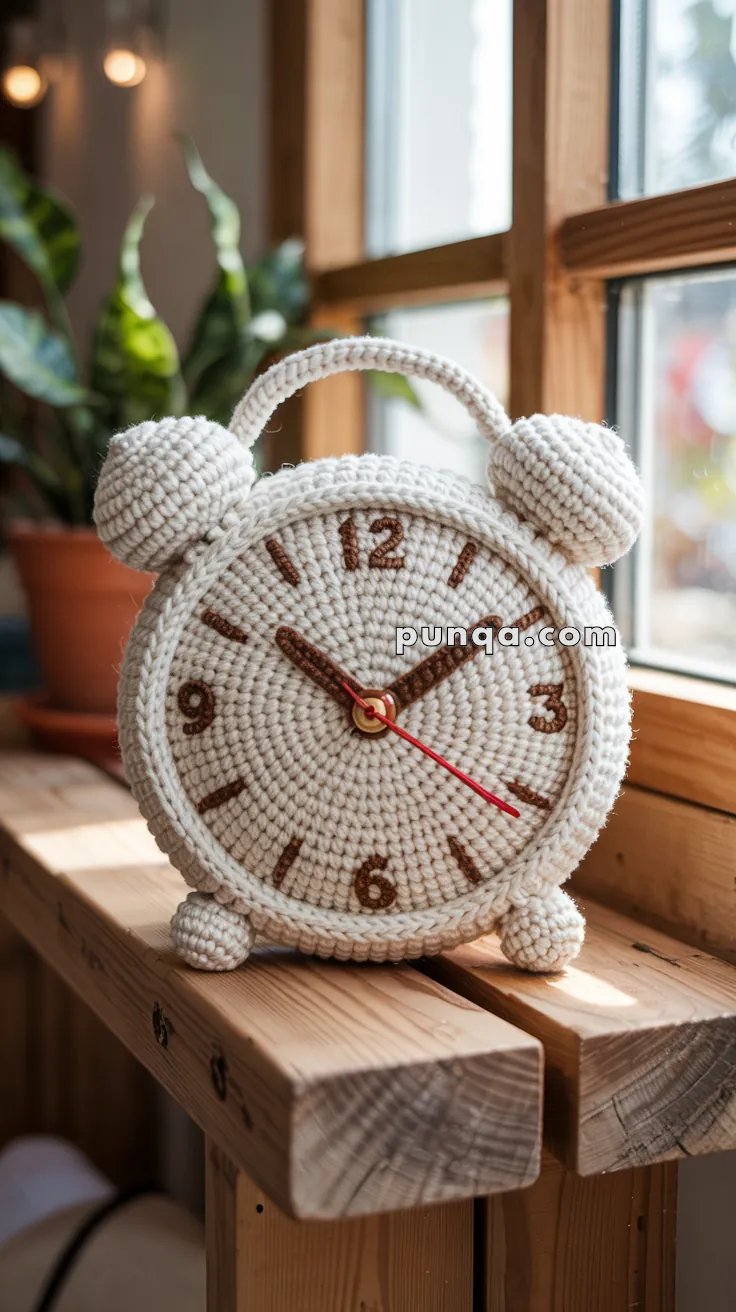
Add timeless charm to your space with this vintage-style crochet clock! Featuring three-dimensional clock hands, stitched numerals, and bold twin bells, this project is a delightful blend of cozy and clever design.
✨ Skill Level
Intermediate — involves working in the round, shaping, and light embroidery.
📏 Finished Size
Approximately 8–10 inches (20–25 cm) tall when made with medium (worsted) weight yarn and a 3.0 mm hook.
🧶 Materials
- Color A: Cream (main clock body, bells, handle, feet) – 80 g
- Color B: Brown (numbers, hour & minute hands) – 15 g
- Color C: Red (second hand) – a few yards
- Hook: 3.0 mm
- Stuffing: Polyester fiberfill
- Stitch marker, tapestry needle, embroidery needle
- Optional: plastic disc or sturdy cardboard circle (for a flat clock face)
🔤 Abbreviations (US Terms)
MR – Magic Ring
sc – Single Crochet
inc – Increase (2 sc in one st)
dec – Decrease (sc 2 together)
ch – Chain
sl st – Slip Stitch
FO – Fasten Off
BLO – Back Loop Only
FLO – Front Loop Only
🕰️ Pattern Instructions
⏺ Clock Face (Make 2)
With Color A (cream):
- MR, 6 sc (6)
- inc ×6 (12)
- (1 sc, inc) ×6 (18)
- (2 sc, inc) ×6 (24)
- (3 sc, inc) ×6 (30)
- (4 sc, inc) ×6 (36)
- (5 sc, inc) ×6 (42)
- (6 sc, inc) ×6 (48)
- (7 sc, inc) ×6 (54)
- (8 sc, inc) ×6 (60)
11–13. sc around (60)
Fasten off one circle. Keep the second attached for joining later.
👉 Optional: insert a flat cardboard/plastic disc between faces before stuffing for a firm, even clock shape.
🧵 Outer Rim (Joining)
Hold both clock faces together, wrong sides facing.
- sc through both pieces around (60)
2–3. sc around (60), stuffing as you go to maintain shape.
FO, weave ends securely.
🦶 Clock Feet (Make 2)
With Color A:
- MR, 6 sc (6)
- inc ×6 (12)
- (1 sc, inc) ×6 (18)
4–5. sc around (18) - (1 sc, dec) ×6 (12)
Stuff lightly and sew flat to bottom front edge — spaced evenly.
🛎 Twin Bells (Make 2)
With Color A:
- MR, 6 sc (6)
- inc ×6 (12)
- (1 sc, inc) ×6 (18)
- (2 sc, inc) ×6 (24)
- sc around (24)
- (2 sc, dec) ×6 (18)
- dec ×6 (12)
Stuff firmly and sew each bell on top of the clock at slight outward angles.
🌀 Handle (Top Arch)
With Color A:
- Ch 32
- sc in 2nd ch and across (31)
FO and curve into an arch shape.
Sew both ends behind the bells to form the handle.
🕒 Clock Hands
Hour Hand (Color B):
Ch 9, sc in 2nd ch and across (8). FO and shape into a blunt point.
Minute Hand (Color B):
Ch 13, sc across (12). FO and shape to a point.
Second Hand (Color C):
Ch 14, sl st across. FO.
Sew all three hands to the clock center with the hour and minute hands overlapping, and the red second hand slightly raised for a 3D look.
🔢 Numbers (1–12)
Using Color B:
For a clean stitched look:
- Embroider the numbers 1–12 using surface slip stitches or backstitch.
- Keep the positions proportional — at rounds 5–9 of the clock face (12 at top, 6 bottom, etc.).
- Each number is small (2–3 stitches tall).
Optional: only add 12, 3, 6, and 9 for a minimalist look.
🎯 Finishing
- Adjust the clock hands to your favorite time (photo shows ~10:10).
- Weave in ends.
- Add a felt circle or thin cardboard insert on the back for stability if desired.
- Gently shape and steam-block to smooth edges.
💡 Optional Touches
- Embroider a thin border line around the rim for added definition.
- Use gold embroidery thread for metallic accents.
- Insert a real clock mechanism for a functional version!
🎉 Your Crochet Clock Is Ready!
This plush amigurumi clock looks stunning on a shelf, cozy nook, or craft room. Its realistic face, neatly stitched numerals, and dimensional bells make it a show-stopping handmade decor piece — proof that time spent crocheting is time well spent! ⏰💛