Ah, the holiday season! 🎄 There’s something magical about it, isn’t there? One way I love to capture that festive spirit is by crafting adorable amigurumi Christmas elves. These little yarn companions bring charm and joy to any home, embodying the spirit of Santa’s little helpers. The “Elf on the Shelf” tradition has captured hearts worldwide, and making a custom amigurumi version adds a personal touch to the fun. It’s not just about having a cute decorative piece; it’s about creating something unique that can become a cherished part of holiday traditions for years to come.
The process of creating an amigurumi Christmas elf is as delightful as the end result. It all starts with choosing vibrant, festive yarns that evoke the holiday spirit. 🧶 Next, I gather my trusty crochet hook and follow a pattern, which guides me through each stitch to form the body, hat, and tiny accessories. Crafting the elf’s cheerful face is my favorite part—embroidering a playful grin and twinkling eyes that seem to say, “Let’s spread some holiday cheer!” With each passing hour, my little elf comes to life, and before long, it’s ready to take its place on the shelf, ready to delight both young and old alike.
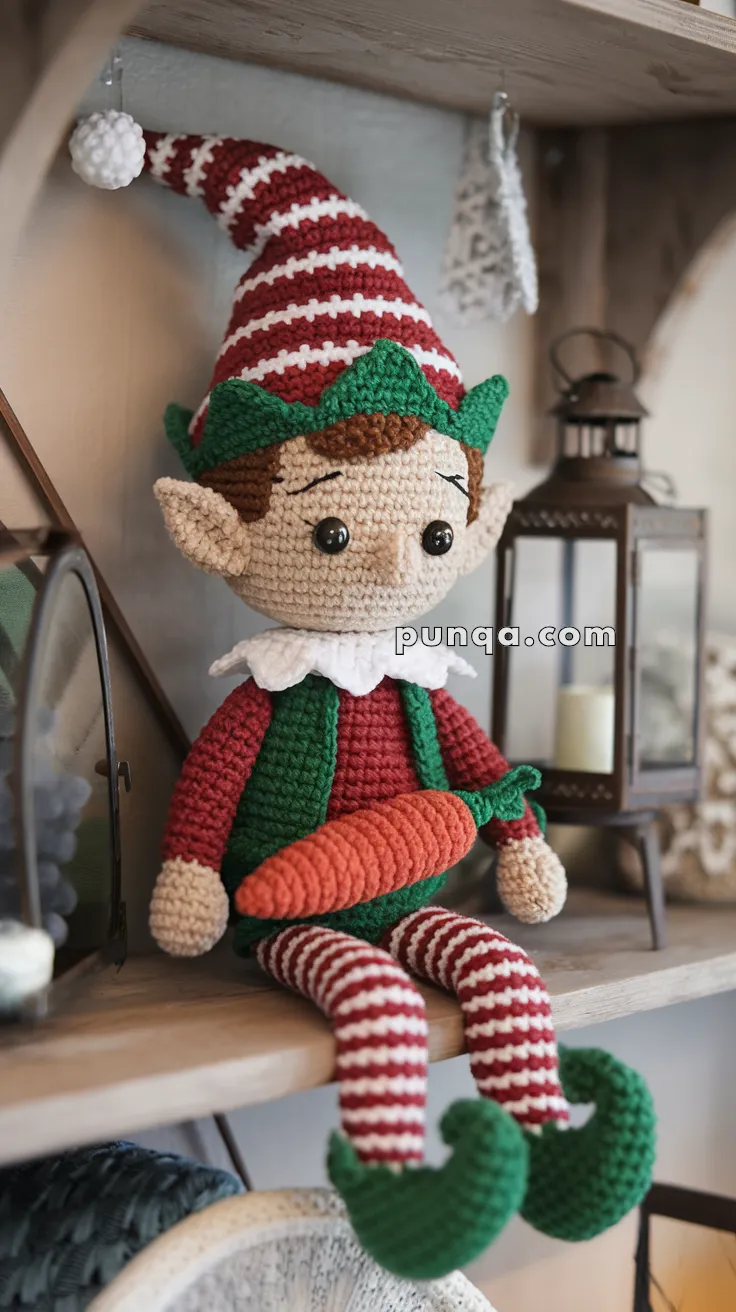
🎄 Amigurumi Christmas Elf on the Shelf – Free Crochet Pattern
Bring festive magic to life with this playful Christmas elf! With striped leggings, a curved hat, and holiday cheer, he’s a charming handmade addition to your holiday decor.
🧵 Skill Level: Intermediate
📏 Finished Size: ~12–14 inches seated
🧶 Materials
-
Worsted weight yarn in:
-
Skin tone (beige)
-
Red (shirt, hat, legs)
-
White (leg stripes, collar, hat stripe)
-
Green (vest, shoes, hat leaves)
-
Brown (hair)
-
Black (eyebrows, mouth)
-
Orange (carrot)
-
-
2.5 mm–3.0 mm crochet hook
-
10 mm black safety eyes
-
Stitch markers
-
Yarn needle
-
Polyester fiberfill
-
Optional: pipe cleaner or wire (for poseable limbs and hat)
✨ Abbreviations (US Terms)
-
MR – Magic Ring
-
sc – Single Crochet
-
inc – Increase
-
dec – Decrease
-
ch – Chain
-
sl st – Slip Stitch
-
BLO/FLO – Back/Front Loop Only
-
FO – Fasten Off
🧑🎄 Head (Beige)
-
MR, 6 sc
-
inc x6 = 12
-
(1 sc, inc) x6 = 18
-
(2 sc, inc) x6 = 24
-
(3 sc, inc) x6 = 30
-
(4 sc, inc) x6 = 36
7–14. sc around -
(4 sc, dec) x6 = 30
-
(3 sc, dec) x6 = 24
-
(2 sc, dec) x6 = 18
-
(1 sc, dec) x6 = 12
-
dec x6 = 6
FO and close
Insert safety eyes between Rnds 10–11, ~9 stitches apart
Embroider eyebrows and smile with black thread
👂 Ears (Make 2 – Beige)
-
MR, 6 sc
-
(1 sc, inc) x3 = 9
-
sc around
FO and flatten; sew on sides of head
🟫 Hair (Brown)
Using brown yarn:
-
MR, 6 sc
-
inc x6 = 12
-
(1 sc, inc) x6 = 18
-
(2 sc, inc) x6 = 24
-
(3 sc, inc) x6 = 30
-
(4 sc, inc) x6 = 36
Cut jagged fringe edges and sew to top front of head
👕 Body (Red)
-
MR, 6 sc
-
inc x6 = 12
-
(1 sc, inc) x6 = 18
-
(2 sc, inc) x6 = 24
-
(3 sc, inc) x6 = 30
6–10. sc around -
Switch to green (vest section), sc around
12–16. sc around
Stuff firmly -
(3 sc, dec) x6 = 24
-
(2 sc, dec) x6 = 18
-
(1 sc, dec) x6 = 12
FO and leave long tail for sewing
🤚 Arms (Make 2 – Beige to Red)
Start with beige (hands):
-
MR, 6 sc
-
inc x6 = 12
3–5. sc around
Switch to red:
6–20. sc around
Lightly stuff
FO and sew to body at shoulder level
🧦 Legs (Make 2 – Red and White Striped)
Alternate colors each round (start with red):
-
MR, 6 sc
-
inc x6 = 12
3–26. sc around in red/white stripes
FO and stuff
Sew to bottom of body (angled for sitting position)
👞 Shoes (Green)
-
MR, 6 sc
-
inc x6 = 12
-
(1 sc, inc) x6 = 18
4–6. sc around
Shape point by decreasing: -
(1 sc, dec) x6 = 12
-
sc around, FO
Roll tip upward and stitch in place for a curled effect
🎩 Hat (Red and White)
Alternate red and white every round:
-
MR, 4 sc (red)
-
inc x4 = 8
-
sc around (white)
-
(1 sc, inc) x4 = 12 (red)
-
sc around (white)
Continue alternating colors, increasing by 4 every 2 rounds, until ~48 sts
Make hat ~25–30 rounds long
Stuff slightly
FO and attach white pompom
🍃 Hat Leaf Brim (Green – Make 6)
-
Ch 6
-
sc in 2nd ch from hook, hdc, dc, hdc, sc
-
Turn, repeat on other side
Make 6 leaf shapes and sew around hat base
🧣 Collar (White)
Ch 28, sl st to form ring
Rnds 1–2: sc around
Rnd 3: (1 sc, ch 2, sl st in same st) repeat around for a ruffle effect
Sew around neck
🥕 Carrot (Orange and Green)
Carrot Body (Orange)
-
MR, 5 sc
-
(1 sc, inc) x2 = 7
3–12. sc around
Stuff
Continue increasing slightly for shape, then FO
Carrot Top (Green)
Ch 5, sl st in each
Repeat to make 3–5 leaves
Sew to carrot tip
Place in elf’s lap or stitch into hands
🪡 Assembly
-
Sew head to top of body
-
Attach ears, arms, and legs
-
Place hat over head, stitch in place
-
Add shoes, collar, and carrot
-
Embroider final face details
💡 Tips
-
Insert wire in hat to make it poseable
-
Add blush with a bit of fabric paint or crayon
-
You can pose the elf’s legs with pipe cleaners too
-
Customize with a name tag or belt for Santa’s helper style