As the holiday season approaches, I find myself eagerly diving into the delightful world of amigurumi, where crochet hooks and vibrant yarn come together to create enchanting little creatures. One of my favorite projects to work on this time of year is the Christmas candy cane caterpillar amigurumi. Just imagine a playful caterpillar wrapped in festive colors, embodying the whimsical spirit of Christmas! 🌟 There’s something truly magical about crafting these adorable critters, watching them take shape stitch by stitch, and knowing they’ll bring joy and a touch of handmade charm to any holiday decor. The process is as much fun as it is rewarding, providing a creative outlet that brings warmth to the chilly winter days. ❄️
Creating a candy cane caterpillar is a joyful journey, starting with selecting the perfect yarn in classic red, white, and green hues. The best part is that the pattern is often simple enough for beginners to tackle, yet offers enough creative twists to keep seasoned crafters engaged. Using basic crochet techniques, such as single crochet and increasing and decreasing stitches, I carefully shape each segment of the caterpillar’s body. Adding whimsical details like tiny eyes and a cheerful smile truly brings the caterpillar to life! 😊 This project isn’t just about the final piece; it’s about the process and the joy it brings. I love sharing these little treasures as heartfelt gifts or keeping them as part of my holiday decor, spreading cheer and a sense of accomplishment with each loop and turn of the yarn. 🎁
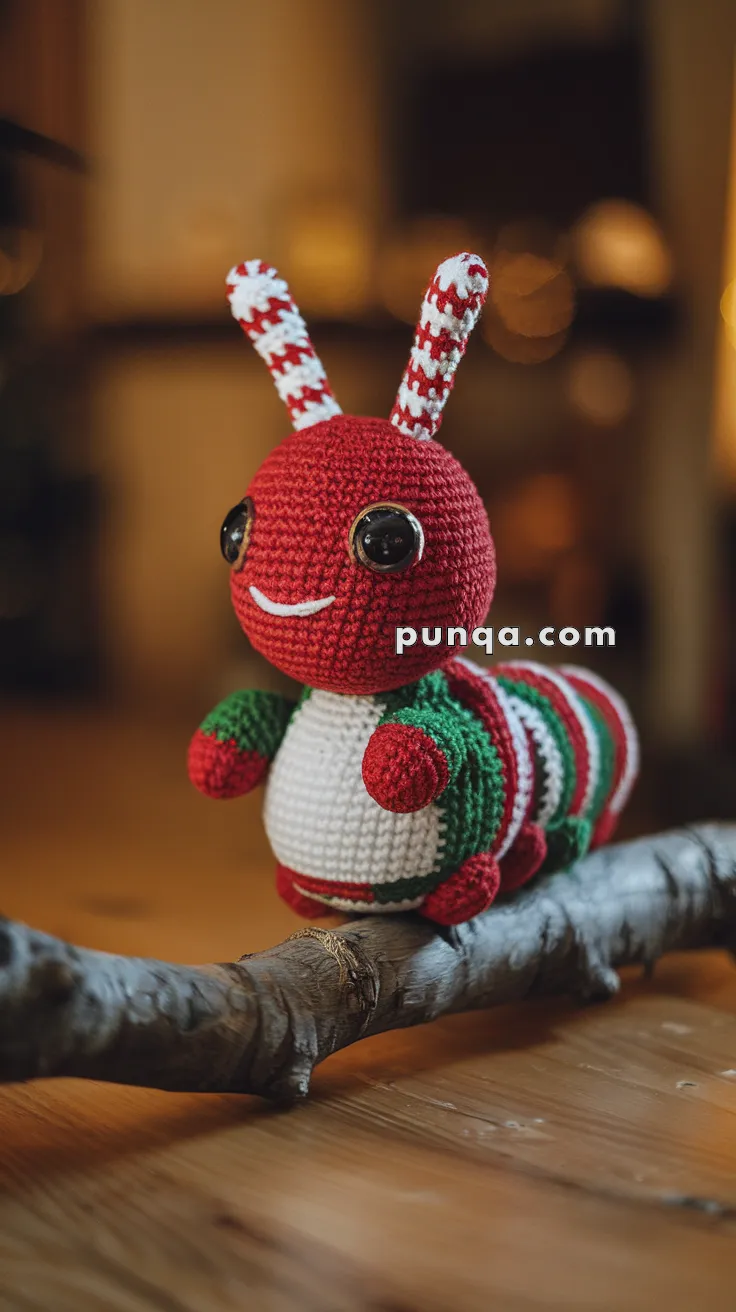
🐛 Christmas Candy Cane Caterpillar Pattern
Bring festive cheer to your amigurumi collection with this whimsical candy cane-inspired caterpillar! With its peppermint stripes and sweet smile, it’s the perfect handmade holiday decoration or gift.
📏 Finished Size:
Approx. 18–22 cm (7–9 in) long when using DK yarn and a 2.5 mm hook
🧶 Skill Level:
Confident Beginner to Intermediate
✂️ Materials:
-
DK weight yarn in:
-
Red
-
White
-
Green
-
-
2.5 mm crochet hook
-
Black safety eyes (10 mm)
-
Polyester fiberfill stuffing
-
Stitch marker
-
Yarn needle
-
White embroidery thread (for smile)
-
Optional: chenille stem for flexible antennae
🧵 Abbreviations (US Terms):
-
MR – magic ring
-
sc – single crochet
-
inc – increase (2 sc in same st)
-
dec – decrease (sc 2 together)
-
sl st – slip stitch
-
ch – chain
-
st – stitch
-
… – repeat instructions between asterisks
🍬 Pattern Instructions
🔴 Head (Red yarn):
-
MR, 6 sc (6)
-
inc around (12)
-
sc, inc around (18)
-
2 sc, inc around (24)
-
3 sc, inc around (30)
-
4 sc, inc around (36)
7–12. sc around (36) -
4 sc, dec around (30)
-
3 sc, dec around (24)
Insert safety eyes between Rnd 7–8, about 7 sts apart. -
2 sc, dec around (18)
-
sc, dec around (12)
Stuff firmly. -
dec around (6), fasten off, weave to close.
🟢 Body Segments (Make 4 in Candy Cane Stripe):
Alternate red, white, green every 2 rounds.
-
MR, 6 sc (6)
-
inc around (12)
-
sc, inc around (18)
4–6. sc around (18)
Stuff lightly. -
sc, dec around (12)
-
dec around (6), fasten off, sew to previous segment.
🍭 Belly Panel (White yarn):
-
Ch 10
-
Row 1–10: sc across, ch 1, turn (9)
Fasten off and sew under the body segments for the belly effect.
🎄 Legs (Make 6 in red):
-
MR, 6 sc (6)
-
inc around (12)
3–4. sc around (12)
Fasten off and sew three legs on each side.
🍬 Antennae (Make 2, Candy Stripe):
Switch red and white every 2 rounds.
-
MR, 6 sc (6)
2–10. sc around (6)
Insert optional wire/chenille stem for flexibility.
Fasten off, sew on top of head.
😊 Face:
-
Use white embroidery thread to stitch a curved smile.
-
Add a tiny white stitch to eyes for extra sparkle (optional).
✨ Final Tips:
-
For extra holiday magic, add a tiny jingle bell or bow around the neck.
-
Use glitter yarn for a sparkling finish.
-
Adjust size by switching yarn weight and hook size.