Capture the fluffy charm of a beloved breed with this Amigurumi Chow Chow crochet pattern! Inspired by the regal and cuddly nature of Chow Chows, this adorable design features their signature thick fur, round face, and sweet expression in every stitch. With carefully crafted details that bring their unique personality to life, this crochet Chow Chow is perfect for adding a touch of canine cuteness to your handmade collection. Whether you’re crafting for dog lovers, creating a cozy decor piece, or simply enjoy making animal-inspired amigurumi designs, this pattern lets you stitch up a lovable Chow Chow bursting with charm! 🐶✨
Designed for customization, this pattern allows you to experiment with different shades of fluffy yarn, embroidered details, or even tiny accessories like a miniature collar or bone for extra flair. Craft a classic Chow Chow with warm golden hues, create a whimsical version with pastel tones, or even stitch up a full set of dog-inspired amigurumi for a delightful display! Whether gifted as a cherished keepsake, displayed as a heartwarming accent, or made simply for the joy of crafting, this Amigurumi Chow Chow is a fun and creative project—perfect for bringing a touch of handmade canine magic to every stitch! 🧶💖
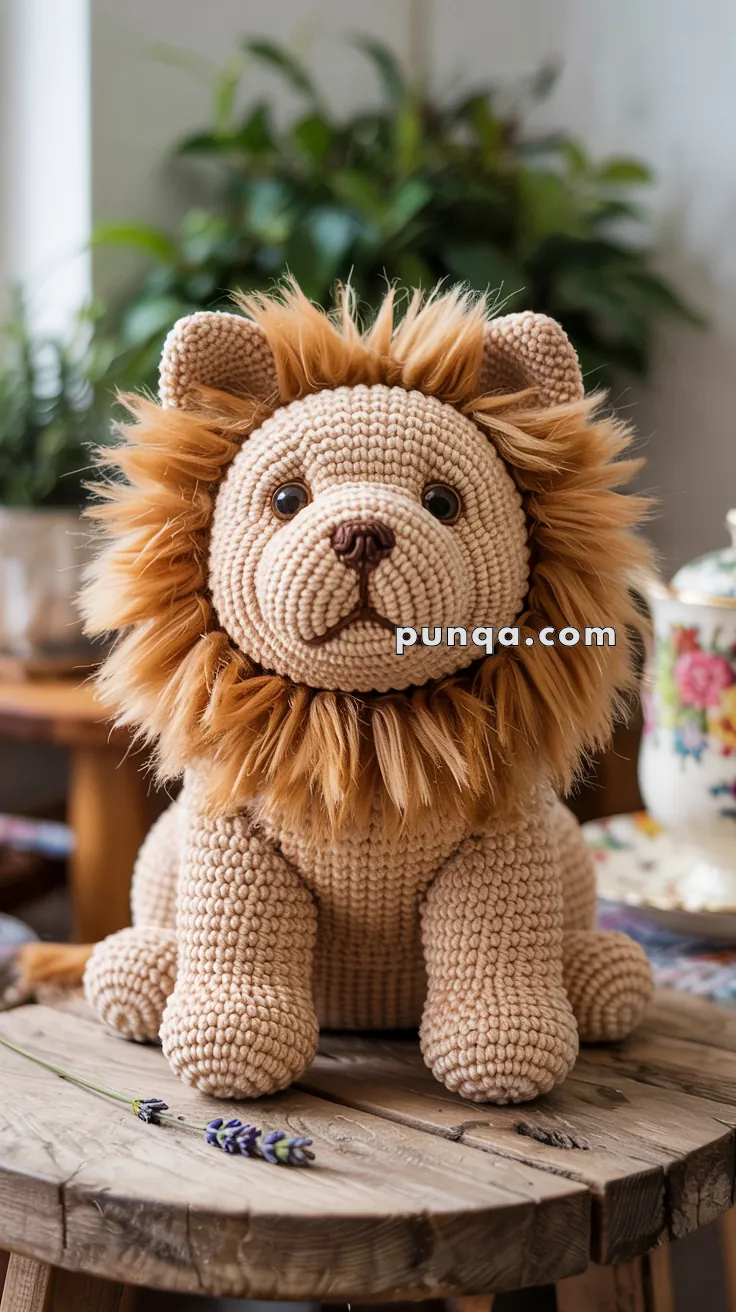
🧶 Amigurumi Chow Chow Crochet Pattern
This fluffy lion-like pup is ready to become your next loyal handmade companion! With a sturdy body, soft paw pads, and that iconic thick mane, this Chow Chow is a showstopper in plush form. Perfect for intermediate crocheters who love adding personality and realistic touches to their amigurumi.
✨ Skill Level
Intermediate – Requires shaping, sewing multiple parts, and attaching faux fur yarn for the mane.
📏 Finished Size
Approx. 10–12 inches (25–30 cm) tall using worsted weight yarn and a 3.5–4 mm hook.
🧶 Materials
- Yarn (Worsted weight):
- Color A: Light tan (main body)
- Color B: Dark brown (nose, mouth embroidery)
- Faux fur or brushed yarn in golden brown (mane)
- Crochet hook: 3.5 mm
- 10 mm safety eyes
- Tapestry needle
- Stitch marker
- Polyfill stuffing
- Scissors
- Optional: slicker brush (to fluff yarn mane)
🧵 Abbreviations (US Terms)
- MR – Magic Ring
- sc – Single Crochet
- inc – Increase
- dec – Decrease
- sl st – Slip Stitch
- FO – Fasten Off
- BLO – Back Loop Only
🐶 Pattern Instructions
🧠 Head
With Color A
- MR, 6 sc
- inc x6 (12)
- (1 sc, inc) x6 (18)
- (2 sc, inc) x6 (24)
- (3 sc, inc) x6 (30)
- (4 sc, inc) x6 (36)
- (5 sc, inc) x6 (42)
8–14. sc around (42) - (5 sc, dec) x6 (36)
- (4 sc, dec) x6 (30)
- (3 sc, dec) x6 (24)
Insert safety eyes between Rounds 10–11, 6 stitches apart
Stuff head firmly - (2 sc, dec) x6 (18)
- (1 sc, dec) x6 (12)
- dec x6 (6)
FO, weave shut
🐽 Muzzle
With Color A
- MR, 6 sc
- inc x6 (12)
- (1 sc, inc) x6 (18)
4–5. sc around (18)
FO, leave tail for sewing
Lightly stuff and sew to center bottom of face
Nose & Mouth:
- Embroider triangle nose with Color B
- Use a long stitch for vertical line and curve into smile
🐾 Body
With Color A
- MR, 6 sc
- inc x6 (12)
- (1 sc, inc) x6 (18)
- (2 sc, inc) x6 (24)
- (3 sc, inc) x6 (30)
- (4 sc, inc) x6 (36)
7–18. sc around (36) - (4 sc, dec) x6 (30)
- (3 sc, dec) x6 (24)
- (2 sc, dec) x6 (18)
Stuff firmly - (1 sc, dec) x6 (12)
- dec x6 (6)
FO and close
🐾 Legs (Make 4)
With Color A
- MR, 6 sc
- inc x6 (12)
- (1 sc, inc) x6 (18)
4–8. sc around (18) - (1 sc, dec) x6 (12)
10–12. sc around (12)
Stuff and flatten
FO, leave tail and sew to bottom of body (2 front, 2 back)
🐕 Tail
With Color A
- MR, 6 sc
- (1 sc, inc) x3 (9)
3–5. sc around (9) - dec, sc x4, dec (7)
FO, lightly stuff and sew to back top of body curving upward
👂 Ears (Make 2)
With Color A
- MR, 4 sc
- (1 sc, inc) x2 (6)
- (2 sc, inc) x2 (8)
- sc around (8)
- dec x4 (4)
FO, fold slightly and sew on top sides of head
🦁 Mane
With faux fur yarn or brushed acrylic in golden brown
- Cut multiple strands of yarn 4–5″ long
- Attach around the head using lark’s head knots
- Cover area from behind ears, along cheeks, and under neck
- Use a slicker brush if using standard yarn to fluff out fibers
🧷 Final Assembly
- Sew head onto top of body
- Attach legs, tail, ears
- Brush or fluff the mane for extra volume
- Embroider brow or eyelid details for expression (optional)
💡 Tips
- To shape the mane, trim uneven pieces after brushing
- Add small beans to paw tips for a weighted feel
- Safety-lock the eyes and secure all parts well if gifting to children
This amigurumi Chow Chow is the ultimate plush guardian – regal, cuddly, and full of charm! 🧶🦁