Step into the enchanted world of Studio Ghibli with this Amigurumi Chihiro crochet pattern! 🍃✨ With her signature outfit, expressive eyes, and adventurous spirit, this design captures the essence of the beloved heroine from Spirited Away in yarn form. Whether you’re crafting for a Ghibli fan, a themed décor piece, or simply love character-inspired amigurumi, this FREE pattern is a magical addition to your collection.
Designed for intermediate crocheters, this pattern allows for customization in outfit details, facial features, and even tiny accessories like embroidered soot sprites or a miniature bath token to enhance Chihiro’s personality. Choose classic greens and whites for an authentic look or experiment with pastel hues for a whimsical twist! Whether displayed alongside other Ghibli characters or gifted to a fellow crochet enthusiast, this amigurumi Chihiro is sure to impress.
Grab your hook, select your favorite yarn, and let’s bring this spirited adventurer to life—one stitch at a time! 🧶✨
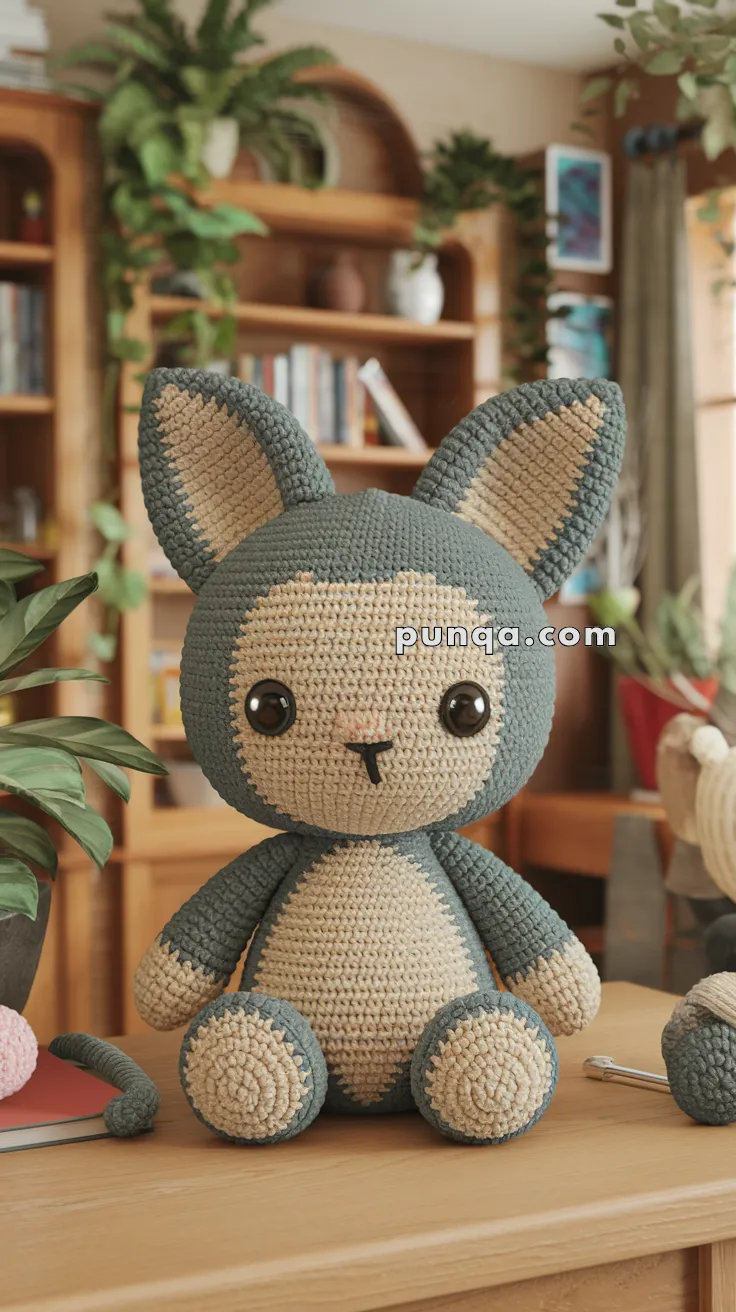
🐰 Amigurumi Chihiro Bunny Crochet Pattern
Bring this charming bunny character, Chihiro, to life with this soft and cuddly crochet pattern! With oversized ears, two-toned fur, and an adorable belly patch, this huggable plushie is perfect for gifts, nurseries, or simply spreading joy around the home.
✨ Skill Level
Beginner to Intermediate – Basic shaping, color changes, and simple sewing.
📏 Finished Size
Approximately 10–12 inches (25–30 cm) tall using worsted weight yarn and a 3.5 mm crochet hook.
🧶 Materials
-
Yarn (Worsted Weight):
-
Color A: Grey-blue (main body, outer ears)
-
Color B: Beige (inner ears, face, belly, paw pads)
-
-
3.5 mm crochet hook
-
12 mm safety eyes (1 pair)
-
Black embroidery thread (nose/mouth)
-
Tapestry needle
-
Polyfill stuffing
-
Stitch marker
-
Scissors
🧵 Abbreviations (US Terms)
MR – Magic Ring
sc – Single Crochet
inc – Increase
dec – Decrease
sl st – Slip Stitch
ch – Chain
FO – Fasten Off
BLO – Back Loop Only
🐰 Head (With Color A)
-
MR, 6 sc [6]
-
inc x6 [12]
-
(1 sc, inc) x6 [18]
-
(2 sc, inc) x6 [24]
-
(3 sc, inc) x6 [30]
-
(4 sc, inc) x6 [36]
7–14. sc around [36] -
(4 sc, dec) x6 [30]
-
(3 sc, dec) x6 [24]
-
(2 sc, dec) x6 [18]
— Place safety eyes between Rounds 10 and 11, approx. 6 stitches apart.
— Stuff firmly. -
(1 sc, dec) x6 [12]
-
dec x6 [6]
FO and weave tail to close.
🐾 Body (Start with Color A)
-
MR, 6 sc [6]
-
inc x6 [12]
-
(1 sc, inc) x6 [18]
-
(2 sc, inc) x6 [24]
5–10. sc around [24] -
(3 sc, inc) x6 [30]
12–16. sc around [30] -
(3 sc, dec) x6 [24]
-
(2 sc, dec) x6 [18]
— Stuff firmly -
(1 sc, dec) x6 [12]
FO, leave long tail for sewing to head.
🐰 Arms (Make 2 – Start with Color B for paws)
-
MR, 6 sc [6]
-
inc x6 [12]
3–4. sc around [12]
Change to Color A:
5–12. sc around [12] -
(2 sc, dec) x3 [9]
Stuff lightly and FO, leave long tail for sewing.
🐰 Legs (Make 2 – Start with Color B for feet)
-
MR, 6 sc [6]
-
inc x6 [12]
3–5. sc around [12]
Change to Color A:
6–10. sc around [12]
FO and stuff firmly. Sew to bottom of body.
🐰 Ears (Make 2 – Inner in Color B, Outer in Color A)
Inner Ear (Color B):
-
Ch 9, sc in 2nd ch from hook and across [8]
2–8. sc across, ch 1 turn
FO and weave in ends.
Outer Ear (Color A):
Repeat same as inner ear but do not FO.
Place inner ear on top and sc around both layers.
Sew to top sides of head.
🧵 Tail (Color A)
-
MR, 6 sc [6]
-
inc x6 [12]
3–5. sc around [12] -
(1 sc, dec) x4 [8]
FO and stuff lightly. Sew to lower back.
😺 Face Details
-
Use black embroidery thread to stitch a tiny nose and vertical mouth.
-
Use a small piece of pink yarn to add a subtle blush or embroidered cheeks if desired.
✂️ Finishing Touches
-
Attach arms to sides of the upper body.
-
Attach legs symmetrically to the bottom of the body.
-
Make sure ears and tail are aligned.
-
Gently shape the toy by hand after stuffing.
-
Weave in all yarn ends securely.
💡 Optional Customizations
-
Add a bow or scarf for extra cuteness
-
Embroider eyebrows or tiny whiskers
-
Create a full forest critter collection with different ear shapes!
Chihiro is the perfect handmade gift full of personality, softness, and gentle charm! 🧵🌿