Have you ever wondered how to combine the cuteness of amigurumi with the mythical allure of a creature like Cerberus? 🐶✨ Creating an amigurumi Cerberus pattern is a delightful journey that blends creativity, craftsmanship, and a touch of whimsy. I find it fascinating how we can take the fearsome image of a three-headed guardian and transform it into an adorable crochet companion. The process begins with selecting soft, colorful yarns that bring warmth and character to your creation. It’s almost like painting with threads! Choosing the perfect shades for each head, perhaps giving them distinct personalities, adds to the fun. 🧶
As I dive into the crochet process, starting with the magic circle and working my way through each head, I can’t help but feel a sense of accomplishment with each little detail that brings Cerberus to life. The assembly is where the magic truly happens, stitching each piece carefully to ensure the heads sit just right, with their expressions capturing both mischief and charm. It’s a bit like sculpting, only with yarn and a hook! The final touch often involves adding tiny embellishments, like little collars or embroidered features, that give each head its unique flair. Crafting an amigurumi Cerberus is a joyful experience, blending imagination and skill into a mythical masterpiece that’s sure to bring smiles to everyone who sees it! 🥰

🧶 Three-Headed Cerberus Amigurumi Pattern
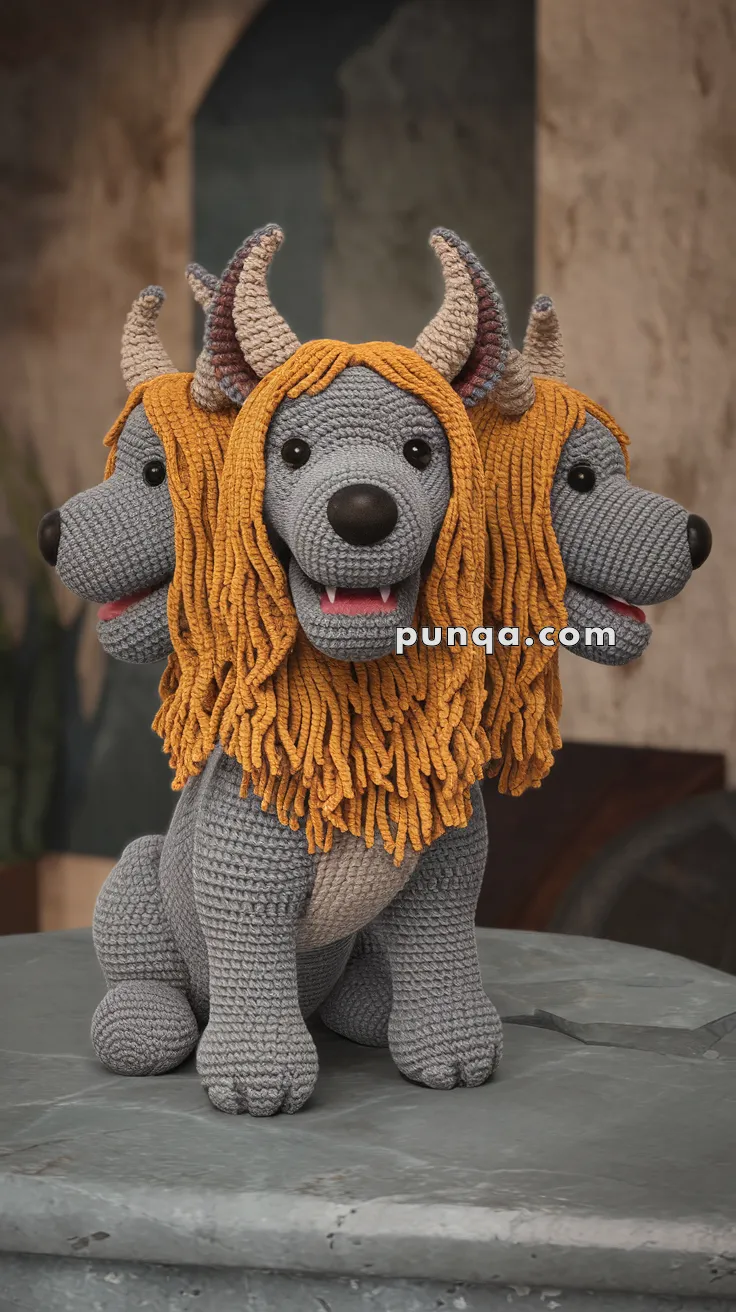
A majestic guardian creature with bold horns and a flowing mane!
✨ Finished Size
Approximately 30–35 cm (12–14 inches) tall using worsted weight yarn and a 3.5 mm hook.
🧵 Skill Level
Intermediate – includes color changes, shaping, and assembling multiple parts.
🧰 Materials Needed
-
Worsted weight yarn in:
-
Gray (main body)
-
Beige (horns)
-
Orange/Goldenrod (mane)
-
Black (nose)
-
Pink (mouth detail)
-
White (teeth)
-
-
3.5 mm crochet hook
-
Stitch marker
-
Black safety eyes (6 pairs)
-
Fiberfill stuffing
-
Yarn needle
-
Scissors
-
Hot glue (optional for extra stability of horns)
🧷 Abbreviations (US Terms)
-
MR – Magic Ring
-
sc – Single Crochet
-
inc – Increase (2 sc in one stitch)
-
dec – Decrease (sc 2 stitches together)
-
sl st – Slip Stitch
-
ch – Chain
-
st(s) – Stitch(es)
-
FO – Fasten Off
🐾 Pattern Instructions
🔹 Body (Make 1)
With gray yarn:
-
MR, 6 sc (6)
-
inc x6 (12)
-
(sc, inc) x6 (18)
-
(2 sc, inc) x6 (24)
5–12. sc in each st (24) -
(2 sc, dec) x6 (18)
-
(sc, dec) x6 (12)
-
sc in each st (12)
Stuff firmly and FO.
🔹 Legs (Make 4)
With gray yarn:
-
MR, 6 sc (6)
-
inc x6 (12)
3–6. sc in each st (12) -
(2 sc, dec) x3 (9)
8–10. sc in each st (9)
Stuff and FO, leaving a long tail for sewing.
🔹 Tail (Make 1)
-
MR, 6 sc (6)
-
inc x6 (12)
3–7. sc in each st (12) -
(sc, dec) x4 (8)
9–10. sc in each st (8)
FO, stuff lightly, leave tail for sewing.
🔹 Head (Make 3)
With gray yarn:
-
MR, 6 sc (6)
-
inc x6 (12)
-
(sc, inc) x6 (18)
-
(2 sc, inc) x6 (24)
5–11. sc in each st (24) -
(2 sc, dec) x6 (18)
-
(sc, dec) x6 (12)
-
sc in each st (12)
Stuff well and FO.
Insert safety eyes between rounds 6 and 7, spaced 5–6 sts apart.
🔹 Muzzle (Make 3)
With gray yarn:
-
MR, 6 sc (6)
-
inc x6 (12)
3–5. sc in each st (12)
FO, stuff lightly.
Add small white triangles for teeth using yarn or felt.
🔹 Ears (Make 6)
With gray yarn:
-
MR, 5 sc (5)
-
inc x5 (10)
-
(sc, inc) x5 (15)
-
sc in each st (15)
FO, flatten and do not stuff.
🔹 Horns (Make 6)
Start with beige:
-
MR, 6 sc (6)
2–4. sc in each st (6)
Change to darker beige: -
(sc, inc) x3 (9)
6–7. sc in each st (9) -
(2 sc, inc) x3 (12)
-
sc in each st (12)
Stuff tightly and FO.
🔸 Mane (Orange Yarn)
Cut 10–15 cm strands. Attach in loops around each head like fringe. Use a latch-hook technique or yarn needle. Trim evenly.
🧩 Assembly
-
Sew the legs to the base of the body.
-
Attach tail to the back.
-
Position and sew the three heads in a triangle formation at the top of the body.
-
Attach muzzles, eyes, and ears to each head.
-
Attach horns behind the ears symmetrically.
-
Sew on the mane around each head, layering evenly.
-
Weave in all yarn tails securely.
🐕 Final Touches
-
Add a little blush or shading under the eyes with fabric paint if desired.
-
Pose it with a backdrop like a stone throne for a mythical vibe!


