Creating an amigurumi cat fridge magnet is like bringing a little bit of magic into our everyday spaces. These adorable crochet creations have a way of brightening up even the dullest of kitchen corners, adding a touch of whimsy and charm. The process itself is a delightful journey from a simple skein of yarn to a personality-filled feline friend. I find myself continually amazed at how a few stitches can transform yarn into something so endearing and personal. Plus, who doesn’t love having a cute, handcrafted guardian watching over the fridge?
With each stitch, I get to play creator in the most delightful way. The process usually starts with picking out the perfect yarn in just the right shades to capture a cat’s quirky essence. Then comes the rhythm of crocheting—hook in hand, creating loops and patterns that slowly morph into the familiar shapes of a cat’s head or paws. The real fun often lies in adding those final touches: a cheeky face, a swirly tail, and of course, the all-important magnet on the back. The end result is not just a fridge magnet; it’s a pocket-sized piece of art that adds a sprinkle of happiness to everyday life. 🐱✂️
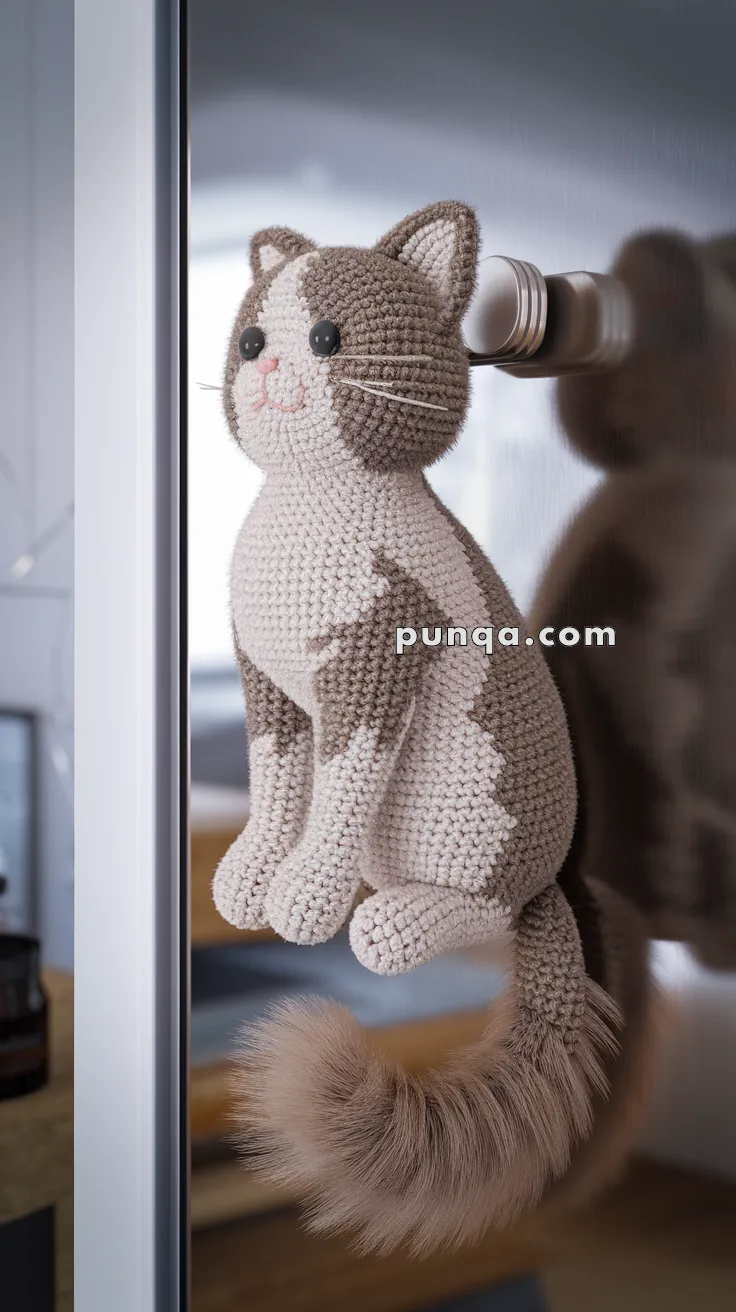
🐾 Amigurumi Cat Fridge Magnet Pattern
This cuddly and realistic amigurumi cat magnet is perfect for perching on your fridge or office whiteboard. With its sweet face, soft curves, and fluffy tail, this feline friend brings charm and coziness to any space.
🧶 Skill Level
Intermediate – Includes color changes, shaping, magnet placement, and sewing.
📏 Finished Size
Approx. 15 cm (6 in) tall when made with sport-weight yarn and a 2.5–3.0 mm hook.
✂️ Materials Needed
-
Yarn (Sport or DK weight):
-
Cream or light beige (base)
-
Brown or gray (patches)
-
Pink (nose, smile)
-
-
2.5–3.0 mm crochet hook
-
2 safety eyes (8 mm)
-
Polyester stuffing
-
Tapestry needle
-
Small round magnets (2–3)
-
Fabric glue (optional for securing magnets)
-
Faux fur or furry yarn (for tail)
-
Optional: whisker thread or bristles
🧵 Abbreviations (US Terms)
-
MR – Magic ring
-
sc – single crochet
-
inc – increase (2 sc in next stitch)
-
dec – decrease (sc 2 together)
-
ch – chain
-
sl st – slip stitch
-
FO – fasten off
-
BLO – back loop only
-
FLO – front loop only
🐱 Head
With cream:
-
MR, 6 sc
-
inc x6 (12)
-
(sc, inc) x6 (18)
-
(2 sc, inc) x6 (24)
-
(3 sc, inc) x6 (30)
6–10. sc around (30) -
(3 sc, dec) x6 (24)
-
(2 sc, dec) x6 (18)
-
(sc, dec) x6 (12)
Insert safety eyes between rounds 6–7, approx. 5–6 sts apart. Stuff well. -
dec x6 (6)
FO and weave in end.
🐾 Body
Start with cream:
-
MR, 6 sc
-
inc x6 (12)
-
(sc, inc) x6 (18)
-
(2 sc, inc) x6 (24)
5–10. sc around (24) -
(6 sc, dec) x3 (21)
-
(5 sc, dec) x3 (18)
-
(4 sc, dec) x3 (15)
-
(3 sc, dec) x3 (12)
Stuff and insert 1 small magnet at the back (secure with glue if desired) -
dec x6 (6)
FO and close.
🐾 Legs (Make 2)
With cream:
-
MR, 6 sc
-
inc x6 (12)
3–4. sc around (12) -
dec x6 (6)
Stuff lightly. FO and sew to lower front of body.
🐾 Arms (Make 2)
With cream:
-
MR, 6 sc
-
(sc, inc) x3 (9)
3–4. sc around (9) -
dec x3, sc x3 (6)
Lightly stuff. FO and sew to top front sides.
🐱 Ears (Make 2)
With brown or patch color:
-
MR, 4 sc
-
(sc, inc) x2 (6)
-
sc around (6)
Flatten, FO, and sew to top of head.
🐱 Tail (Fluffy Style)
Use faux fur or fluffy yarn:
-
Chain 20
-
sl st back down the chain
-
FO and brush out tail to fluff. Sew to the lower back.
🐱 Face Details
-
Embroider pink triangle nose, smile line, and cheeks
-
Optional: Add fine thread for whiskers
-
Optional: Add blush with pink chalk or fabric paint
🧲 Magnet Placement
-
Insert one magnet inside the back before closing
-
Optional: Add one inside each paw (arm) or behind the head to improve hold
🎉 Final Touches
Sew the head to the body, align legs for seated pose, and style the fluffy tail. Stick your adorable kitty on your fridge or board — it’s sure to make you smile every day! 🐾💕