Light up your crochet collection with this Amigurumi Candle pattern! Inspired by the cozy glow of a flickering flame, this charming design captures the warmth and elegance of a classic candle in every stitch. With its sturdy base, soft textures, and delicate flame, this crochet candle is perfect for adding a whimsical touch to your handmade projects. Whether you’re crafting for holiday decor, creating a thoughtful gift, or simply enjoy making unique amigurumi designs, this pattern lets you stitch up a miniature candle bursting with charm! 🕯️✨
Designed for customization, this pattern allows you to experiment with different colors, embroidered embellishments, or even tiny accessories like a decorative holder or glowing effect for extra flair. Craft a classic candle with soft neutrals, create a vibrant version with bold hues, or even stitch up a full set of cozy-inspired amigurumi for a charming display! Whether gifted as a heartfelt keepsake, displayed as a stylish accent, or made simply for the joy of crafting, this Amigurumi Candle is a fun and creative project—perfect for bringing a touch of handmade warmth to every stitch! 🧶💖✨
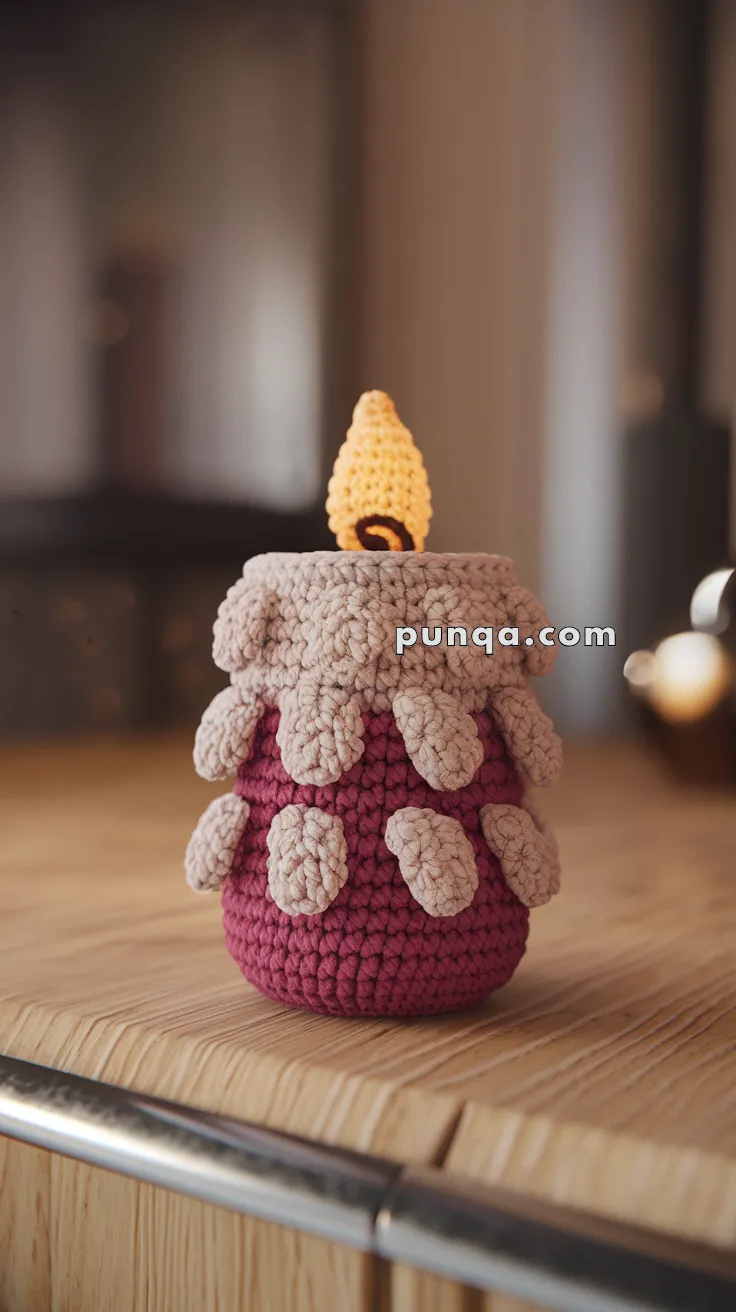
🕯️ Amigurumi Candle Crochet Pattern
This cozy amigurumi candle is the perfect handmade touch for autumn and winter. With soft textured wax drips, a glowing flame, and a chunky cylindrical body, it adds warmth to your seasonal décor without any fire hazard!
Whether used as a centerpiece, shelf accent, or part of a festive display, this plushy candle is sure to charm.
✨ Skill Level
Beginner to Intermediate – simple stitches, but includes shaping, textured details, and assembly.
📏 Finished Size
Approx. 6–7 inches (15–18 cm) tall when made with bulky chenille or velvet yarn and a 4.5–5 mm hook.
🧶 Materials
-
Yarn (Super Bulky/Velvet or Chenille):
-
Color A: Burgundy / Deep Red (candle body)
-
Color B: Beige (wax drips & puddle)
-
Color C: Yellow or Gold (flame outer)
-
Color D: Brown or Orange (flame inner)
-
-
Crochet hook: 4.5–5 mm
-
Fiberfill stuffing
-
Tapestry needle
-
Stitch marker
-
Scissors
-
Optional: small LED tea light for glow effect
🧵 Abbreviations (US Terms)
-
MR – Magic Ring
-
sc – Single Crochet
-
inc – Increase (2 sc in same st)
-
dec – Decrease (sc2tog)
-
ch – Chain
-
sl st – Slip Stitch
-
FO – Fasten Off
-
BLO – Back Loop Only
🕯️ Candle Body (Color A – Burgundy)
-
MR, 6 sc (6)
-
inc ×6 (12)
-
(sc, inc) ×6 (18)
-
(2 sc, inc) ×6 (24)
-
(3 sc, inc) ×6 (30)
-
(4 sc, inc) ×6 (36)
7–24. sc around (36)
– Stuff firmly as you go. -
(4 sc, dec) ×6 (30)
-
(3 sc, dec) ×6 (24)
FO and weave in end at top.
💧 Wax Drips & Puddle (Color B – Beige)
Large Rounded Drips (Make 6–8)
-
MR, 6 sc (6)
-
(sc, inc) ×3 (9)
3–4. sc around (9)
FO. Pinch slightly and sew along upper sides of the candle so they bulge outward.
Small Rounded Drips (Make 6–8)
-
MR, 6 sc (6)
-
sc around (6)
FO. Sew randomly down the sides of the candle for a melted effect.
Top Wax Puddle (with Overhang)
-
MR, 6 sc (6)
-
inc ×6 (12)
-
(sc, inc) ×6 (18)
-
(2 sc, inc) ×6 (24)
-
(3 sc, inc) ×6 (30)
-
(4 sc, inc) ×6 (36)
-
(5 sc, inc) ×6 (42)
-
(6 sc, inc) ×6 (48)
Wavy Edge (melted rim):
(sc, hdc, dc, hdc, sc) in same st, sl st in next st) repeat around.
FO. Sew on top of candle, letting it droop slightly over the sides like thick melted wax.
🔥 Flame
Outer Flame (Color C – Yellow)
-
MR, 4 sc (4)
-
sc around (4)
-
(1 sc, inc) ×2 (6)
4–7. sc around (6) → makes the flame tall and narrow -
(1 sc, dec) ×2 (4)
-
dec ×2 (2)
FO, leave tail for sewing.
Inner Flame (Color D – Brown/Orange)
-
MR, 4 sc (4)
-
sc around (4)
-
dec ×2 (2)
FO, sew inside outer flame.
🪡 Assembly
-
Attach the wax puddle to the top edge of the candle body. Let the edge hang slightly.
-
Sew large and small wax drips randomly around sides for melted effect.
-
Sew the flame securely into the center top of the candle.
-
Shape the flame with your fingers so it curves gently.
✂️ Finishing Touches
-
Add glitter thread to the wax for sparkle.
-
Place an LED tealight inside if you leave the top slightly open.
-
Make a set of 3 in different heights for a holiday centerpiece!
🎉 And that’s it! You now have a soft, safe, and festive amigurumi candle to brighten your home.