Welcome to the sweet and whimsical world of amigurumi! 🍰✨ Today, I’m excited to share my free crochet pattern for an Amigurumi Cake Slice—a delightful and mouthwatering creation perfect for dessert lovers, playful décor, or anyone who enjoys crafting adorable and colorful plush designs! 🧶 Whether you love stitching up miniature treats, experimenting with fun textures, or simply want to add a cute cake slice to your handmade lineup, this pattern will guide you through crafting a beautifully sculpted plush with fluffy layers, rich frosting, and a touch of handmade charm! 💖
This design embraces soft textures, vibrant colors, and tiny details to bring a fun and cheerful presence to your crochet projects! 🧶✨ I’ve carefully outlined each step to ensure your Amigurumi Cake Slice turns out just right—ready to brighten up your space or become a treasured handmade gift! 🎁 So grab your hooks, pick out pastel pinks, creamy whites, or rainbow sprinkles, and let’s stitch up a delicious cake slice! 🍰
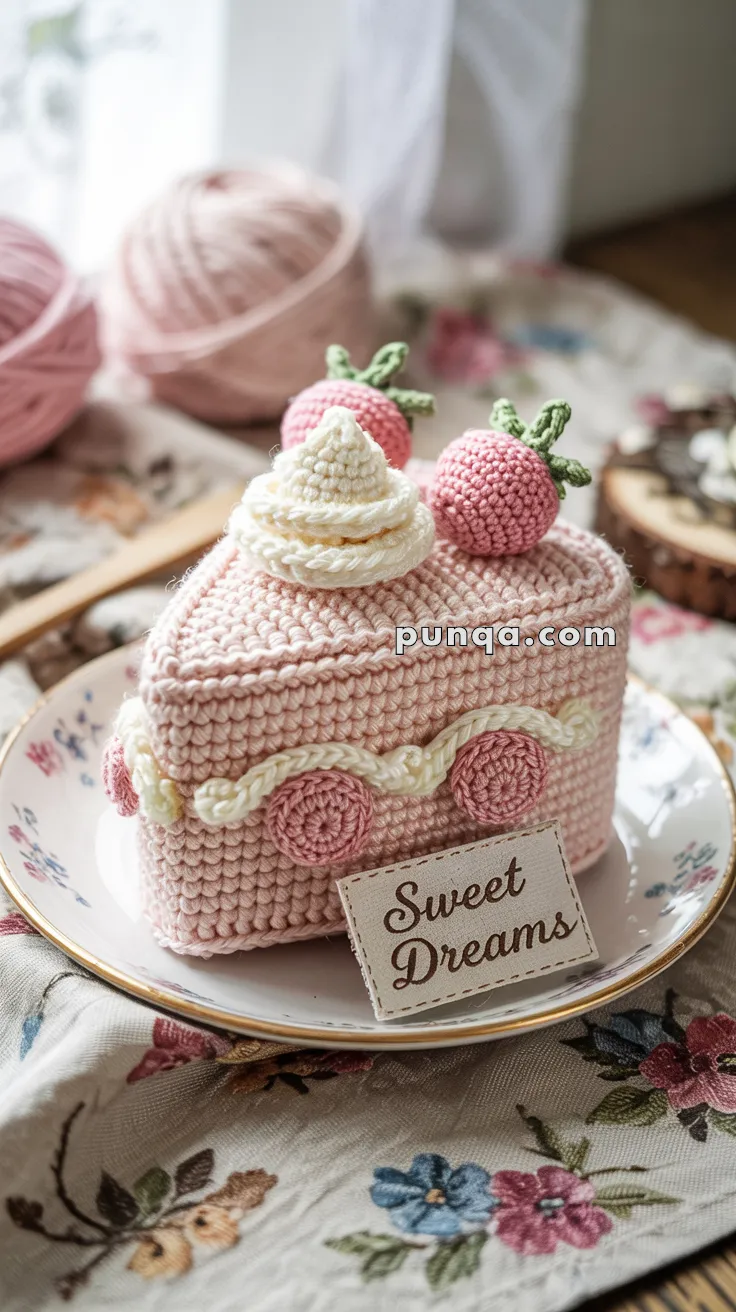
🍓 Sweet Dreams Cake Slice Amigurumi Pattern
Bring the charm of a strawberry shortcake to life with this delightful plush pattern! Topped with piped cream and crocheted strawberries, this cake slice is a dream in yarn. 🍰✨
🧶 Skill Level
Intermediate – involves shaping, color changes, and sewing details.
📏 Finished Size
Approximately 10–12 cm tall when made with worsted weight yarn and a 3.5 mm hook.
✂️ Materials
- Worsted weight cotton yarn in:
- Light pink (cake slice)
- Cream or off-white (whipped cream and icing)
- Rose pink (round side berries and strawberries)
- Green (strawberry tops)
- 3.5 mm crochet hook
- Fiberfill stuffing
- Yarn needle
- Stitch marker
- Optional: cardboard base insert for structure
- Hot glue or sewing needle for attaching tiny pieces
🪡 Abbreviations (US Terms)
MR – Magic Ring
sc – Single crochet
inc – Increase (2 sc in next st)
dec – Decrease (sc 2 together)
ch – Chain
sl st – Slip stitch
FO – Fasten off
🍰 Cake Slice Body (worked as a triangle prism)
Base triangle – make 2
With light pink:
- Ch 2
- Row 1: 1 sc in 2nd ch from hook (1)
- Row 2: ch 1, turn, inc (2)
- Row 3: ch 1, turn, inc, sc (3)
- Row 4: ch 1, turn, inc, sc 2 (4)
6–11. Continue increasing 1 st per row until you reach 10 stitches - Repeat Row 11 to even out
FO both triangles and set aside.
Side rectangle (edge strip)
With light pink:
- Ch 35
- sc in 2nd ch from hook and across (34)
3–6. sc across rows (34)
FO, leave long tail for sewing.
Assembly:
Sew the long strip along two triangle pieces to form a cake wedge. Stuff lightly as you go. Use cardboard inside the base for sturdiness (optional).
🍥 Swirled Whipped Cream (Make 1)
With cream:
- Ch 18
- In 2nd ch from hook, 3 sc in each ch across
The ruffle will spiral naturally.
Roll into a swirl and sew to top center of cake.
🍓 Strawberries (Make 2)
With rose pink:
- MR, 6 sc
- (1 sc, inc) x3 (9)
- (2 sc, inc) x3 (12)
4–5. sc around (12) - (2 sc, dec) x3 (9)
- dec x4, sc (5), FO
Stuff and close hole.
Strawberry tops (Make 2):
With green:
Ch 4, sl st into base, repeat 5 times for a star shape
Sew to strawberry top.
🌸 Side Decorations – Icing and Rounds
Pink rounds (Make 3–4)
With rose pink:
- MR, 6 sc
- inc x6 (12)
FO and sew along cake side
Icing swirls (Make 2)
With cream:
Ch 18
Sl st in each ch across to create soft ruffle.
Sew across the pink rounds in a wave shape as shown.
😊 Optional Details
- Embroider a smile on one side using brown thread.
- Add beads or felt for embellishment.
- Attach tag like “Sweet Dreams” with a scrap of linen or felt.
🧵 Assembly Order
- Make cake wedge
- Stuff and close shape
- Sew whipped cream and strawberries on top
- Attach round pink berries to side
- Sew icing swirls
- Add details as desired
This plush cake slice makes a charming décor piece or cozy play dessert! 🍓 Let me know if you’d like a chocolate version or matching cupcake!


Very gorgeous