Bring a little buzz to your ride with this Amigurumi Buzzing Bees Car Hanging crochet pattern! Featuring a cluster of cheerful bees with tiny wings and sweet smiles, this adorable design is perfect for adding a touch of handmade sunshine to your rearview mirror. Whether you’re crafting a cute car charm, a thoughtful gift, or just love turning tiny creatures into joyful decor, this pattern lets you stitch up a swarm of happiness that’s sure to brighten every drive. 🐝🚗🌼
Designed for charm and creativity, this pattern invites you to play with sunny yellows, soft textures, and expressive details like blushing cheeks or tiny antennae. Add a flower or two, a little swing, or even a dangling honey pot for extra flair. Whether it’s fluttering in your car or hanging in a cozy corner at home, this Amigurumi Buzzing Bees Car Hanging is a delightful and satisfying project—perfect for bringing a touch of handmade cheer to every stitch! 💛🧶✨
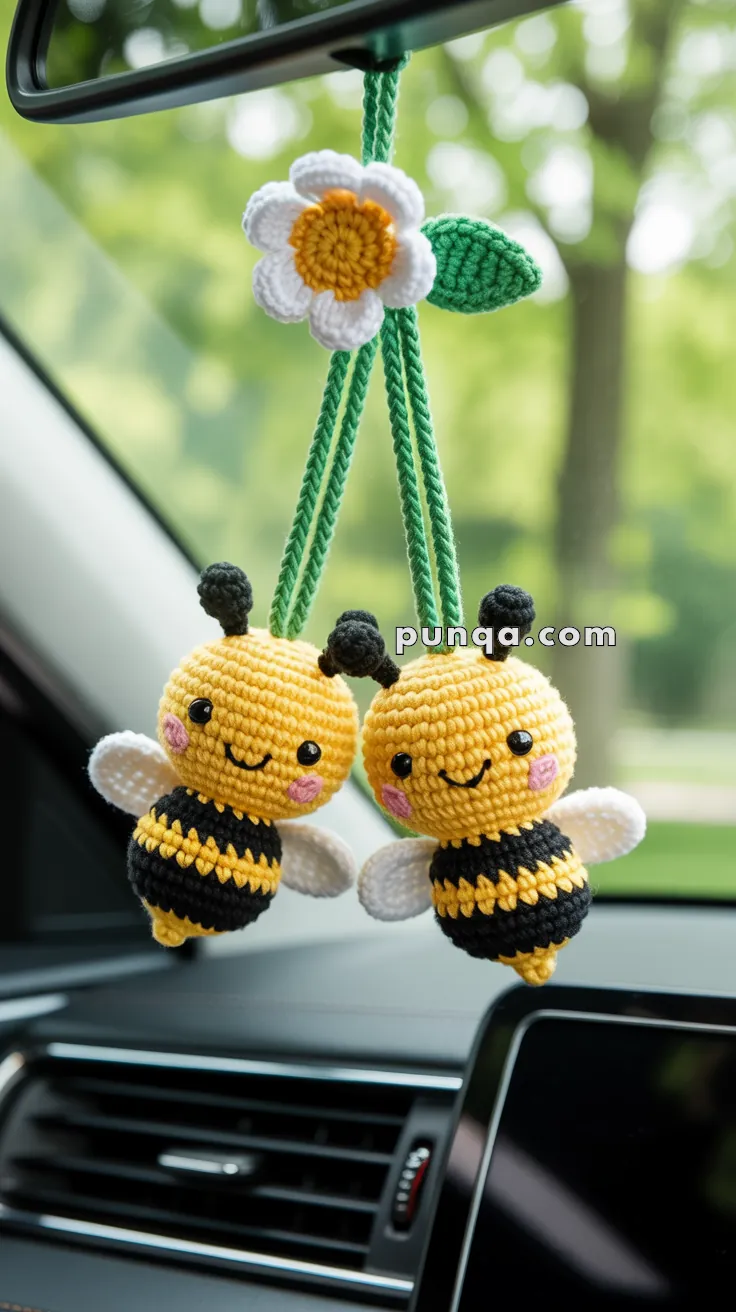
🐝 Amigurumi Buzzing Bees Car Hanging Crochet Pattern
Add some adorable cheer to your drive with this duo of smiling bees, dangling sweetly from a daisy flower! This pattern is perfect for a car mirror charm, baby mobile, or nursery decor. Let’s bring your buzzing buddies to life!
✨ Skill Level
Beginner–Intermediate — small parts, color changes, and assembly.
📏 Finished Size
Each bee: approx. 6–7 cm (2.5–3 in) tall
Total hanging length: adjustable
🧶 Materials
DK cotton yarn:
- Yellow — head/body
- Black — stripes & antennas
- White — wings & petals
- Golden yellow — flower center
- Green — cords & leaf
- Pink embroidery yarn — cheeks
6 mm safety eyes
2.5–3 mm crochet hook
Stuffing
Yarn needle
🪡 Abbreviations (US Terms)
MR = magic ring
sc = single crochet
inc = increase
dec = decrease
sl st = slip stitch
ch = chain
FO = fasten off
🐝 Bee Head & Body (One Piece)
The bee is head-heavy with a smaller rounded bottom.
Start with yellow
R1: MR, 6 sc (6)
R2: inc ×6 (12)
R3: (sc, inc) ×6 (18)
R4: (2 sc, inc) ×6 (24)
R5: (3 sc, inc) ×6 (30)
R6: (4 sc, inc) ×6 (36)
R7–10: sc around (36)
Insert eyes between R8–9, about 6 sts apart.
R11: (4 sc, dec) ×6 (30)
Stripe section (matches photo)
Switch to black:
R12–13: sc around (30)
Switch to yellow:
R14: sc around (30)
Switch to black:
R15–16: sc around (30)
Stuff firmly.
R17: (3 sc, dec) ×6 (24)
R18: (2 sc, dec) ×6 (18)
R19: (sc, dec) ×6 (12)
R20: dec ×6 (6)
FO and close.
The bottom should form a small rounded point, not flat.
🐝 Antennas (Make 2 per bee)
With black:
R1: MR, 4 sc
R2–3: sc around (4)
FO leaving long tail.
Lightly bend and sew close together on top of head.
🪽 Wings (Make 2 per bee)
With white:
R1: MR, 6 sc
R2: inc ×6 (12)
R3: (sc, inc) ×6 (18)
R4: sc around (18)
Flatten slightly.
Sl st across top edge to create an oval wing.
FO leaving long tail.
Sew low on the sides so wings angle slightly backward.
😄 Face Embroidery
Embroider a small curved smile with black yarn.
Add pink oval cheeks under the eyes.
🌼 Daisy Flower Topper
Flower Center
With golden yellow:
R1: MR, 6 sc
R2: inc ×6 (12)
R3: (sc, inc) ×6 (18)
FO.
Petals (worked around center)
Join white yarn.
For each petal:
ch 5
sl st in 2nd ch, sc, hdc, dc
sl st into next stitch of center
Repeat 6–7 petals evenly.
🍃 Leaf
With green:
ch 9
Row 1: sc, hdc, dc, dc, hdc, sc, sl st
Work back along other side:
sl st, sc, hdc, dc, dc, hdc, sc
FO.
Sew behind flower.
🌿 Braided Hanging Cords
Make two identical cords.
For each cord:
Cut 3 strands of green yarn about 40–50 cm long.
Tie together and braid tightly.
Knot ends.
Thread one cord through the top of each bee’s head and secure inside.
Bring both cords up and tie securely behind the flower.
Attach flower at the top join point.
🧵 Assembly
- Sew wings to sides of each bee
- Attach antennas centered on top
- Secure braided cords inside heads
- Join both cords behind flower
- Sew leaf behind flower
Ensure bees hang at slightly different heights like in the photo.
🌟 Final Thoughts
These smiling bees capture the playful charm of the photo — round heads, tiny bodies, and soft dangling movement. The braided cords and daisy topper create a balanced, decorative hanging that feels light and cheerful.
Perfect for a car mirror charm, nursery decor, or a sweet handmade gift, this buzzing duo brings a little sunshine wherever they hang. 🐝🌼✨