🐶 Amigurumi Bulldog Crochet Pattern
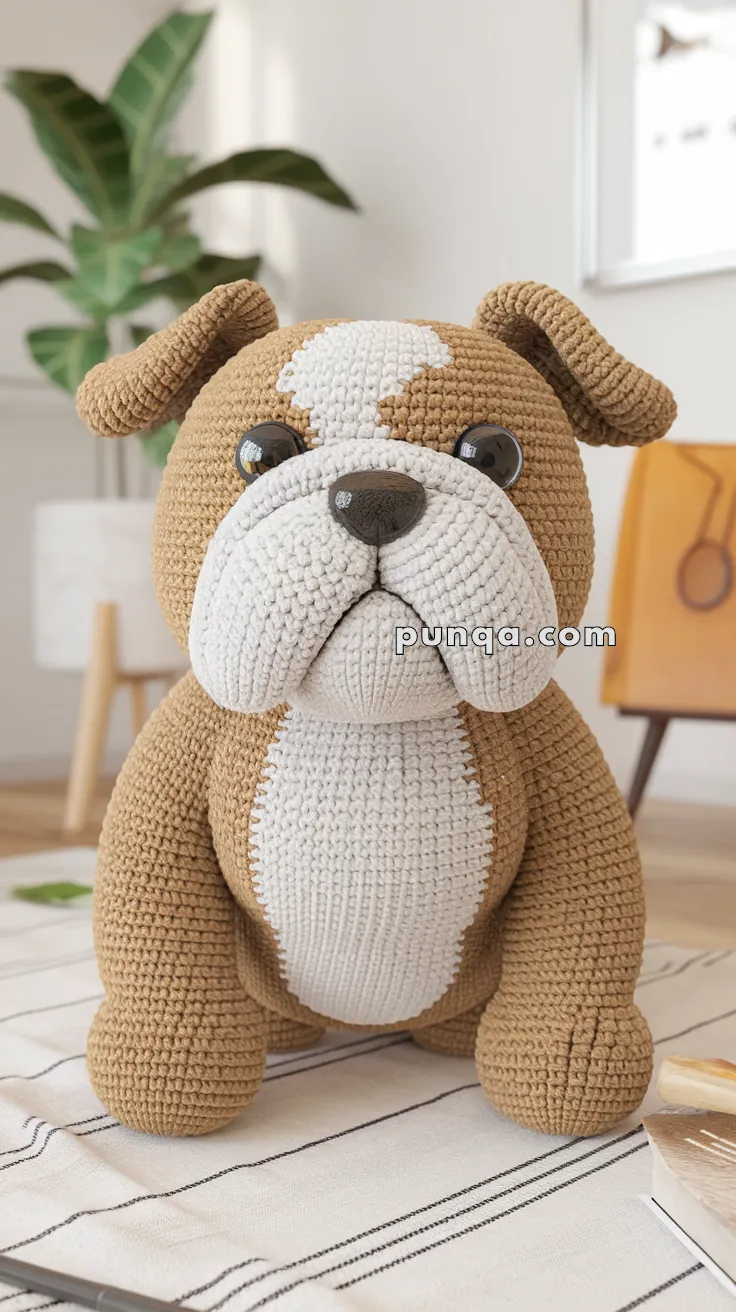
This chunky amigurumi bulldog features a broad head, oversized wrinkled muzzle, folded ears, and a sturdy seated body with thick rounded paws. The soft tan coat contrasts with a large creamy face blaze and chest panel, creating a gentle, expressive look. With sculpted shaping and layered muzzle construction, this bulldog has a lovable, realistic presence while remaining soft and cuddly.
✨ Skill Level
Intermediate – includes layered muzzle construction, shaped appliqué panels, color placement, and structured assembly.
📏 Finished Size
Approximately 30–34 cm (12–13.5 inches) tall
Using worsted weight yarn and a 3.5–4.0 mm hook.
🧶 Yarn Requirements (Worsted Weight)
Tan / light brown (head, body, legs, ears): 220–250 g
Cream / off-white (muzzle, blaze, chest panel): 120–140 g
Dark brown or black (nose, mouth embroidery): small amount
Polyester fiberfill stuffing: 400–500 g
🧵 Materials
3.5–4.0 mm crochet hook
16 mm safety eyes
Tapestry needle
Stitch markers
Polyester fiberfill
Work in continuous rounds unless stated otherwise.
🔤 Abbreviations (US Terms)
MR – magic ring
sc – single crochet
inc – increase (2 sc in one stitch)
dec – invisible decrease
ch – chain
sl st – slip stitch
FO – fasten off
🧠 Head (Tan)
The head is large and spherical to support the layered muzzle.
R1: MR 6 (6)
R2: inc x6 (12)
R3: (1 sc, inc) x6 (18)
R4: (2 sc, inc) x6 (24)
R5: (3 sc, inc) x6 (30)
R6: (4 sc, inc) x6 (36)
R7: (5 sc, inc) x6 (42)
R8: (6 sc, inc) x6 (48)
R9–16: sc around (48)
Insert eyes between R12–13, spaced about 12 stitches apart.
R17: (6 sc, dec) x6 (42)
R18: (5 sc, dec) x6 (36)
R19: (4 sc, dec) x6 (30)
Stuff firmly and evenly.
R20: (3 sc, dec) x6 (24)
R21: (2 sc, dec) x6 (18)
R22: (1 sc, dec) x6 (12)
R23: dec x6 (6)
FO and close.
🤍 Face Blaze (Cream Panel)
The blaze is a vertical teardrop shape that widens slightly at the forehead and narrows toward the muzzle.
With cream:
Ch 7.
Round 1: sc in 2nd ch from hook, sc 4, 3 sc in last st.
Work along opposite side: sc 4, 2 sc in last st (14)
Round 2: inc, sc 4, inc x3, sc 4, inc x2 (20)
Round 3: sc, inc, sc 4, (sc, inc) x3, sc 4, (sc, inc) x2 (26)
Round 4–5: sc around (26)
FO leaving long tail.
Sew centered on the face.
The top should sit just above eye level and the lower point should extend slightly into the muzzle area.
🐽 Upper Muzzle Base (Cream)
This is the main rounded snout structure.
R1: MR 6
R2: inc x6 (12)
R3: (1 sc, inc) x6 (18)
R4: (2 sc, inc) x6 (24)
R5: (3 sc, inc) x6 (30)
R6: (4 sc, inc) x6 (36)
R7–9: sc around (36)
Stuff firmly but flatten the top slightly with your fingers.
Sew centered over the lower face, overlapping the bottom of the blaze slightly.
🐾 Lower Jowls (Make 2 – Cream)
These form the heavy drooping cheeks.
R1: MR 6
R2: inc x6 (12)
R3: (1 sc, inc) x6 (18)
R4–7: sc around (18)
Stuff lightly.
Sew one jowl on each side of the upper muzzle.
They should sit slightly lower than the center muzzle and extend outward for fullness.
🐶 Upper Lip Strip (Above Jowls)
This strip creates the fold line that defines the bulldog’s upper lip.
With cream:
Ch 13.
Row 1: sc across (12)
Row 2–3: sc across (12)
FO leaving long tail.
Curve gently and sew across the top seam where the jowls meet the upper muzzle.
This should sit horizontally and create a visible layered crease.
👃 Nose & Mouth
Embroider a wide rounded triangular nose at the top center of the upper muzzle.
Add a short vertical stitch downward.
Then embroider subtle curved stitches toward each jowl to define the mouth fold.
👂 Ears (Make 2 – Tan)
R1: MR 6
R2: (1 sc, inc) x3 (9)
R3: (2 sc, inc) x3 (12)
R4–8: sc around (12)
Flatten.
Fold the top edge slightly backward before sewing high on the head so they droop outward.
🐕 Body (Tan)
The body is wide and rounded to support the heavy head and legs.
R1: MR 6
R2: inc x6 (12)
R3: (1 sc, inc) x6 (18)
R4: (2 sc, inc) x6 (24)
R5: (3 sc, inc) x6 (30)
R6: (4 sc, inc) x6 (36)
R7: (5 sc, inc) x6 (42)
R8: (6 sc, inc) x6 (48)
R9–18: sc around (48)
Stuff very firmly.
R19: (6 sc, dec) x6 (42)
R20: (5 sc, dec) x6 (36)
FO and close.
🤍 Chest Panel (Cream)
The chest panel is a long oval that narrows at the top and bottom and is widest at mid-belly.
Ch 10.
Round 1: sc 8, 3 sc in last st.
Work opposite side: sc 8, 2 sc in last st (22)
Round 2: inc, sc 8, inc x3, sc 8, inc x2 (30)
Round 3: sc, inc, sc 8, (sc, inc) x3, sc 8, (sc, inc) x2 (36)
Round 4–6: sc around (36)
FO leaving long tail.
Sew centered on the body from just under the chin down to lower belly.
Align vertically with the face blaze.
🐾 Front Legs (Make 2 – Tan)
R1: MR 6
R2: inc x6 (12)
R3: (1 sc, inc) x6 (18)
R4: (2 sc, inc) x6 (24)
R5–12: sc around (24)
Stuff firmly.
Flatten top slightly and sew to the front lower body so paws angle forward.
🐾 Back Legs (Make 2 – Tan)
R1: MR 6
R2: inc x6 (12)
R3: (1 sc, inc) x6 (18)
R4: (2 sc, inc) x6 (24)
R5–10: sc around (24)
Stuff firmly.
Attach to lower sides so the bulldog sits solidly.
🧵 Assembly & Shaping
-
Attach blaze first.
-
Sew upper muzzle centered.
-
Add jowls evenly and slightly lower than center.
-
Attach upper lip strip to create fold depth.
-
Align chest panel with blaze.
-
Attach head with slight forward tilt.
-
Position legs evenly to support seated posture.
🐾 Finishing Details
Gently press the jowls outward for fullness.
Slightly indent above the nose if you want deeper expression.
Adjust ears to droop naturally outward.
Ensure stuffing is smooth for a sturdy silhouette.
🐶 Finished Bulldog
With its broad head, layered muzzle structure, strong seated stance, and clean vertical blaze-to-chest alignment, this bulldog has a calm, loyal presence. The sculpted lip strip and heavy jowls give realistic depth while the rounded proportions keep him soft and huggable.
A bold, dependable handmade companion ready to sit proudly in your collection. 🧶🐾