✨ Skill Level
Advanced / Confident Intermediate
Includes:
📏 Finished Size
Approx. 50–55 cm (20–22 in) seated
Approx. 70 cm (27 in) extended
Using DK yarn + 3.0 mm hook
🧶 Materials
Yarn
Tools
-
3.0–3.5 mm crochet hook
-
12 mm safety eyes
-
Polyester fiberfill
-
Yarn needle
-
Stitch markers
-
Scissors
Optional Armature (Recommended)
🧵 Abbreviations (US)
MR – magic ring
sc – single crochet
inc – increase
dec – decrease
ch – chain
sl st – slip stitch
FO – fasten off
🦴 Wire Structure (Important)
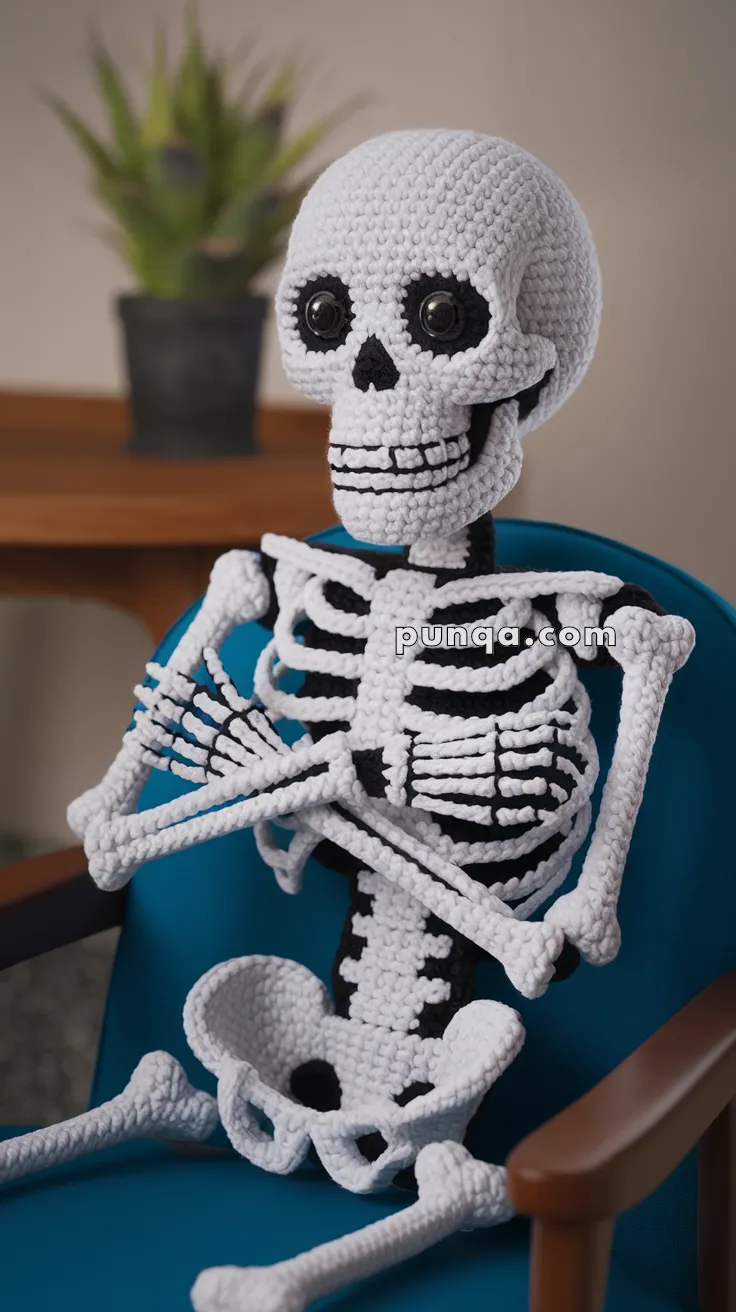
The photo shows raised arms and seated legs. To achieve this:
✔ Insert wire into both arms
✔ Insert wire into both legs
✔ Optional continuous wire from head → spine → pelvis
✔ Wrap wire tips with tape before inserting
✔ Stuff firmly around wire
Without wire: the skeleton will not hold the seated pose with lifted arms.
💀 Skull (White)
Rounded skull with visible jaw and stitched teeth.
R1: MR 6 (6)
R2: inc x6 (12)
R3: (sc, inc) x6 (18)
R4: (2 sc, inc) x6 (24)
R5: (3 sc, inc) x6 (30)
R6: (4 sc, inc) x6 (36)
R7–13: sc around (36)
Insert eyes between R9–10, 8 sts apart.
R14: (4 sc, dec) x6 (30)
R15: (3 sc, dec) x6 (24)
R16: (2 sc, dec) x6 (18)
Stuff firmly
R17: (sc, dec) x6 (12)
R18: dec x6 (6)
FO and close.
Face Details 🖤
-
Embroider black eye sockets
-
Nose: black inverted triangle
-
Mouth: 5 horizontal lines + small vertical stitches for teeth
-
Add curved jawline stitch under mouth
🖤 Inner Spine Core (Black Tube)
R1: MR 6 (6)
R2: inc x6 (12)
R3–22: sc around (12)
Stuff lightly
FO
This is the black visible torso in the photo.
🦴 Rib Cage (Make 6 Pairs)
Ch 14
sc in 2nd ch and across (13)
FO with long tail
Sew pairs onto the spine tube starting at round 5, evenly spaced.
🦴 Sternum Plate (Chest Bone)
Ch 6
sc in 2nd ch and across (5)
Rows 2–5: sc across (5)
FO
Sew vertically over ribs at center.
🦴 Collar Bones (Make 2)
Ch 10
sl st back
FO
Attach from sternum to shoulders.
🦴 Pelvis
R1: MR 6 (6)
R2: inc x6 (12)
R3: (sc, inc) x6 (18)
R4: (2 sc, inc) x6 (24)
R5–8: sc around (24)
Hip openings:
Ch 6, skip 6 sts, sc around
Next round: sc around
Flatten slightly and sew to bottom of spine tube.
🦴 Arms (Make 2)
Upper Arm
R1: MR 6
R2: (sc, inc) x3 (9)
R3–10: sc around (9)
Insert wire
Stuff lightly
FO
Lower Arm
R1: MR 6
R2–9: sc around (6)
FO
Hand (Bone Fingers)
Ch 3, sl st back – repeat 5 times
Attach to small palm circle (MR 6)
Sew lower arm to upper arm and attach arms crossing chest (as in photo).
🦴 Legs (Make 2)
Thigh
R1: MR 6
R2: inc x6 (12)
R3–10: sc around (12)
Insert wire
FO
Shin
R1: MR 6
R2–9: sc around (6)
FO
🦶 Feet (Not Visible in Photo – Required for Stability)
Flat seated skeleton feet.
R1: MR 6
R2: inc x6 (12)
R3: (sc, inc) x6 (18)
R4–6: sc around (18)
Stuff lightly
Flatten and close
Attach shin to back of foot at seated angle.
🦴 Neck Connector (Black)
Ch 8, join in round
Rows 1–4: sc around
FO
Attach skull to spine.
🧩 Assembly Order
-
Attach skull to spine tube
-
Sew ribs and sternum
-
Attach collarbones
-
Sew pelvis
-
Insert legs in bent seated position
-
Attach arms crossing chest
-
Shape with stuffing
-
Secure wire ends
-
Finish facial embroidery
✨ Finishing Touches
-
Steam lightly for shaping
-
Add black stitch lines for joints
-
Shape jaw and cheekbones with sculpting stitches
-
Adjust pose until seated upright
🧠 Wiring Summary
Wire is strongly recommended for:
Without wire → skeleton becomes floppy and cannot match the photo posture.
🎉 Final Result
Your finished skeleton will match the reference image with:
💀 Sculpted skull
🦴 Layered rib cage
🖤 Black spine contrast
🦶 Complete pelvis & feet
✋ Poseable arms
🪑 Stable seated posture
Perfect for:
-
Halloween décor
-
Gothic art dolls
-
Crochet sculptures
-
Spooky handmade gifts
🕸️ Your bone-chilling crochet skeleton is complete — elegant, eerie, and photo-accurate!
Happy stitching! 🧶☠️