Welcome to the cozy and nature-inspired world of amigurumi! 🐦✨ Today, I’m excited to share my free crochet pattern for an Amigurumi Birdhouse—a charming and decorative creation perfect for bird lovers, cottagecore enthusiasts, or anyone who enjoys crafting whimsical and functional plush designs! 🧶 Whether you love stitching up miniature homes, experimenting with textured stitches, or simply want to add a delightful birdhouse to your handmade lineup, this pattern will guide you through crafting a beautifully sculpted plush with intricate details, soft edges, and a touch of woodland magic! 🌿
This design embraces earthy tones, structured shaping, and playful details to bring a warm and inviting presence to your crochet projects! 🧶✨ I’ve carefully outlined each step to ensure your Amigurumi Birdhouse turns out just right—ready to brighten up your space or become a treasured handmade gift! 🎁 So grab your hooks, pick out rustic browns, soft creams, and vibrant greens, and let’s stitch up an adorable birdhouse! 🐦
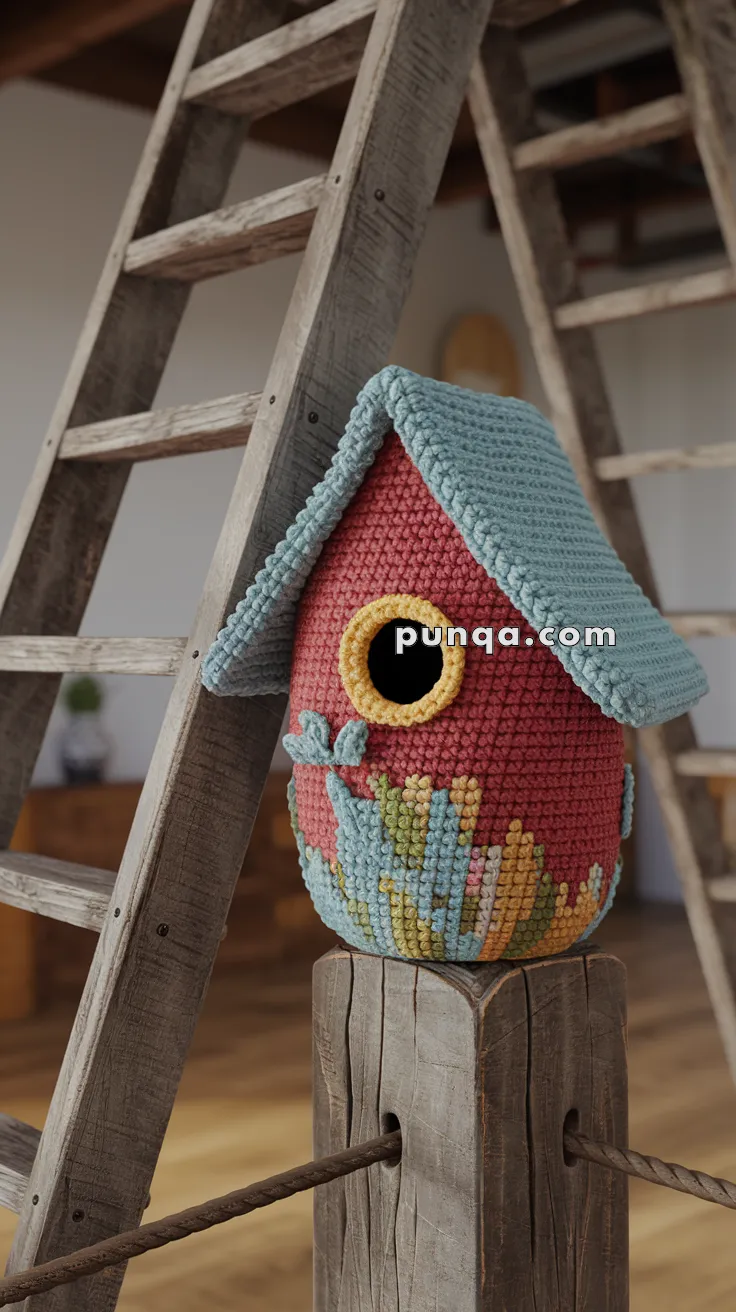
🐦 Amigurumi Birdhouse – Free Crochet Pattern
A charming decorative birdhouse featuring a curved roof, floral base design, and an open window perch — perfect for home decor or as a whimsical gift! 🌸
✨ Skill Level
Intermediate – includes color changes, shaping, and assembly.
📏 Finished Size
Approx. 9″ (23 cm) tall × 5″ (13 cm) wide when using worsted weight yarn.
🧶 Materials Needed
-
Worsted weight yarn in:
-
Brick red (main house)
-
Pale blue (roof)
-
Yellow (window ring)
-
Green, pink, orange, and blue (floral pattern)
-
-
3.5 mm crochet hook
-
Stitch markers
-
Fiberfill stuffing
-
Yarn needle
-
Cardboard or plastic base insert (optional for stiffening)
🧵 Abbreviations (US Terms)
-
MR – Magic Ring
-
ch – Chain
-
sc – Single crochet
-
inc – Increase (2 sc in one st)
-
dec – Decrease (sc 2 together)
-
sl st – Slip stitch
-
BLO – Back loop only
-
FO – Fasten off
🏠 Pattern Instructions
🟥 House Body
Using brick red yarn:
Round Base
-
MR, 6 sc in ring (6)
-
inc x6 (12)
-
(sc, inc) x6 (18)
-
(2 sc, inc) x6 (24)
-
(3 sc, inc) x6 (30)
-
(4 sc, inc) x6 (36)
-
(5 sc, inc) x6 (42)
-
(6 sc, inc) x6 (48)
9–35. sc in each st (48)
Colorwork Floral Base (optional)
Rows 15–25: Use tapestry crochet technique to work in floral color changes using green, pink, orange, and blue according to the visual placement in the photo.
Round 36 (Start roof taper)
Change to BLO
36. (6 sc, dec) x6 (42)
37. sc in each st (42)
38. (5 sc, dec) x6 (36)
39. sc in each st (36)
40. (4 sc, dec) x6 (30)
41. sc in each st (30)
FO, weave in ends.
Stuff body firmly before adding roof.
🔵 Circular Window Ring
Using yellow:
-
MR, 6 sc (6)
-
inc x6 (12)
-
(sc, inc) x6 (18)
-
(2 sc, inc) x6 (24)
-
sc around (24)
FO, leave a long tail for sewing.
Cut a hole in the front body (approx. round 20–23). Carefully reinforce the hole edges with sl st or simple whipstitch, then sew the yellow ring around it.
💙 Roof Panels (make 2)
Using blue:
-
Ch 21
-
Row 1: sc in 2nd ch from hook and across (20)
3–20. Ch 1, turn, sc across (20)
Repeat for second panel.
Joining Roof Panels
With right sides together, sc the long edges of the two panels together, leaving a clean ridge line. FO.
Fold the roof over the top of the body and sew the sides down along the top rounds, curving downward at each side. Let the roof slightly droop over the opening.
🌿 Leaves & Side Decoration (optional)
Use any scrap colors (green, teal, blue) to cut leaf shapes from crochet pieces or use simple:
-
Ch 8
-
sc back across, shaping a leaf-like tip by increasing in the 4th stitch
-
FO and sew decoratively around base and window
🪵 Optional: Base Stiffener
Cut a circular cardboard or plastic canvas and insert in the base before stuffing the house completely.
🧡 Finishing Touches
-
Embroider additional flowers or vines
-
Add a felt or crocheted bird peeking from the window
-
Attach a hanging loop from the roof ridge
Your adorable crochet birdhouse is ready to perch on a shelf, hang by a window, or become a centerpiece of handmade charm! 🐥✨