Welcome to the enchanting and nomadic world of amigurumi! 🏜️✨ Today, I’m thrilled to introduce my free crochet pattern for a Bedouin Tent—a beautifully crafted piece that brings the warmth and tradition of desert life into miniature form. Whether you’re creating a stunning desert diorama, adding depth to a cultural-inspired scene, or simply want to craft a rustic tent filled with adventure, this pattern will guide you through stitching up a detailed and atmospheric piece with flowing fabric, sturdy ropes, and a touch of nomadic charm! ⛺
This design embraces earthy tones, textured details, and dynamic shaping to bring a rich and authentic presence to your crochet projects! 🧶🌅 I’ve carefully outlined each step to ensure your Amigurumi Bedouin Tent turns out just right—ready to set the stage for your miniature desert scene or become a treasured handmade keepsake! 🎁 So grab your hooks, pick out warm browns, sandy neutrals, or rich reds, and let’s stitch up a timeless Bedouin tent for your amigurumi world! ✨
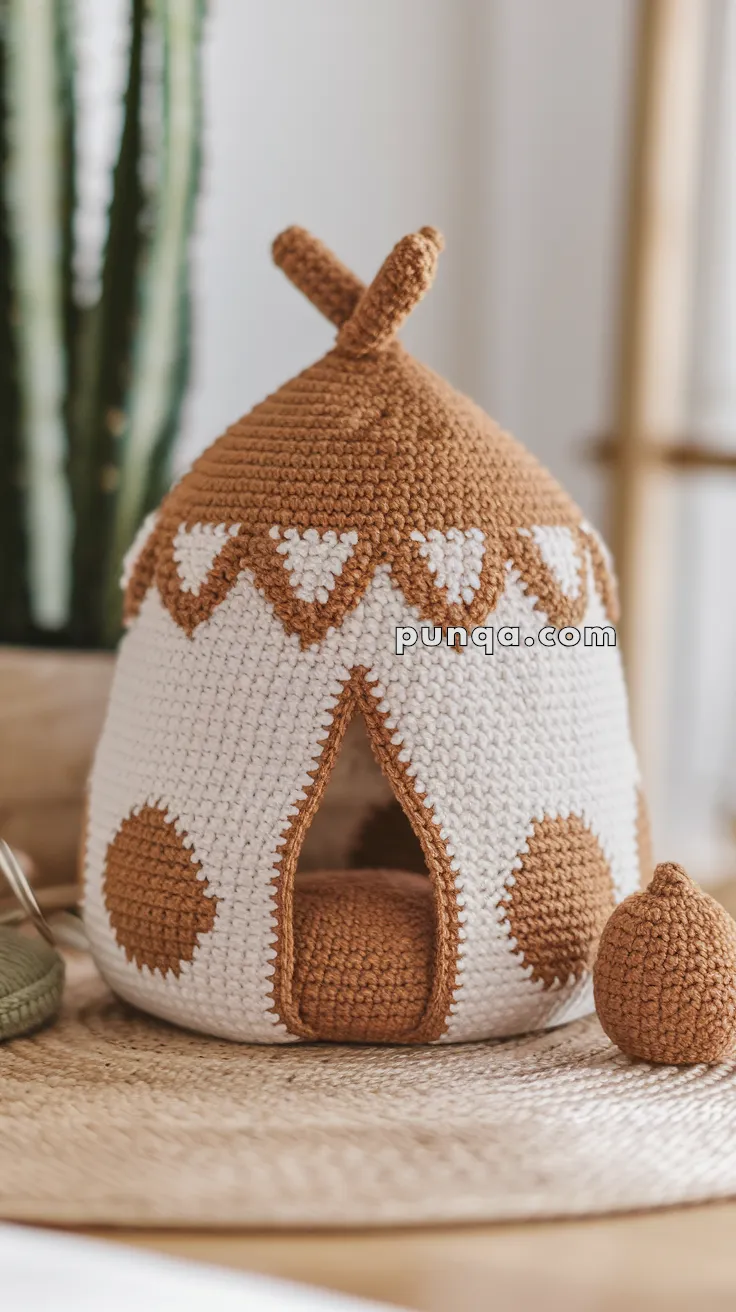
🏜️ Amigurumi Bedouin Tent for a Mini Desert Scene Crochet Pattern
Craft your own cozy and detailed Bedouin-style tent with this adorable amigurumi pattern. Perfect as a miniature prop for a desert scene or dollhouse, this tent features an arched doorway, triangle trim, cross-top poles, and optional cushion and jug for extra character. 🏺🐪
✨ Skill Level
Intermediate – Includes shaping, colorwork, and structural shaping.
📏 Finished Size
Approx. 7–8 inches (18–20 cm) tall using worsted weight yarn and a 3.5 mm hook.
🧶 Materials
Yarn (Worsted weight):
-
Camel (Main brown for roof, spots, accents)
-
Cream or sand (Tent base body)
Optional Accessories:
-
Extra camel yarn (Mini pillow + jug)
Other Supplies:
-
3.5 mm crochet hook
-
Stitch marker
-
Tapestry needle
-
Fiberfill stuffing
-
Cardboard or plastic base circle (optional for structure)
-
Pipe cleaners or floral wire (for top poles)
🧵 Abbreviations (US Terms)
MR – Magic Ring
sc – Single Crochet
inc – Increase
dec – Decrease
sl st – Slip Stitch
ch – Chain
BLO – Back Loop Only
FLO – Front Loop Only
FO – Fasten Off
🏕 Tent Base (worked bottom up)
With cream yarn:
-
MR, 6 sc
-
inc x6 (12)
-
(1 sc, inc) x6 (18)
-
(2 sc, inc) x6 (24)
-
(3 sc, inc) x6 (30)
-
(4 sc, inc) x6 (36)
-
(5 sc, inc) x6 (42)
-
(6 sc, inc) x6 (48)
-
(7 sc, inc) x6 (54)
-
BLO, sc around (54)
11–20. sc around (54)
Colorwork for Spot Designs:
Use tapestry crochet to switch to brown for polka dot motifs (space 3–4 stitches apart). Continue working sc in cream where not spotted.
⛺ Roof Cone
Switch to camel yarn:
-
sc around (54)
-
(7 sc, dec) x6 (48)
-
(6 sc, dec) x6 (42)
-
(5 sc, dec) x6 (36)
-
(4 sc, dec) x6 (30)
-
(3 sc, dec) x6 (24)
-
(2 sc, dec) x6 (18)
-
(1 sc, dec) x6 (12)
-
dec x6 (6)
FO and weave closed.
🔽 Triangle Trim Band (Brown & Cream)
Make separately and sew on OR crochet as you go during Round 1 of roof section.
Triangle Pattern (repeat):
-
With brown: (sc 2, ch 1, sl st in same st)
-
With cream: sl st 2, ch 1, sl st in same
Continue around circumference and sew flat.
🚪 Doorway
Find center front, mark 8 stitches for arch.
Row 1: Attach camel yarn to edge and sc up left side of doorway
Row 2: Ch 1, sc around arch, ch 1, down right side
FO and tidy.
Optional Cushion Inside:
With camel yarn:
-
MR, 6 sc
-
inc x6 (12)
-
(1 sc, inc) x6 (18)
-
sc around 2 rounds
-
(1 sc, dec) x6 (12)
-
dec x6 (6)
Stuff, FO and close.
✖️ Tent Poles (Make 2)
With camel yarn:
-
MR, 6 sc
2–10. sc around (6)
Stuff lightly or insert pipe cleaner.
FO, sew in X-shape to top of tent.
🏺 Mini Jug (Optional Decoration)
With camel yarn:
-
MR, 6 sc
-
inc x6 (12)
3–5. sc around (12) -
(2 sc, dec) x3 (9)
7–8. sc around (9) -
(1 sc, dec) x3 (6)
-
sc around
FO, stuff lightly and close.
✂️ Finishing Touches
-
Weave in all ends
-
Shape petals and doorway
-
Attach all pieces firmly
-
Use a flat base inside to keep tent upright if needed
🧵 Your cozy Bedouin tent is complete! Perfect as a part of a desert diorama, doll scene, or as a charming cultural keepsake. 🌵🐫