Add a sprinkle of sweetness to your baby gifts with this Amigurumi Bear Baby Rattle crochet pattern! With its soft, huggable shape and gentle rattle sound, this adorable bear is the perfect blend of cuddly and practical. Whether you’re crafting for a baby shower, welcoming a new arrival, or simply love making charming handmade toys, this pattern lets you stitch up a lovable little friend that’s sure to bring smiles and giggles. It’s a heartwarming way to create something both playful and precious. 🐻🧸✨
Designed with tiny hands in mind, this pattern invites you to play with soft yarns, soothing colors, and sweet embroidered details to make your bear truly one of a kind. Add a bow tie, a flower crown, or even a tiny heart on its belly for extra flair. Whether you’re making it as a keepsake or a daily companion for a little one, this Amigurumi Bear Baby Rattle is a joyful and satisfying project—perfect for bringing a touch of handmade love to every stitch! 🧶💖🎀
🧸 Amigurumi Bear Baby Rattle Crochet Pattern
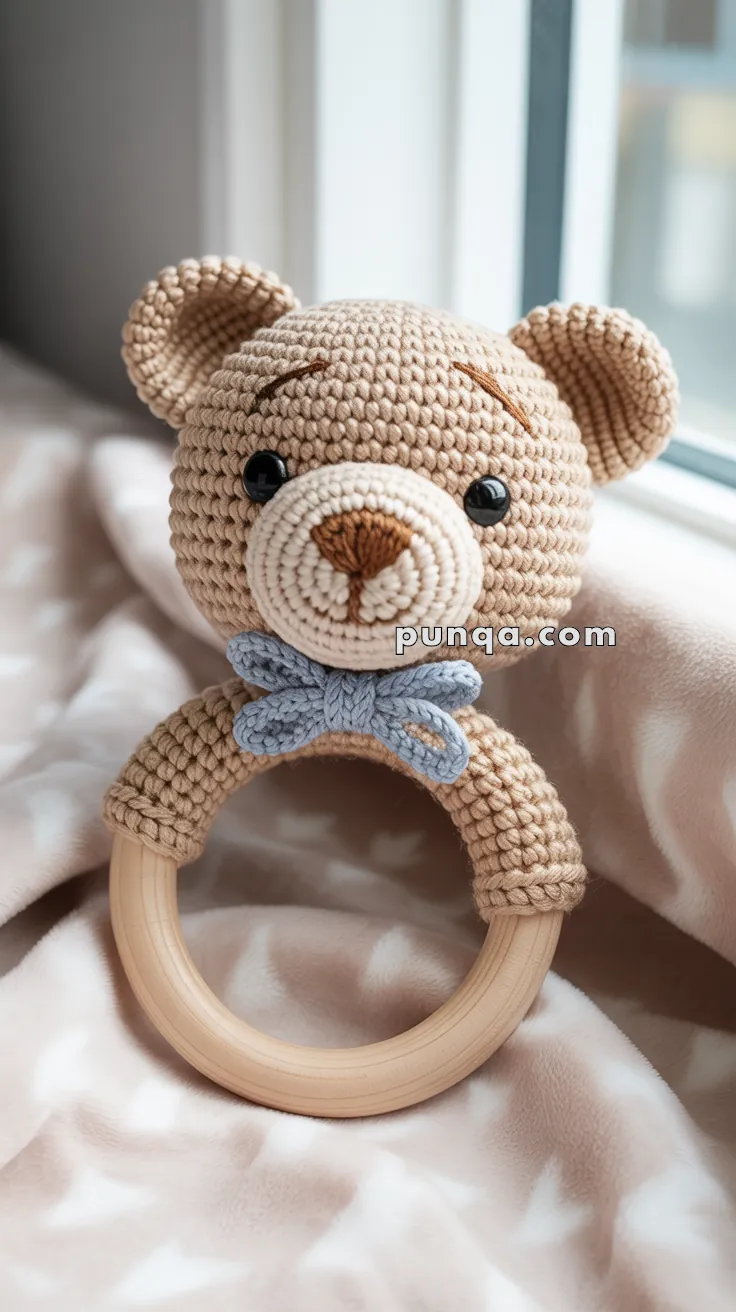
This soft and sweet amigurumi bear baby rattle is a perfect handmade gift for a new arrival. Designed with a smooth wooden ring and a cuddly bear face, it’s both safe for little hands and soothing for teething or grasping.
✨ Skill Level
Easy to Intermediate – includes basic amigurumi shaping, embroidery, and sewing.
📏 Finished Size
Approx. 6–7 in (15–18 cm) tall using DK cotton yarn and a 70 mm wooden ring.
🧶 Materials and Yarn Amounts
Use 100% cotton sport or DK weight yarn.
Light Brown (head, ears, and ring cover) – 25–30 g
Cream (snout) – 8–10 g
Brown (nose and eyebrow embroidery) – <1 g
Blue (bow) – 3–5 g
10 mm safety eyes
70 mm smooth wooden teething ring
2.5 mm crochet hook
Fiberfill stuffing
Tapestry needle
Stitch marker
Optional: small rattle insert
🧵 Abbreviations (US Terms)
MR – Magic Ring
sc – Single Crochet
inc – Increase (2 sc in same stitch)
dec – Decrease (sc2tog)
ch – Chain
sl st – Slip Stitch
FO – Fasten Off
st(s) – Stitch(es)
🐻 Head (Light Brown – Rounded Version)
Round 1: MR, 6 sc
Round 2: inc x6 (12)
Round 3: (1 sc, inc) x6 (18)
Round 4: (2 sc, inc) x6 (24)
Round 5: (3 sc, inc) x6 (30)
Round 6: (4 sc, inc) x6 (36)
Rounds 7–12: sc around (36) ← keeps head spherical, not tall
Round 13: (4 sc, dec) x6 (30)
Round 14: (3 sc, dec) x6 (24)
Round 15: (2 sc, dec) x6 (18)
Round 16: (1 sc, dec) x6 (12)
Round 17: dec x6 (6)
Stuff firmly, FO, and close.
Eyes: Insert 10 mm safety eyes between Rounds 8–9, 6–7 stitches apart.
Brows: With brown yarn, embroider two short upward-angled stitches one round above eyes.
🐽 Snout (Cream – Larger and Puffy)
Round 1: MR, 6 sc
Round 2: inc x6 (12)
Round 3: (1 sc, inc) x6 (18)
Round 4: (2 sc, inc) x6 (24)
Round 5: sc around (24)
Round 6: sc around (24)
Stuff lightly, FO with long tail.
Sew centered on lower half of face so the top edge aligns just below the eyes.
Embroider a brown oval nose and a short vertical line, then a tiny “V” for the mouth.
👂 Ears (Make 2 – Light Brown)
Round 1: MR, 6 sc
Round 2: inc x6 (12)
Round 3: sc around (12)
Round 4: (1 sc, dec) x4 (8) ← adds gentle cup shape
FO and leave a long tail.
Sew ears higher on the head (Rounds 7–9) and slightly angled outward to face sideways.
🪵 Wooden Ring Cover (Light Brown – Tight Fit)
Make a chain that measures about 1 inch shorter than the ring’s circumference (typically 36–38 chains).
Join carefully to form a circle.
Round 1: sc around (36–38)
Rounds 2–6: sc around (5 rounds total)
FO with long tail.
Stretch and sew the piece tightly around the wooden ring so no gaps or wrinkles remain. The fabric should feel snug and smooth.
🧸 Assembly
- Position the head directly atop the wooden ring and sew firmly using the tail from the head.
- Insert stuffing or optional rattle insert before sealing.
- Reinforce attachment with several passes for baby safety.
- Check stability by gently pulling — the head should not shift.
🎀 Flat Bow (Blue)
ch 15
Row 1: sc in 2nd ch and across (14)
Row 2–4: ch 1, turn, sc across (14)
FO and leave a long tail.
Fold the strip so short ends meet in the center, wrap the yarn tail around the middle several times, and tie tightly to gather.
Sew under the bear’s chin.
💡 Customization & Finishing Tips
- Use pastel pink, mint, or gray for the bow.
- Lightly brush the snout and ears with a soft toothbrush for extra plush texture.
- Add faint blush circles with pink yarn or non-toxic fabric paint.
- Embroider initials or a date on the back for a personal touch.
🪄 Safety Notes
- All pieces must be sewn securely and yarn ends hidden deeply.
- Only use untreated, baby-safe wood and non-toxic cotton yarn.
- If gifting to infants, omit detachable parts such as bells or beads.
Your Amigurumi Bear Baby Rattle is complete — featuring the rounded head, puffed snout, high-set ears, flat gathered bow, and flawlessly tight ring wrap just like in the photo.
This handmade treasure is a soothing keepsake that will comfort and delight little hands for years to come. 🧸✨