Bring a touch of mythical magic to your crochet collection with this Amigurumi Basilisk pattern! Inspired by the legendary serpent of folklore, this striking design captures the basilisk’s fierce expression, textured scales, and mesmerizing presence in every stitch. Whether you’re crafting for fantasy lovers, adding a mystical accent to your decor, or simply enjoy making creature-inspired amigurumi, this pattern lets you stitch up a miniature basilisk bursting with character! Perfect for brightening up any space with a mythical twist, this crochet creation brings a touch of handmade enchantment to your collection. 🐍✨
Designed for customization, this pattern allows you to experiment with different shades of green, embroidered details, or even tiny accessories like a miniature crown or glowing eyes for extra flair. Craft a classic basilisk with deep, earthy tones, create a whimsical version with vibrant hues, or even stitch up a full set of fantasy-inspired amigurumi for an enchanting display! Whether gifted as a quirky keepsake, displayed as a mystical accent, or made simply for the joy of crafting, this Amigurumi Basilisk is a fun and creative project—perfect for bringing a touch of handmade legend to every stitch! 🧶💖✨

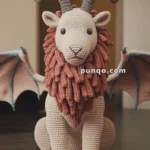
🐉 Majestic Basilisk Dragon Amigurumi Crochet Pattern
Create a noble fantasy dragon with elegant curves, layered dorsal fins, and a seamless belly panel. This dragon rests in a curled sitting pose with a lifted head, sculpted snout, ear frills, and a proud forehead horn. Its rich gray body contrasts beautifully with the warm rust belly and accents.
✨ Skill Level
Advanced
Includes shaping, ribbed texture, seamless belly panel, layered fins, and detailed assembly.
📏 Finished Size
Approx. 35–40 cm (14–16 in) long using plush or chenille yarn and a 4.0 mm hook.
🧶 Materials
Yarn
-
Charcoal gray – body, head, tail, fins, ears, legs
-
Burnt orange / rust – belly, jaw accent, frill edges, tongue
-
White / ivory – teeth
-
Black or dark brown – nostrils
Other
-
4.0 mm crochet hook
-
12–14 mm safety eyes or felt eyes
-
Polyester fiberfill
-
Tapestry needle
-
Stitch marker
-
Scissors
-
Optional floral wire for poseable tail
🪡 Abbreviations (US)
MR – Magic Ring
sc – single crochet
inc – increase
dec – decrease (sc2tog)
BLO – back loop only
ch – chain
sl st – slip stitch
FO – fasten off
Work in continuous rounds unless stated otherwise.
🐲 Head (Charcoal Gray)
R1: MR 6 (6)
R2: inc x6 (12)
R3: (sc, inc) x6 (18)
R4: (2 sc, inc) x6 (24)
R5: (3 sc, inc) x6 (30)
R6: (4 sc, inc) x6 (36)
R7–12: sc around (36)
Insert eyes between R8–9, about 8 sts apart.
R13: (5 sc, dec) x6 (30)
R14: (4 sc, dec) x6 (24)
R15: sc 10, inc x4, sc 10 (28)
R16–18: sc around (28)
R19: (3 sc, dec) x5, sc 3 (23)
R20: sc around (23)
Stuff firmly. FO leaving tail.
🐽 Lower Jaw (Rust)
Ch 10
Row 1: sc across (9), inc both ends (11)
Row 2: inc, sc 9, inc (13)
Rows 3–4: sc across (13)
FO. Curve slightly and sew under snout leaving mouth opening.
🦷 Teeth (Make 8–10, Ivory)
Ch 3, sl st in 2nd ch and next ch, FO.
Attach along upper and lower jaw edges.
🦄 Forehead Horn (Charcoal Gray)
R1: MR 4 (4)
R2: (sc, inc) x2 (6)
R3: sc around (6)
R4: (2 sc, inc) x2 (8)
R5: sc around (8)
Stuff lightly. Sew centered above eyes.
🦻 Ear Frills (Make 2)
Ch 26
Row 1: sc in 2nd ch and across (25)
Rows 2–9: BLO sc across
Row 10: BLO dec, sc 21, dec (23)
Row 11: sc across (23)
FO.
Edge with rust yarn using sl st.
Fold slightly and sew behind each eye.
🐉 Body (Charcoal Gray)
R1: MR 6 (6)
R2: inc x6 (12)
R3: (sc, inc) x6 (18)
R4: (2 sc, inc) x6 (24)
R5: (3 sc, inc) x6 (30)
R6: (4 sc, inc) x6 (36)
R7: (5 sc, inc) x6 (42)
R8: BLO sc around (42) – leaves ridge for belly panel
R9–18: sc around (42)
R19: (5 sc, dec) x6 (36)
R20: (4 sc, dec) x6 (30)
R21: (3 sc, dec) x6 (24)
R22: (2 sc, dec) x6 (18)
R23: (sc, dec) x6 (12)
R24: dec x6 (6)
Stuff firmly. FO.
🧡 Seamless Belly Panel (Rust)
Attach rust yarn to front loops from Body R8.
Row 1: sc across front 30 sts
Row 2–18: sc across, picking up 1 stitch from gray body on each side per row
Rows 19–20: sc across evenly to taper under chin
FO. This creates a smooth blended belly.
🦵 Legs (Make 4)
R1: MR 6
R2: inc x6 (12)
R3: (sc, inc) x6 (18)
R4–6: sc around (18)
R7: (4 sc, dec) x3 (15)
R8–12: sc around (15)
R13: (3 sc, dec) x3 (12)
R14–15: sc around (12)
Stuff lightly. Flatten and sew under body.
🐊 Tail
R1: MR 6
R2: inc x6 (12)
R3: (sc, inc) x6 (18)
R4–8: sc around (18)
R9: (4 sc, dec) x3 (15)
R10–14: sc around (15)
R15: (3 sc, dec) x3 (12)
R16–20: sc around (12)
R21: (2 sc, dec) x3 (9)
R22–26: sc around (9)
R27: (sc, dec) x3 (6)
R28–32: sc around (6)
R33: dec x3 (3)
Insert wire if desired. Stuff lightly and curve tail forward.
🦖 Dorsal Plates (Ribbed Fins)
Work flat, all BLO.
Large Plates (Make 3)
Ch 26
Row 1: sc across (25)
Rows 2–4: BLO sc
Row 5: inc, sc 21, inc, sc 2 (27)
Row 6: BLO sc
Row 7: dec, sc 23, dec, sc 2 (25)
Row 8: BLO sc
Row 9: dec, sc 21, dec, sc 2 (23)
Row10: BLO sc
Row11: dec, sc 19, dec, sc 2 (21)
Row12: BLO sc
FO. Edge in rust.
Medium Plates (Make 3)
Start with Ch 22, follow same shaping to end with 19 sts.
Small Plates (Make 2)
Start with Ch 18, shape to end with 15 sts.
Sew plates overlapping down spine from head to tail.
🧵 Assembly
-
Attach belly panel
-
Sew legs in tucked sitting pose
-
Attach head tilted slightly upward
-
Sew horn and ear frills
-
Attach dorsal plates overlapping
-
Add teeth and tongue strand
-
Shape tail curl forward
🌟 Final Shaping
Steam lightly to set curves.
Curve tail and neck into resting pose.
Fan out dorsal fins and frills gently.
🐉 Final Notes
This Majestic Basilisk Dragon features flowing fins, layered armor plates, sculpted facial details, and a seamless rust belly panel that blends naturally into the gray body. With its elegant posture and mythical character, it makes a striking centerpiece for any fantasy crochet collection and a truly rewarding advanced project.