✨ Skill Level
Intermediate to Advanced
Includes structured shaping, color-panel construction (not surface embroidery), limb positioning, and claw detailing.
📏 Finished Size
Approx. 30–34 cm (12–13.5 inches) tall
Using worsted weight yarn and a 3.25–3.5 mm hook.
🧶 Yarn Requirements (Worsted Weight)
Dark Brown (head sides, back of head, body sides/back, arms, legs, tail): 170–190 g
Cream (face stripe, muzzle, belly panel, inner ears): 70–80 g
Black (claws only): 10–15 g
Stuffing: 200–250 g polyester fiberfill
🧵 Materials
-
3.5 mm crochet hook
-
12 mm black safety eyes
-
20 mm black safety nose
-
Fiberfill stuffing
-
Tapestry needle
-
Stitch markers
🔤 Abbreviations (US Terms)
MR – magic ring
sc – single crochet
inc – increase (2 sc in one stitch)
dec – invisible decrease
FO – fasten off
Work in continuous rounds unless noted.
🦡 Head (Color Panels Built In)
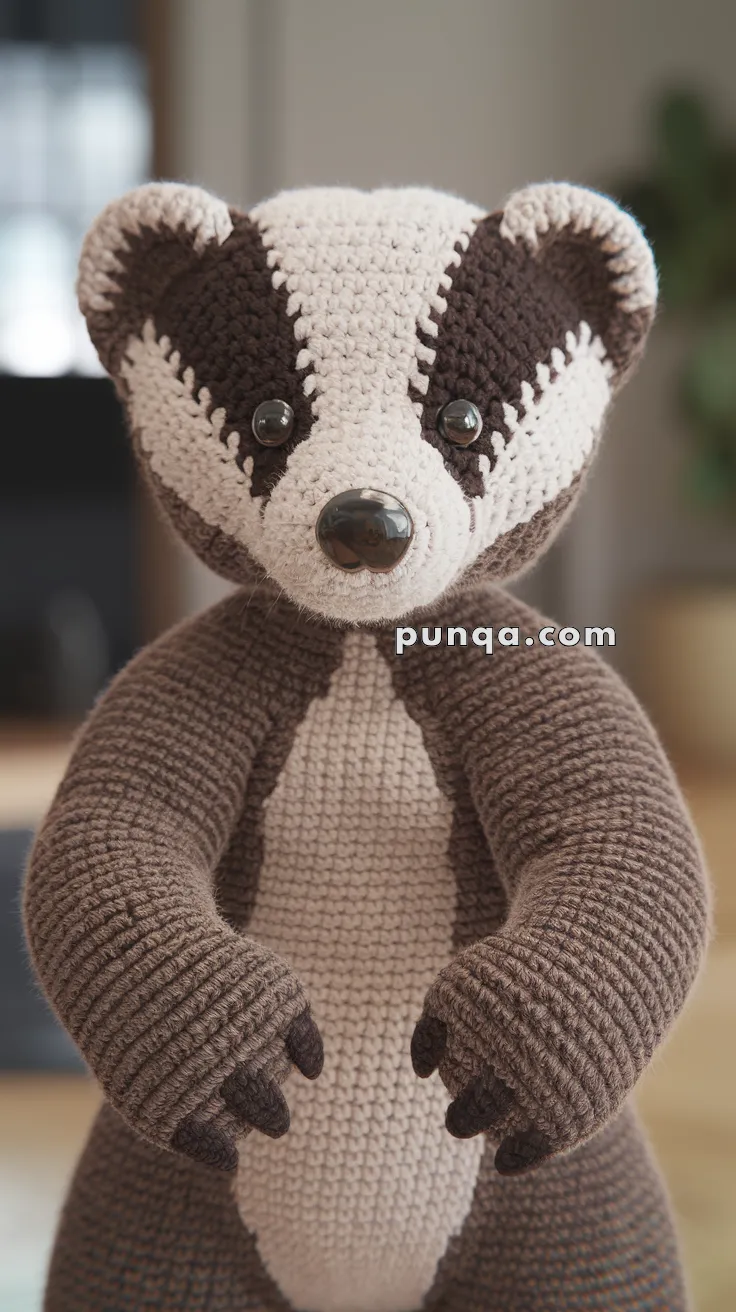
The head is large and slightly flattened at the front. The cream center stripe is wide and straight, while the dark brown panels frame the eyes and wrap into the ears.
Start with cream.
R1: MR 6 sc (6)
R2: inc x6 (12)
R3: (1 sc, inc) x6 (18)
R4: (2 sc, inc) x6 (24)
R5: (3 sc, inc) x6 (30)
R6: (4 sc, inc) x6 (36)
R7: (5 sc, inc) x6 (42)
R8: (6 sc, inc) x6 (48)
R9–10: sc around (48)
Begin Color Placement
From this point, divide stitches:
-
16 cream stitches (center front panel)
-
16 dark brown stitches (side/back)
-
16 cream stitches (center panel continues over crown)
Maintain symmetry carefully.
R11–18: sc around (48), keeping:
Insert eyes between Rounds 13–14, positioned exactly where cream meets brown, about 12 stitches apart.
R19: (6 sc, dec) x6 (42)
R20: (5 sc, dec) x6 (36)
R21: (4 sc, dec) x6 (30)
R22: (3 sc, dec) x6 (24)
Stuff firmly, shaping cheeks wide and flat at front.
R23: (2 sc, dec) x6 (18)
R24: (1 sc, dec) x6 (12)
R25: dec x6 (6)
FO and close.
🐽 Muzzle (Cream)
The muzzle is firm, oval, and slightly protruding.
R1: MR 6 sc (6)
R2: inc x6 (12)
R3: (1 sc, inc) x6 (18)
R4: (2 sc, inc) x6 (24)
R5–7: sc around (24)
Stuff firmly.
Insert 20 mm safety nose high on the muzzle.
Sew centered over lower portion of cream stripe so it projects outward noticeably.
Do not embroider a heavy mouth — keep expression subtle.
👂 Ears (Make 2)
Start with cream.
R1: MR 6 sc
R2: inc x6 (12)
R3: sc around (12)
Switch to dark brown.
R4: sc around (12)
R5: (1 sc, dec) x4 (8)
Lightly stuff base only.
Flatten bottom slightly.
Attach high on head so they curve outward slightly.
🧍 Body (Tall Upright Shape)
The body is elongated and slightly tapered at waist with a long cream belly panel.
Start with cream.
R1: MR 6 sc (6)
R2: inc x6 (12)
R3: (1 sc, inc) x6 (18)
R4: (2 sc, inc) x6 (24)
R5: (3 sc, inc) x6 (30)
R6: (4 sc, inc) x6 (36)
Switch to dark brown while keeping a centered cream belly panel of 14 stitches.
R7–18: sc around (36), maintaining:
R19: (4 sc, dec) x6 (30)
R20: (3 sc, dec) x6 (24)
R21: (2 sc, dec) x6 (18)
Stuff firmly, especially lower torso to support upright posture.
R22: (1 sc, dec) x6 (12)
FO leaving long tail.
Attach head securely, aligning cream belly with face stripe.
💪 Arms (Make 2 – Long and Slightly Curved)
Dark brown.
R1: MR 6 sc (6)
R2: (1 sc, inc) x3 (9)
R3–16: sc around (9)
Do not overstuff — lightly stuff upper half only.
🖤 Paw Tips
Switch to black for last 2 rounds.
R17–18: sc around (9)
FO.
Embroider three small vertical claw lines on each paw tip.
Attach arms high on body so they angle inward slightly and hang forward naturally.
🦵 Legs (Make 2 – Strong Base)
Dark brown.
R1: MR 6 sc (6)
R2: inc x6 (12)
R3: (1 sc, inc) x6 (18)
R4: (2 sc, inc) x6 (24)
R5–12: sc around (24)
Switch to black for bottom 2 rounds.
R13–14: sc around (24)
Stuff very firmly.
Flatten top slightly before attaching.
Sew to lower body angled slightly forward to create stable stance.
🐾 Tail
Short and thick.
Dark brown.
R1: MR 6 sc (6)
R2: (1 sc, inc) x3 (9)
R3: (2 sc, inc) x3 (12)
R4–6: sc around (12)
Stuff lightly.
FO and attach centered at back.
🪡 Final Shaping & Details
-
Ensure cream stripe runs straight from forehead to belly.
-
Eyes should sit at the edge of color transition.
-
Nose should appear prominent and rounded.
-
Arms curve inward slightly.
-
Belly panel should be smooth and centered.
-
Legs positioned wide enough for balance.
Light steaming can smooth stitches if desired.
🌲 Finished Standing Badger
Your completed badger features:
-
Wide cream facial stripe
-
Bold dark side panels framing eyes
-
Large glossy nose
-
Tall upright body
-
Long natural arms
-
Dark paw tips with visible claws
-
Defined cream belly panel
-
Short rounded tail
This realistic woodland companion makes a beautiful forest-themed décor piece or a treasured handmade gift for nature lovers.