Welcome to the majestic and spirited world of amigurumi! 🐎✨ Today, I’m excited to share my free crochet pattern for an Arabian Horse—a beautifully elegant and dynamic creation perfect for equestrian lovers, nature-inspired collections, or anyone who enjoys crafting expressive and lifelike plush figures! 🌿 Whether you love stitching up graceful animals, creating detailed and textured designs, or simply want to add a stunning Arabian horse to your handmade lineup, this pattern will guide you through crafting a sculpted plush with flowing mane, strong legs, and that signature Arabian charm! 🤍
This design embraces soft curves, intricate shaping, and rich tones to bring a sense of strength and beauty to your crochet projects! 🧶🏜️ I’ve carefully outlined each step to ensure your Amigurumi Arabian Horse turns out just right—ready to gallop into your collection or become a treasured handmade gift! 🎁 So grab your hooks, pick out deep chestnuts, sleek blacks, or striking grays, and let’s stitch up a breathtaking Arabian horse! ✨
🐎 Amigurumi Arabian Horse Crochet Pattern
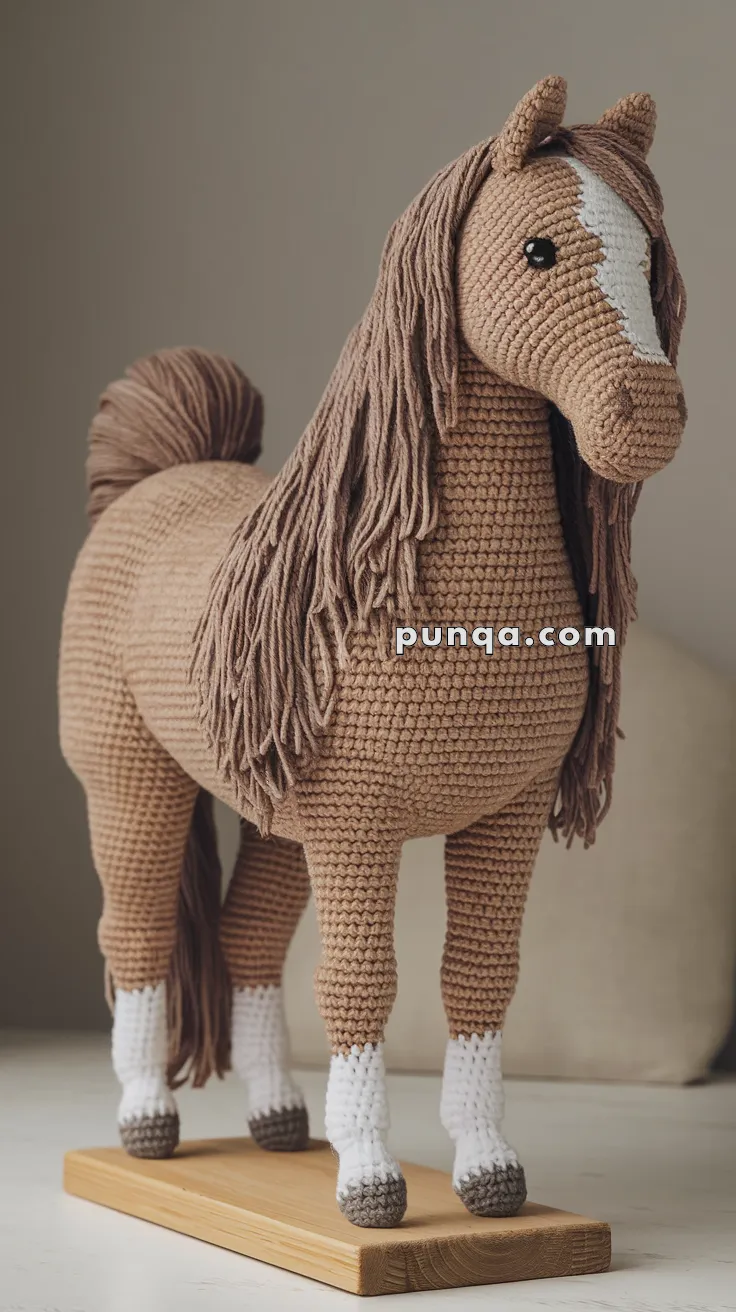
Bring the elegance of the Arabian breed to life with this detailed amigurumi horse pattern! With flowing yarn mane, proud neck arch, and sturdy hooves, this doll makes a majestic companion or collector’s piece. ✨
✨ Skill Level
Advanced
This pattern includes:
-
Sculpted shaping for realistic anatomy
-
Long reinforced legs for standing structure
-
Separate head, neck, and body construction
-
Yarn-attached mane and tail
-
Color transitions for socks, hooves, and blaze
📏 Finished Size
Height: 35–40 cm (14–16 inches)
Body length: 26–30 cm (10–12 inches)
Using DK cotton yarn and a 2.75–3.25 mm hook.
🧶 Yarn Requirements
DK cotton yarn recommended.
Light tan yarn (main body, head, neck, upper legs): 100 g (300 m)
White yarn (blaze and socks): 20 g (60 m)
Medium brown yarn (mane, tail): 45 g (135 m)
Dark brown yarn (hooves): 12 g (35 m)
Black yarn (optional eye embroidery): 2 g (6 m)
Additional materials:
-
10–12 mm safety eyes
-
Polyester stuffing (firm)
-
3.0 mm crochet hook
-
Yarn needle
-
Stitch markers
Optional but recommended:
-
Floral wire or wooden dowels inside legs
🧵 Abbreviations (US Terms)
MR – magic ring
sc – single crochet
inc – increase
dec – invisible decrease
sl st – slip stitch
FO – fasten off
🐴 Muzzle and Head
With tan yarn:
Round 1: MR, 6 sc (6)
Round 2: inc x6 (12)
Round 3: (1 sc, inc) x6 (18)
Round 4: (2 sc, inc) x6 (24)
Round 5: (3 sc, inc) x6 (30)
Rounds 6–12: sc around (30)
Insert safety eyes between rounds 8 and 9, spaced 9–10 stitches apart.
Round 13: (3 sc, dec) x6 (24)
Round 14: sc around (24)
Round 15: (2 sc, dec) x6 (18)
Stuff muzzle firmly.
Round 16: (1 sc, dec) x6 (12)
FO leaving tail for sewing.
The muzzle should appear slightly squared and gently protruding.
🤍 Blaze Marking
Using white yarn and duplicate stitch:
Create a vertical blaze starting at the forehead and narrowing slightly toward the muzzle.
The shape should taper naturally rather than remain perfectly straight.
👂 Ears (Make 2)
With tan yarn:
Round 1: MR, 4 sc (4)
Round 2: (1 sc, inc) x2 (6)
Round 3: sc around (6)
Round 4: (2 sc, inc) x2 (8)
Rounds 5–7: sc around (8)
FO leaving tail.
Flatten slightly and sew upright near top of head.
🐎 Neck
With tan yarn:
Round 1: MR, 6 sc (6)
Round 2: inc x6 (12)
Round 3: (1 sc, inc) x6 (18)
Round 4: (2 sc, inc) x6 (24)
Rounds 5–18: sc around (24)
Stuff extremely firmly to maintain upright posture.
FO leaving tail.
🐎 Body
With tan yarn:
Round 1: MR, 6 sc (6)
Round 2: inc x6 (12)
Round 3: (1 sc, inc) x6 (18)
Round 4: (2 sc, inc) x6 (24)
Round 5: (3 sc, inc) x6 (30)
Round 6: (4 sc, inc) x6 (36)
Round 7: (5 sc, inc) x6 (42)
Rounds 8–20: sc around (42)
Round 21: (5 sc, dec) x6 (36)
Rounds 22–26: sc around (36)
Stuff firmly.
FO leaving tail.
Body should appear oval and slightly longer than tall.
🦵 Legs (Make 4)
Start with dark brown yarn.
Round 1: MR, 6 sc (6)
Round 2: inc x6 (12)
Rounds 3–4: sc around (12)
Switch to white yarn.
Rounds 5–10: sc around (12)
Switch to tan yarn.
Rounds 11–36: sc around (12)
Insert wire if desired.
Stuff firmly.
FO leaving tail.
Legs must be long, straight, and evenly shaped.
🐎 Mane
Cut 100–140 strands of medium brown yarn, each 28–35 cm long.
Attach strands along one side of neck from between ears down to base of neck using lark’s head knots.
Attach densely so mane appears full.
Allow strands to fall naturally along one side.
Trim ends unevenly for realism.
🐎 Tail
Create a rounded tail dock first:
With tan yarn:
Round 1: MR, 6 sc
Round 2: inc x6 (12)
Round 3: sc around (12)
FO and attach to rump.
Cut 50–70 strands of medium brown yarn, 30–35 cm long.
Attach under dock.
Trim ends straight.
🧵 Assembly
Sew head to top of neck.
Sew neck securely to front upper body.
Attach legs evenly spaced to ensure stable standing posture.
Attach ears at top of head.
Attach mane and tail.
Adjust stuffing to balance structure.
✨ Final Shaping Tips
Ensure:
-
Neck stands upright
-
Legs remain straight and evenly aligned
-
Mane falls naturally along one side
-
Body appears smooth and evenly stuffed
Optional: mount onto wooden base for permanent display.
🌟 Finished Horse
This standing horse amigurumi features elegant proportions, tall slender legs, a smooth body, flowing mane, and defined socks and hooves. The structured shaping allows it to stand proudly while maintaining a soft handcrafted charm. Perfect for collectors, display, or meaningful handmade gifts, this crochet horse is both graceful and timeless.