Welcome to the adventurous and high-flying world of amigurumi! ✈️✨ Today, I’m excited to share my free crochet pattern for an Amigurumi Airplane—a dynamic and playful creation perfect for aviation lovers, travel enthusiasts, or anyone who enjoys crafting structured and whimsical plush designs! 🧶 Whether you love stitching up miniature vehicles, experimenting with aerodynamic shaping, or simply want to add a charming airplane to your handmade lineup, this pattern will guide you through crafting a beautifully sculpted plush with sleek wings, a rounded fuselage, and a touch of sky-high charm! 🌍
This design embraces bold colors, precise shaping, and thoughtful details to bring an adventurous and uplifting presence to your crochet projects! 🧶✨ I’ve carefully outlined each step to ensure your Amigurumi Airplane turns out just right—ready to soar into your collection or become a treasured handmade gift! 🎁 So grab your hooks, pick out bright blues, fiery reds, or soft grays, and let’s stitch up a delightful airplane!✈️
✈️ Amigurumi Airplane Crochet Pattern
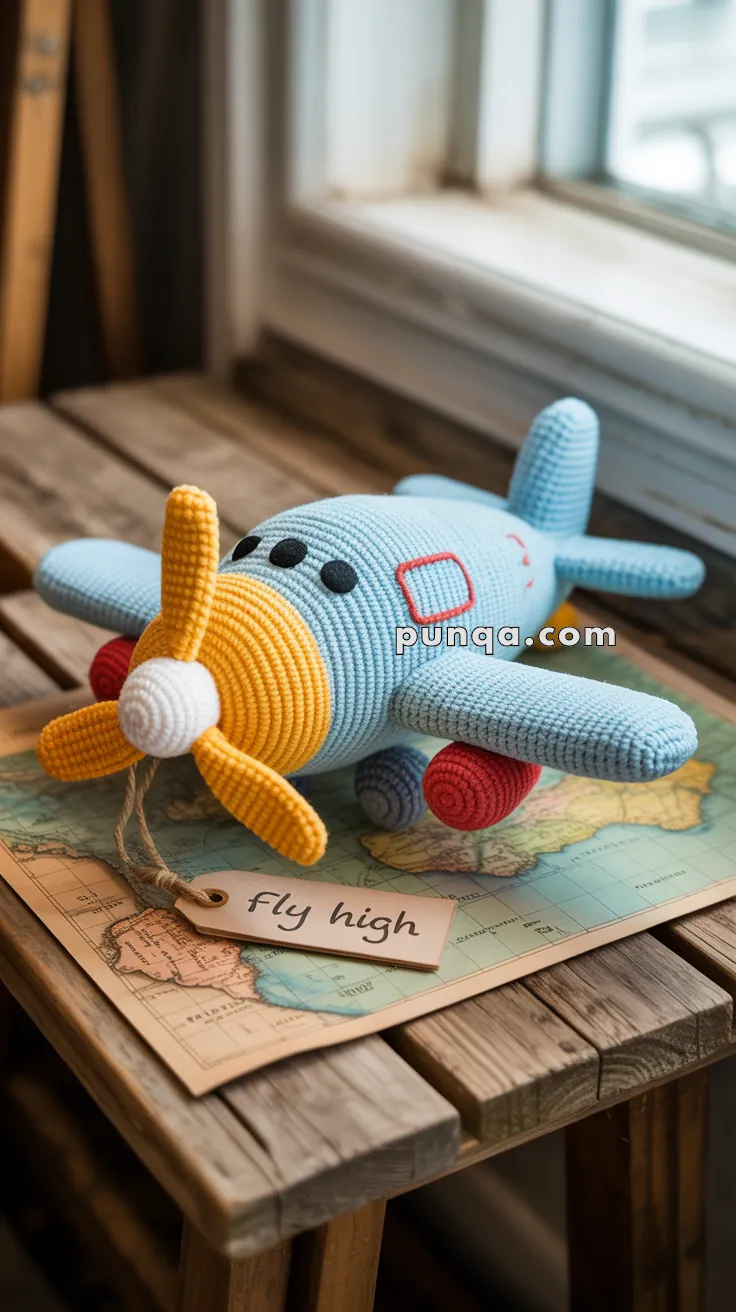
There’s nothing more joyful than crafting a toy that looks ready to take off into the sky! This amigurumi airplane is a soft, colorful, and charming project that’s perfect for little adventurers, nursery decor, or simply as a handmade keepsake. With its cheerful propeller, rounded wheels, and bright body, this plane is sure to “fly high” in your collection.
🧶 Skill Level
Intermediate – involves shaping, working in the round, light stuffing, and assembling multiple pieces.
📏 Finished Size
Approx. 9–10 inches (23–25 cm) long when using DK or worsted weight yarn with a 2.5–3.0 mm hook.
✂️ Materials Needed
- DK or worsted weight yarn:
- Light Blue – main body, wings, tail fins
- Yellow – nose & propeller blades
- White – propeller tip
- Red & Purple – landing wheels
- Black – windows
- Red – side detail embroidery
- Crochet hook: 2.5–3.0 mm
- Polyfill stuffing
- Tapestry needle
- Stitch markers
- Scissors
- Felt or embroidery thread (optional for windows)
🔤 Abbreviations (US Terms)
- MR – Magic Ring
- sc – Single Crochet
- inc – Increase (2 sc in one stitch)
- dec – Decrease (sc 2 together)
- sl st – Slip Stitch
- ch – Chain
- FO – Fasten Off
- (…) – Repeat sequence
✈️ Pattern Instructions
🛩️ Airplane Body (Light Blue)
- MR, 6 sc [6]
- inc around [12]
- (sc, inc) x6 [18]
- (2 sc, inc) x6 [24]
- (3 sc, inc) x6 [30]
- (4 sc, inc) x6 [36]
7–28. sc around [36] - (4 sc, dec) x6 [30]
- (3 sc, dec) x6 [24]
- (2 sc, dec) x6 [18]
- (sc, dec) x6 [12]
- dec around [6]
Stuff firmly and close.
🔄 Nose Base (Yellow)
- MR, 6 sc [6]
- inc around [12]
- (sc, inc) x6 [18]
4–6. sc around [18]
Stuff lightly, FO with tail for sewing to body front.
⚙️ Propeller (Yellow Blades + White Center)
White Center:
- MR, 6 sc [6]
- inc around [12]
FO with tail.
Blades (Make 4 – Yellow):
- Ch 13
- Sc in 2nd ch from hook, sc 10, 3 sc in last st.
- Continue on other side: sc 11.
FO with tail.
Sew 4 blades evenly spaced around the white center. Attach propeller securely to yellow nose base.
🪽 Wings (Make 2 – Light Blue)
- Ch 10
- Round 1: sc 8, 3 sc in last st. Continue on other side: sc 7, inc [20]
3–6. sc around [20]
FO, stuff lightly, flatten slightly, and sew to both sides of body.
👉 Creates the soft, oval-shaped wings in the photo.
🛞 Wheels (Make 2 – Red + Purple)
Red Half:
- MR, 6 sc [6]
- inc around [12]
- (sc, inc) x6 [18]
4–5. sc around [18]
Switch to Purple:
6–8. sc around [18]
9. (sc, dec) x6 [12]
10. dec around [6]
Stuff firmly, FO and close.
Sew wheels under body as shown.
🐟 Tail Fins (3 – Light Blue: 2 horizontal, 1 vertical)
- Ch 6
- Round 1: sc 4, 3 sc in last st. Continue other side: sc 3, inc [12]
3–5. sc around [12]
FO, stuff lightly, flatten and shape.
Sew two horizontally (one each side of tail) and one vertically (top of tail).
🪟 Windows (Black)
- Make 3–4 small black felt circles OR embroider small round dots with black yarn.
- Place near the nose, evenly spaced on top.
📐 Side Detail
- With red yarn, embroider a neat square outline window on the airplane’s side.
✨ Assembly & Finishing Touches
- Sew the yellow nose base with propeller to the airplane body.
- Attach wings symmetrically on each side.
- Sew the wheels under the body near the front.
- Attach the tail fins as described.
- Add windows and side embroidery detail.
- Weave in all ends neatly.
💡 Pro Tips
- Use dense stitches (tight tension) so the plane keeps its shape.
- Stuff gradually and firmly, especially the nose and body.
- For extra firmness in wings or tail, insert a small piece of foam or plastic canvas before closing.
- Add blush or embroidered smile if you want a kawaii-style airplane.
✈️ And that’s it! Your amigurumi airplane is now ready to “fly high.” Perfect as a cuddly toy, nursery mobile piece, or gift for little explorers.