Welcome to the luxurious and architectural world of amigurumi! 🏨✨ Today, I’m excited to share my free crochet pattern for an Amigurumi Burj Al Arab—a stunning and iconic creation perfect for travel lovers, architecture enthusiasts, or anyone who enjoys crafting detailed and structured plush designs! 🧶 Whether you love stitching up famous landmarks, experimenting with sleek shaping, or simply want to add a miniature Burj Al Arab to your handmade lineup, this pattern will guide you through crafting a beautifully sculpted plush with its signature sail-shaped silhouette, elegant details, and a touch of Dubai’s grandeur! 🌟
This design embraces soft whites, deep blues, and precise shaping to bring a sophisticated and awe-inspiring presence to your crochet projects! 🧶✨ I’ve carefully outlined each step to ensure your Amigurumi Burj Al Arab turns out just right—ready to stand tall in your collection or become a treasured handmade gift! 🎁 So grab your hooks, pick out sleek neutrals, and let’s stitch up a breathtaking Burj Al Arab! 🏨
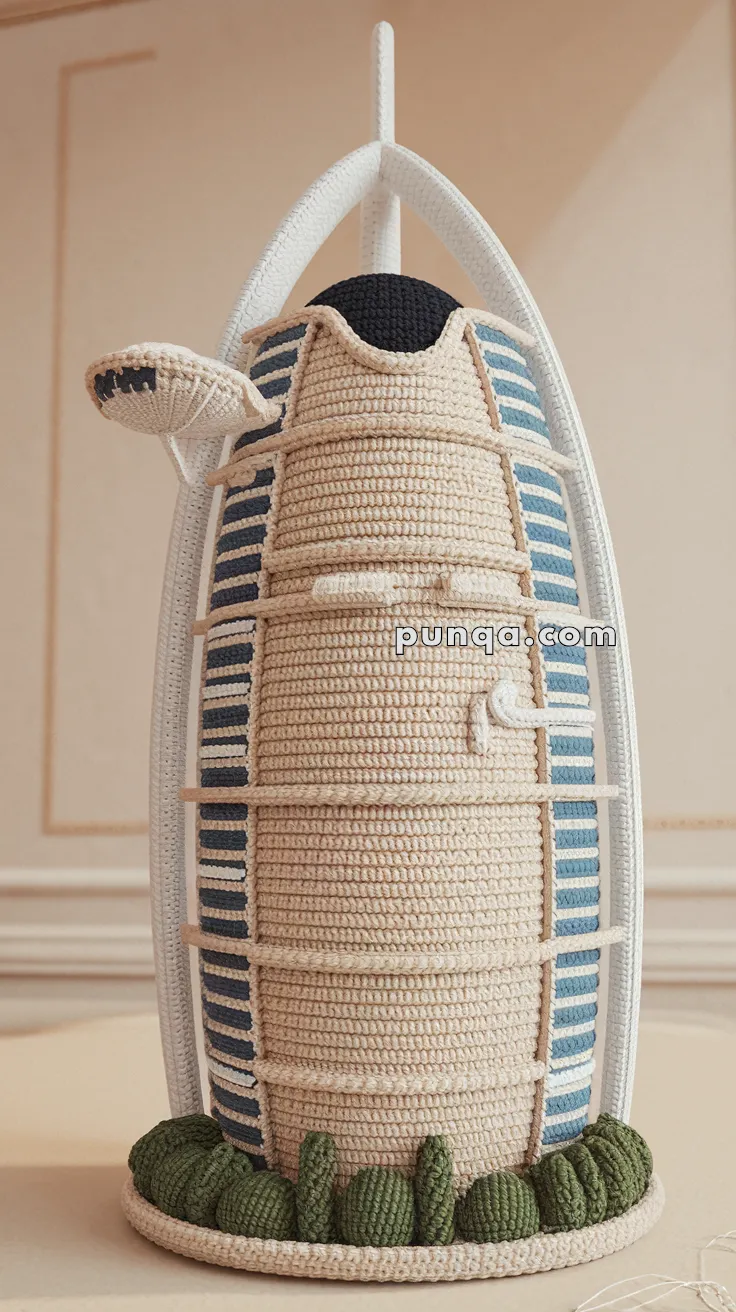
🏨 Amigurumi Burj Al Arab Crochet Pattern
Bring one of the most iconic landmarks in the world into your amigurumi collection with this showstopping crochet project – the Burj Al Arab. Known for its striking sail-shaped design and helipad perched dramatically on the side, this pattern captures all those signature details in yarn. Perfect for advanced crocheters who love a challenge and want to make something truly unique!
✨ Skill Level
Advanced – Includes shaping, color changes, structural elements, and optional non-yarn components for stability.
📏 Finished Size
Approximately 12–14 inches (30–35 cm) tall when using worsted weight yarn and a 3.5 mm hook.
🧶 Materials Needed
-
Worsted weight yarn in:
-
Beige/off-white (main building)
-
Navy blue (window panels)
-
White (outer frame + balcony rails)
-
Black (top dome + helipad)
-
Green (bushes at base)
-
-
Crochet hook: 3.5 mm
-
10 mm stitch marker
-
Tapestry needle
-
Polyfill stuffing
-
Plastic canvas or sturdy cardboard (for stabilizing base & tower back)
-
Flexible tubing or thick wire (for sail support arch)
-
Hot glue or invisible thread (optional for securing structure)
🧵 Abbreviations (US Terms)
MR – Magic Ring
sc – Single Crochet
inc – Increase
dec – Decrease
sl st – Slip Stitch
ch – Chain
FO – Fasten Off
BLO – Back Loop Only
🏗 Main Tower Body (Beige)
-
MR, 6 sc
-
inc x6 (12)
-
(1 sc, inc) x6 (18)
-
(2 sc, inc) x6 (24)
-
(3 sc, inc) x6 (30)
-
(4 sc, inc) x6 (36)
-
(5 sc, inc) x6 (42)
8–50. sc around (42), stuffing lightly as you go
Shape the dome top:
51. (5 sc, dec) x6 (36)
52–54. sc around (36)
55. (4 sc, dec) x6 (30)
56–57. sc around (30)
58. Switch to black, (3 sc, dec) x6 (24)
59. sc around (24)
60. (2 sc, dec) x6 (18)
61. (1 sc, dec) x6 (12)
62. dec x6 (6) – FO and close.
This creates the rounded black dome top as seen on the real Burj Al Arab.
🪟 Window Panels (Blue + White) – Make 2
With navy blue:
-
ch 35
-
Row 1: sc in 2nd ch from hook and across (34)
-
Rows 2–25: alternate 1 row navy blue, 1 row white
-
FO and block
👉 Sew panels vertically on opposite sides of the tower, stretching slightly so they curve along the body.
🧰 Balcony Rails (White) – Make 8
-
ch 35–40, sl st back across
-
FO
👉 Attach rails horizontally across tower over the window panels, evenly spaced every 4–5 rounds. Let them sit slightly outward to mimic 3D balconies.
🚁 Helipad + Arm
Helipad (Black + White Rim):
-
MR, 6 sc
-
inc x6 (12)
-
(1 sc, inc) x6 (18)
-
sc around (18) in black
-
Switch to white, sc BLO to form ridge, sc 1 round
-
FO
Arm Support (Beige):
-
ch 8, sc across (7)
-
FO and roll into short tube
-
Sew between building and helipad
Attach to the left side of tower top.
🌿 Base with Greenery
Base (Beige):
-
MR, 6 sc
-
inc x6 (12)
-
(1 sc, inc) x6 (18)
-
(2 sc, inc) x6 (24)
-
(3 sc, inc) x6 (30)
Continue increasing until ~5–6 inches diameter. FO.
Bushes (Green, make 6–8):
-
MR, 6 sc
-
inc x6 (12)
3–4. sc around (12) -
(2 sc, dec) x3 (9)
-
dec x4 (5), FO and close
Stuff and sew bushes evenly around the base edge.
🏗 Support Arch Frame
-
Cut two equal lengths of tubing or strong wire
-
Bend into curved sail shape
-
Insert securely into base and sew/anchor into tower sides
-
Optional: crochet sc white tubes around the frame for a smooth look
✂️ Assembly
-
Insert plastic canvas or cardboard reinforcement inside tower back.
-
Sew tower to base securely.
-
Attach window panels and balcony rails.
-
Add helipad + arm near top left.
-
Place bushes around base.
-
Fix support arches firmly from base to tower top.
🌟 Finishing Touches
-
Add embroidery or surface crochet for extra small details.
-
Use sparkly thread in windows to mimic glass.
-
Insert tiny LED fairy lights inside for a glowing landmark effect.
🎉 Your Amigurumi Burj Al Arab is Complete!
This isn’t just another amigurumi – it’s a mini architectural sculpture in yarn. Whether displayed on a shelf or gifted to someone who loves Dubai, travel, or engineering wonders, this Burj Al Arab crochet piece is guaranteed to impress. 🌍✨