Welcome to the sacred and architectural world of amigurumi! ⛪✨ Today, I’m excited to share my free crochet pattern for an Amigurumi Church—a beautifully structured and symbolic creation perfect for nativity scenes, religious décor, or anyone who enjoys crafting detailed and meaningful plush designs! 🧶 Whether you love stitching up iconic buildings, experimenting with textured details, or simply want to add a charming church to your handmade lineup, this pattern will guide you through crafting a beautifully sculpted plush with elegant windows, a classic steeple, and a touch of timeless grace! 🌟
This design embraces soft neutrals, intricate shaping, and thoughtful details to bring a peaceful and inspiring presence to your crochet projects! 🧶✨ I’ve carefully outlined each step to ensure your Amigurumi Church turns out just right—ready to stand tall in your collection or become a treasured handmade gift! 🎁 So grab your hooks, pick out warm creams, deep browns, and soft grays, and let’s stitch up a stunning church! ⛪
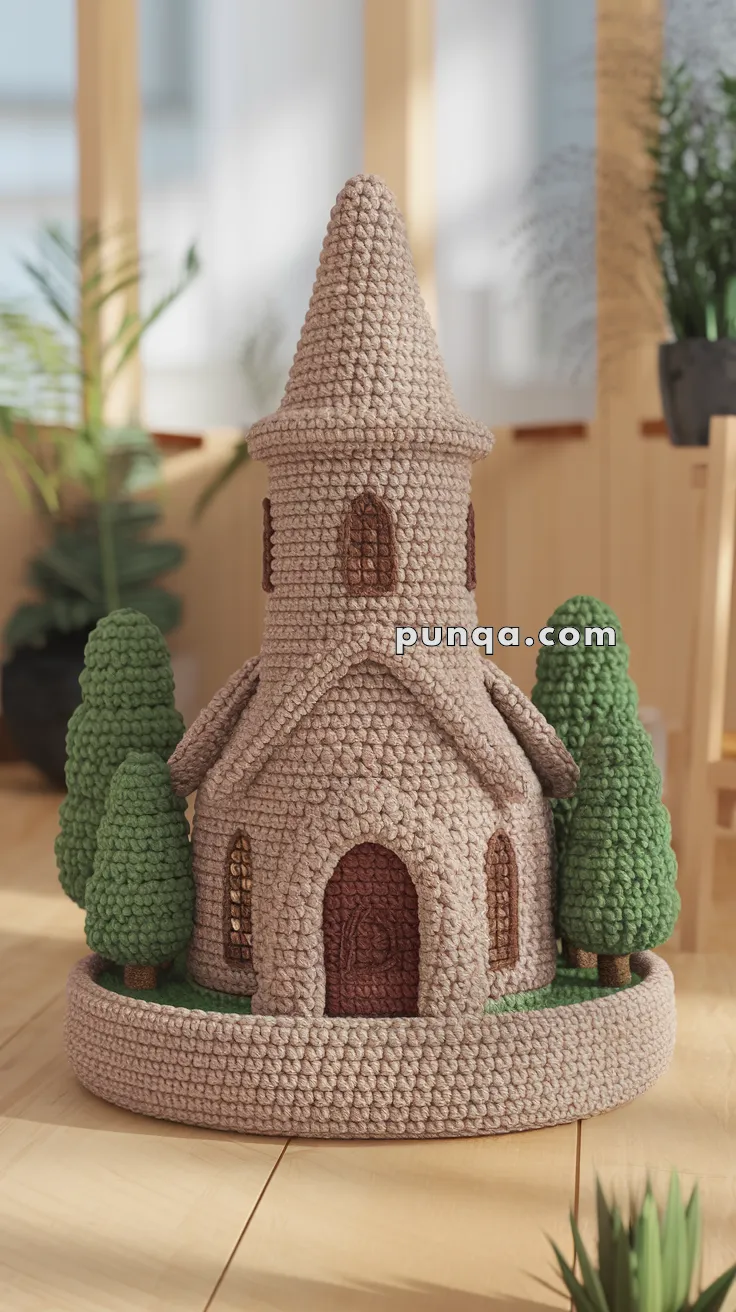
🕍 Amigurumi Church – Free Crochet Pattern
Create a beautiful handmade amigurumi church that adds warmth and charm to any nativity, holiday, or miniature village scene. This pattern features a tall steeple, arched windows, a textured dome roof, and a lovely green yard lined with trees. Perfect for advanced beginners to intermediate crocheters.
✨ Skill Level
Intermediate – Involves shaping, color changes, 3D construction, and optional wire reinforcement for structure.
📏 Finished Size
Approx. 10–12 inches (25–30 cm) tall using velvet or chunky yarn and a 3.5–4 mm hook.
🧶 Materials
-
Chunky or velvet yarn in:
-
Beige or tan (main building)
-
Brown (roof, windows, door)
-
Green (trees/grass)
-
-
Crochet hook: 3.5–4.0 mm
-
Stitch marker
-
Tapestry needle
-
Cardboard or plastic canvas for base
-
Polyfill stuffing
-
Optional: pipe cleaners or wire for shaping trees or tower
🧵 Abbreviations (US terms)
sc – Single Crochet
inc – Increase
dec – Decrease
ch – Chain
sl st – Slip Stitch
BLO – Back Loop Only
FLO – Front Loop Only
FO – Fasten Off
MR – Magic Ring
🧱 Main Base (Round Platform)
With beige yarn:
-
MR, 6 sc
-
inc x6 (12)
-
(1 sc, inc) x6 (18)
-
(2 sc, inc) x6 (24)
-
(3 sc, inc) x6 (30)
-
Continue increasing in this pattern to approx. 90–100 sts
7–10. sc around (this forms the base side wall)
FO and flatten
Optional: Insert cardboard base and stitch top closed
⛪ Church Body (Cylindrical Structure)
With beige yarn:
-
MR, 6 sc
-
inc x6 (12)
-
Continue increasing until base diameter reaches desired size (match platform interior)
4–25. sc around evenly (height of building) -
Start tapering: (5 sc, dec) x6
-
Continue until neck of tower is shaped
FO and stuff bottom firmly
Attach to center of platform
🔔 Steeple Roof (Cone)
With brown yarn:
-
MR, 4 sc
-
(1 sc, inc) x2 (6)
-
sc around
-
(2 sc, inc) x2 (8)
5–20. Continue evenly increasing by 2–4 per round until cone fits top of building
Stuff lightly and attach to the top
🚪 Door (Front Arch)
With brown yarn:
-
ch 6
-
sc across (5), ch 1, turn
3–6. Repeat row for rectangle -
Begin arch shaping: dec first and last stitch
8–10. Continue decreasing until 1 st remains
FO and sew to base front
Optional: Embroider lines or add puff stitch cross on door
🪟 Windows (Make 5–6)
With brown yarn:
-
ch 5, sc across for 3 rows
-
Decrease for rounded top
-
Embroider vertical and horizontal lines with tan yarn to simulate glass panes
-
Stitch around base evenly
🌲 Trees (Make 4–6)
Trunk (brown):
-
MR, 5 sc
2–6. sc around
FO
Top (green):
-
MR, 6 sc
-
inc x6 (12)
-
(1 sc, inc) x6 (18)
-
sc around
-
(1 sc, dec) x6 (12)
-
dec x6 (6), FO
Stuff lightly and attach to trunk
Position trees evenly around base
🧵 Assembly
-
Place and sew the main church body centered on the circular base.
-
Attach roof cone to top.
-
Sew door on front side.
-
Position windows around tower and dome.
-
Stitch green yarn surface to base and add trees at equal intervals.
💡 Tips for Stability
-
Use cardboard/plastic canvas in the base and body floor for sturdiness.
-
Add small weights (flat stones or beans in a sealed pouch) inside base.
-
Pipe cleaners can reinforce cone and trees.
🏁 Final Touches
-
Add a cross on the steeple top with yarn or metallic wire
-
Use warm LED fairy lights inside for a cozy glow
-
Embroider bricks, floral vines, or snow details for seasonal flair
Create your own peaceful miniature chapel – ideal for holiday displays, nativity scenes, or fairy villages! 🧵⛪💚