Futuristic, quirky, and full of handcrafted charm—this Amigurumi Techno Cat crochet pattern is a fantastic way to blend classic amigurumi with a modern, cyber-inspired twist! With its sleek lines, vibrant colors, and optional tiny accessories like sunglasses, this design brings a playful, high-tech feline to life in yarn form. Whether you’re crafting for a sci-fi enthusiast, a themed décor piece, or simply love unique amigurumi creations, this FREE pattern is sure to stand out.
Designed for intermediate crocheters, this pattern allows for customization in color combinations, facial details, and even tiny embellishments to enhance its futuristic personality. Choose metallic tones for a cyberpunk aesthetic or experiment with neon hues for a bold, tech-inspired look! Whether displayed as part of a creative setup or gifted to a fellow crochet enthusiast, this amigurumi Techno Cat is ready to bring some digital-age charm. Grab your hook, select your favorite yarn, and let’s bring this futuristic feline to life! 🐱✨🧶
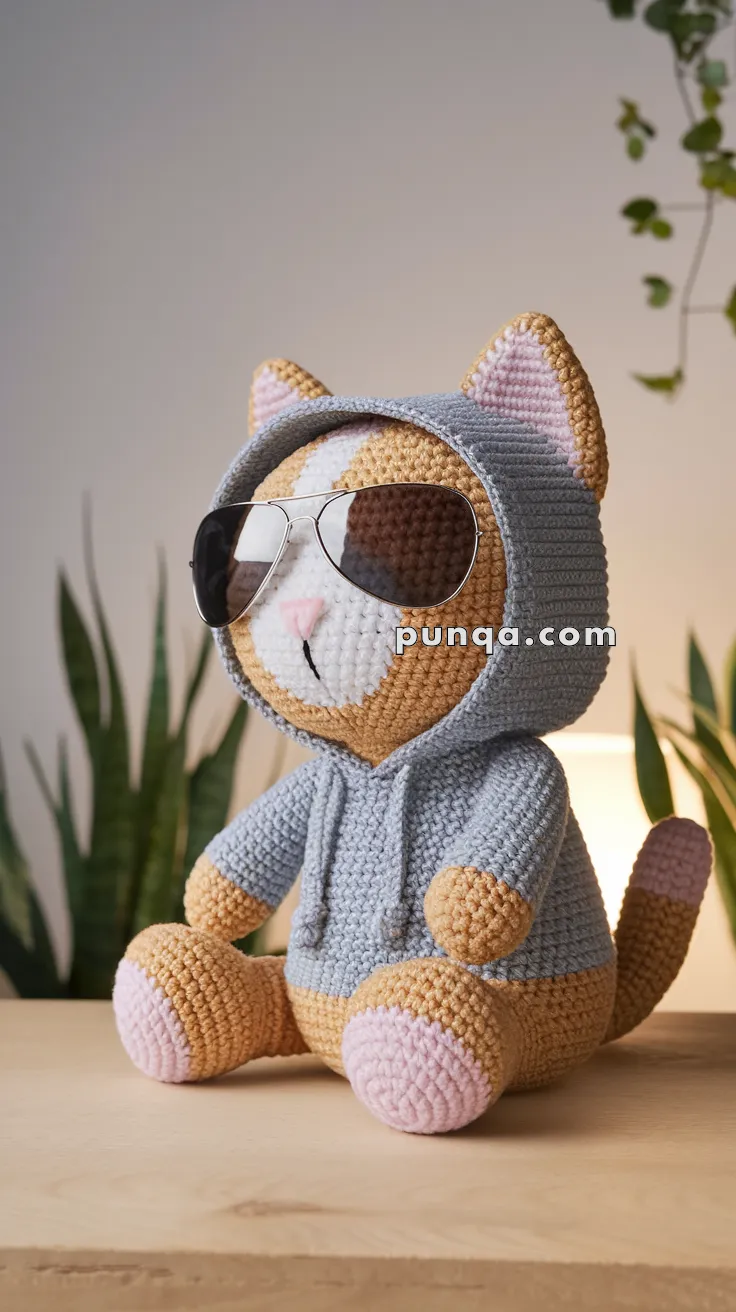
😎 Amigurumi Techno Cat Crochet Pattern
Cool, calm, and full of charisma — meet Techno Cat, the laid-back kitty who wears a hoodie better than anyone! 🐱✨ Complete with pink paws, a soft gray sweatshirt, and (optional) stylish sunglasses, this amigurumi project is both adorable and modern. Whether perched on your desk or gifted to a fellow cat lover, Techno Cat is guaranteed to make people smile.
✨ Skill Level
Intermediate – involves color changes, clothing shaping, and assembly.
📏 Finished Size
Approx. 9–10 inches (23–25 cm) tall when made with worsted-weight yarn and a 3.5 mm hook.
🧶 Materials
Yarn (Worsted or DK weight):
-
Tan or light orange – body, ears (outer), tail base
-
White – face patch, chest
-
Pink – paws, nose, tail tip, ear inner
-
Light gray – hoodie
Tools & Extras:
-
Crochet hook: 3.5 mm
-
Polyfill stuffing
-
Black embroidery thread (mouth)
-
Yarn needle
-
Stitch marker
-
Two short cords (for hoodie drawstrings)
-
Optional: toy sunglasses or mini wire frame
🧵 Abbreviations (US Terms)
MR – Magic Ring
SC – Single Crochet
INC – Increase (2 SC in same stitch)
DEC – Decrease (SC 2 together)
SL ST – Slip Stitch
CH – Chain
FO – Fasten Off
🐱 Head
With tan/orange yarn:
-
MR, 6 SC (6)
-
INC ×6 (12)
-
(1 SC, INC) ×6 (18)
-
(2 SC, INC) ×6 (24)
-
(3 SC, INC) ×6 (30)
6–13. SC around (30) -
Switch to white yarn for lower face area, continue SC around (30)
-
(3 SC, DEC) ×6 (24)
-
(2 SC, DEC) ×6 (18)
– Stuff firmly. -
(1 SC, DEC) ×6 (12)
-
DEC ×6 (6) → FO, close.
Face details:
-
Nose: embroider small pink triangle between eyes.
-
Mouth: use black thread to embroider a small “W” shape under the nose.
-
White face patch: optional — can be crocheted in or surface stitched afterward.
🐾 Ears (Make 2)
Outer (tan):
-
MR, 4 SC (4)
-
(1 SC, INC) ×2 (6)
-
(2 SC, INC) ×2 (8)
-
(3 SC, INC) ×2 (10)
-
SC around (10) → FO.
Inner (pink):
Repeat rounds 1–3.
Sew pink triangle onto tan piece.
Fold slightly and attach to the head later (threading through hood openings).
🧥 Hoodie Body
With gray yarn:
-
MR, 6 SC (6)
-
INC ×6 (12)
-
(1 SC, INC) ×6 (18)
-
(2 SC, INC) ×6 (24)
-
(3 SC, INC) ×6 (30)
6–16. SC around (30) -
(3 SC, DEC) ×6 (24)
-
(2 SC, DEC) ×6 (18)
-
(1 SC, DEC) ×6 (12) → FO, close.
Stuff firmly.
Optional hoodie pocket:
CH 9, SC 2 rows, FO. Sew to the front of the body.
Hoodie details:
Use a yarn needle to attach two gray drawstrings (about CH 30 each) to the neckline. Tie small knots at both ends.
💪 Arms (Make 2)
Start with pink (paws):
-
MR, 6 SC (6)
-
INC ×6 (12)
3–4. SC around (12)
Switch to tan:
5–7. SC around (12)
Switch to gray (sleeves):
8–13. SC around (12)
Stuff lightly, FO.
Sew to sides of body at shoulder level.
🦵 Legs (Make 2)
With pink:
-
MR, 6 SC (6)
-
INC ×6 (12)
3–5. SC around (12)
Switch to tan:
6–10. SC around (12)
Stuff firmly, FO.
Sew to bottom of body in seated position.
🌀 Tail
With tan:
-
MR, 6 SC (6)
2–10. SC around (6)
Switch to pink:
11–13. SC around (6)
Stuff lightly and sew to lower back.
🧢 Hoodie Hood
With gray yarn:
-
CH 26
2–12. SC across each row, CH 1, turn (26 SC). -
Fold piece in half and SL ST along top to form the hood’s back seam.
-
Sew bottom edge of hood around neckline opening to frame the head.
Add drawstrings if not done already by threading through front loops near the neck opening.
😎 Sunglasses (Optional)
Attach ready-made toy sunglasses or create your own from thin wire and black felt.
Position across face just above nose, slightly tilted for that “cool cat” vibe.
🧷 Assembly
-
Sew head onto hoodie body firmly.
-
Attach arms at sides, angled forward slightly.
-
Attach legs so cat sits naturally.
-
Sew tail at the back base.
-
Fit hoodie hood around head and position ears through hood edges.
-
Add drawstrings and optional pocket.
-
Attach or glue sunglasses in place.
-
Weave in all ends neatly.
💡 Customization Ideas
-
Make hoodie black or navy for a streetwear style.
-
Add small felt patches or embroidery to front pocket.
-
Use LED bead eyes instead of sunglasses for “techno” light-up look.
-
Make a duo — one with hoodie up, one down!
🧶 Finishing Touch
Your Techno Cat is now ready to strut its stuff! From its pastel paws to its stylish hoodie and optional shades, every stitch brings personality and charm.
Place this chilled feline on your shelf or gift it to someone who loves cool handmade companions. Because in a world full of copycats — this one’s got attitude. 😼🎧