✨ Skill Level
Intermediate – shaping, layered construction, sculpting details, and structured accessories.
📏 Finished Size
Approx. 26–30 cm (10–12 inches) tall
🧶 Materials & Yarn Amount
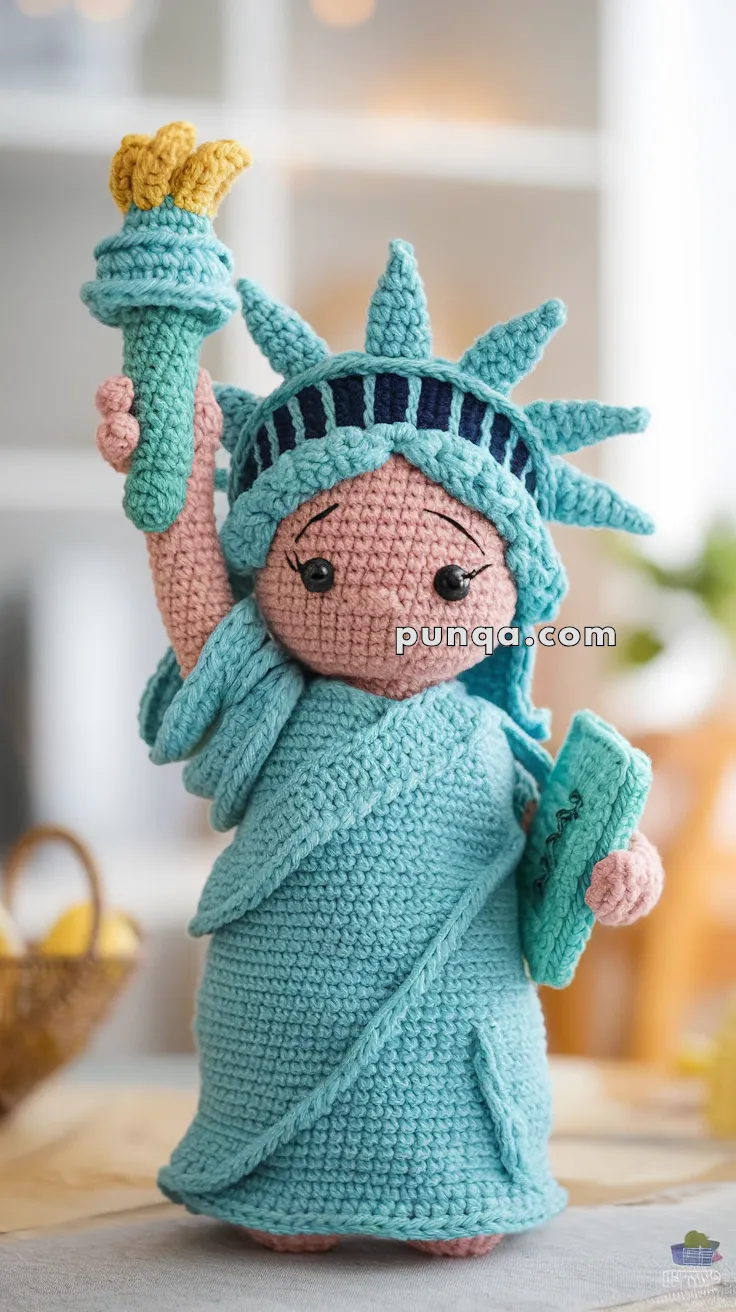
- Light teal (robe, crown, torch handle, tablet): 120–130 g
- Skin tone (head, arms, feet): 45–50 g
- Medium brown (hair): 25 g
- Dark navy (crown accents): 5 g
- Yellow (torch flame): 8–10 g
- Black embroidery thread (lashes, brows, tablet detail): small amount
Supplies:
- 2.5–3.0 mm crochet hook
- 6–8 mm safety eyes
- Polyester stuffing (~220 g)
- Yarn needle, stitch markers
🧵 Abbreviations
MR – magic ring
sc – single crochet
inc – increase
dec – invisible decrease
ch – chain
sl st – slip stitch
BLO – back loop only
FO – fasten off
👣 Legs & Lower Body (One Piece Base)
With skin tone:
R1: MR, 6 (6)
R2: inc ×6 (12)
R3: (1 sc, inc) ×6 (18)
R4–5: sc around (18)
Make 2 legs
Join with 3 ch
R6: sc around (42)
R7–10: sc around (42)
👗 Core Body
Switch to teal:
R11: (5 sc, dec) ×6 (36)
R12–14: sc around (36)
R15: (4 sc, dec) ×6 (30)
R16–18: sc around (30)
R19: (3 sc, dec) ×6 (24)
Stuff firmly
R20: (2 sc, dec) ×6 (18)
😊 Head
Switch to skin tone:
R21: inc ×6 (12)
R22: (1 sc, inc) ×6 (18)
R23: (2 sc, inc) ×6 (24)
R24: (3 sc, inc) ×6 (30)
R25: (4 sc, inc) ×6 (36)
R26–32: sc around (36)
Insert eyes between R27–28 (6 stitches apart)
Embroider brows and lashes
Head Shaping
R33: (4 sc, dec) ×6 (30)
R34: (3 sc, dec) ×6 (24)
R35: (2 sc, dec) ×6 (18)
Stuff firmly
R36: (1 sc, dec) ×6 (12)
R37: dec ×6 (6)
FO
💇 Hair
With medium brown:
Hair Cap
R1: MR, 6
R2: inc ×6 (12)
R3: (1 sc, inc) ×6 (18)
R4: (2 sc, inc) ×6 (24)
R5: (3 sc, inc) ×6 (30)
R6–8: sc around (30)
FO
Front Framing Hair (Make 2)
Ch 12
Row 1–6: sc across
Sew along each side of face, curving slightly inward
Back Hair
Attach short strands across back of cap and trim to neck length
Sew hair cap securely onto head
✋ Arms (Make 2)
With skin tone:
R1: MR, 6
R2: (sc, inc) ×3 (9)
R3–7: sc around (9)
Switch to teal:
R8–15: sc around (9)
Light stuffing
FO
Attach one arm raised and one forward
👗 Robe
Attach teal yarn at waist:
R1: BLO sc around (24)
R2: (3 sc, inc) ×6 (30)
R3: (4 sc, inc) ×6 (36)
R4: (5 sc, inc) ×6 (42)
R5–18: sc around (42)
Draped Overlay
Ch 40
Row 1–6: sc across
FO
Wrap diagonally across the torso and secure
Shoulder Fold
Ch 18
Row 1–5: sc across
Attach at shoulder
👑 Crown
Base
Ch 42, join
R1–3: sc around
Vertical Accents
Using navy yarn, surface crochet evenly spaced vertical lines
Spikes (Make 7)
Ch 6
Work: sc, hdc, dc, tr
FO
Attach evenly around crown
🔥 Torch
Handle
With teal:
R1: MR, 6
R2: inc ×6 (12)
R3–6: sc around (12)
FO
Flame
With yellow:
R1: MR, 5
R2: inc ×5 (10)
R3–5: sc around (10)
FO
Attach to handle
📖 Tablet
With teal:
Ch 12
Row 1–12: sc across
FO
Embroider simple markings
🧩 Assembly
Sew head to body
Attach hair and shape front framing pieces
Place crown above hairline
Attach arms in position
Wrap robe overlay and secure
Attach torch and tablet
Weave in all ends
🌟 Final Shaping Tips
Keep the face soft and rounded
Allow hair to remain visible under crown edges
Shape robe folds naturally
Angle the raised arm slightly
Ensure the base is balanced
💖 Final Thoughts
This elegant crochet doll combines soft shaping, layered fabric effects, and iconic details into a refined handmade piece. The balanced proportions and carefully constructed elements create a graceful and timeless result that feels both artistic and meaningful. 🗽✨