Welcome to the rugged and stylish world of amigurumi! 🤠✨ Today, I’m excited to share my free crochet pattern for an Amigurumi Western Boot—a bold and classic creation perfect for cowboy enthusiasts, Western décor lovers, or anyone who enjoys crafting structured and wearable plush designs! 🧶 Whether you love stitching up iconic accessories, experimenting with sturdy stitches, or simply want to add a cowboy boot to your handmade lineup, this pattern will guide you through crafting a beautifully shaped plush with a defined heel, curved top, and a touch of rodeo-ready charm! 🏇
This design embraces earthy tones, precise shaping, and thoughtful details to bring a rustic and adventurous presence to your crochet projects! 🧶✨ I’ve carefully outlined each step to ensure your Amigurumi Western Boot turns out just right—ready to complete your Western collection or become a treasured handmade gift! 🎁 So grab your hooks, pick out rich browns, deep blacks, or sandy neutrals, and let’s stitch up a legendary cowboy boot! 🤠
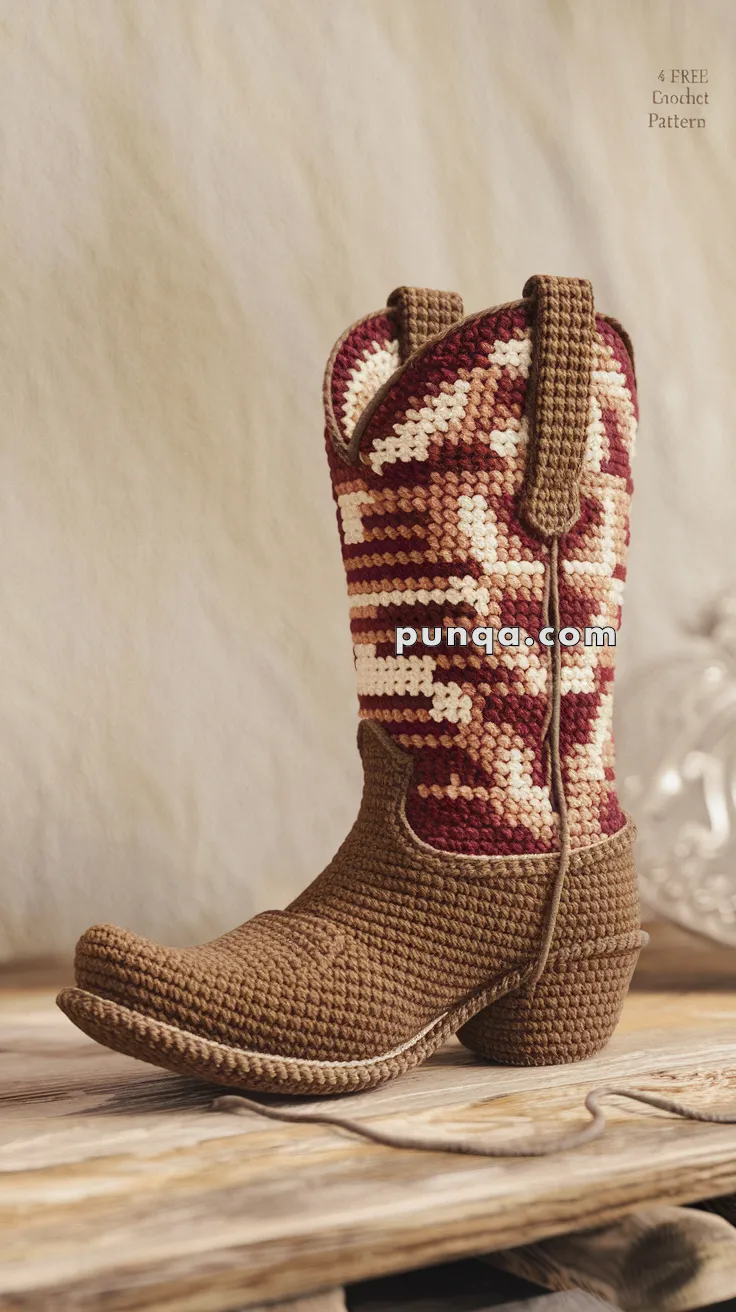
🤠 Amigurumi Western Boot Crochet Pattern
Saddle up and stitch your way to the wild west with this detailed Amigurumi Western Boot! With its classic cowboy shape, curved toe, and embroidered-style shaft pattern, this boot brings bold rustic charm to your handmade collection. Perfect as a décor piece, gift, or display item, this pattern includes detailed instructions for shaping and creating a sturdy structure — even mimicking non-yarn elements like the insole and outsole. 🧶👢🌵
✨ Skill Level
Advanced – Requires shaping, color changes, and structured support techniques.
📏 Finished Size
Approx. 9″ (23 cm) tall using worsted weight yarn and a 3.5 mm hook.
🧶 Materials
-
Yarn (Worsted Weight):
-
Color A: Dark Brown (foot, trim, heel)
-
Color B: Burgundy (shaft base)
-
Color C: Light Brown (pattern and highlight)
-
Color D: Cream (motif pattern)
-
-
Crochet hook: 3.5 mm
-
Tapestry needle
-
Stitch markers
-
Polyfill stuffing
-
Pipe cleaners/floral wire or thick felt (for shaft support)
-
Plastic canvas or cardboard (for sole)
-
Hot glue (optional for stability)
🧵 Abbreviations (US Terms)
-
MR – Magic Ring
-
sc – Single Crochet
-
inc – Increase (2 sc in same stitch)
-
dec – Decrease (sc 2 together)
-
sl st – Slip Stitch
-
BLO – Back Loops Only
-
FLO – Front Loops Only
-
ch – Chain
-
FO – Fasten Off
👣 Boot Sole (Make 2 per boot: bottom + top insert)
With Color A:
-
Ch 13
-
Row 1: sc 11, 3 sc in last ch; rotate, sc 10, 2 sc in last ch (26)
-
(sc 11, inc x3, sc 10, inc x2) (31)
-
sc 12, (sc, inc) x3, sc 11, (sc, inc) x2 (36)
-
BLO sc around (36)
👉 Cut plastic canvas or cardboard to match this shape. Sandwich it between the bottom and top sole pieces later for firmness.
Repeat rows 1–5 again for the top sole. Do not fasten off; continue with toe.
👟 Toe & Foot Body (worked from top sole)
Continue with Color A:
-
sc around (36)
7–10. sc around (36) -
(4 sc, dec) x6 (30)
-
(3 sc, dec) x6 (24)
-
sc around
-
(2 sc, dec) x6 (18)
Stuff firmly.
🧱 Heel Block
Attach yarn to back 7 stitches at heel.
-
Row 1: sc 7
2–4. Ch 1, turn, sc 7 -
dec, sc 3, dec (5)
-
sc across, FO
Sew both sides of heel to close block. Insert small felt or plastic piece if desired for extra firmness.
👢 Shaft (Worked in rounds from foot)
Attach Color B to back heel edge.
1–2. sc around (18)
3. Begin colorwork pattern: alternate B, C, D in rows to create a western motif. Use tapestry crochet technique for clean color changes.
4–17. Continue working pattern in sc rounds. Keep stitches tight and even.
🧶 Colorwork Tip: Keep unused yarn strands carried neatly inside to avoid bulking.
18–20. sc with Color A for upper trim.
🧍 Boot Cuff & Pull Tabs
Cuff:
Attach Color A to top edge.
-
sc around
-
sl st around for a neat edge, FO
Pull Tabs (Make 2)
-
Ch 6
-
Row 1: sc 5
3–6. sc across
Fold in half and sew ends to inside shaft sides near the top.
🧷 Decorative Overlay Trim (optional)
With Color A:
-
Surface slip stitch around the side seam curve from mid-heel to top for that outlined look.
-
You can also chain stitch with a yarn needle to mimic topstitching details.
🧵 Sole Assembly
-
Sandwich plastic canvas between two sole layers.
-
Sew around using whip stitch or sc join in Color A.
-
Add visible edge piping with surface slip stitch in Color C if desired.
🔧 Heel & Arch Support
-
For the heel shape: build up a layered stack of tightly stitched rows, either crocheted or stuffed.
-
You may crochet a small wedge and sew it under the heel for elevation:
-
Ch 7, work 6 sc across
-
Rows 2–6: decrease each row until 1 st remains
-
Sew this piece under the heel.
-
🪄 How to Make Boot Stand Straight
-
Plastic Insert: Use a rolled sheet of stiff felt or plastic canvas inside the shaft.
-
Pipe Cleaners: Insert 2–3 along the inside vertically, behind colorwork.
-
Tight Tension: Crochet tightly to enhance firmness.
-
Stuffing: Lightly stuff foot and base of shaft, but leave top flexible.
-
Steam & Shape: Lightly steam the boot with a garment steamer. Shape the toe curl and shaft by hand and allow to cool while standing.
💡 Finishing Touches
-
Add a yarn loop under the sole and run a thin lace or leather string for a horseshoe touch.
-
Customize colorwork to match team or ranch colors.
-
Use as decor, a pen holder, or fill with wrapped treats for a Western-themed gift!
These rustic amigurumi western boots are as stylish as they are detailed—crafted with cowboy charm and built to stand proud. 🤠🧶