Welcome to the sleek and electrifying world of amigurumi! ⚡🚗 Today, I’m excited to share my FREE crochet pattern for an Amigurumi Tesla Roadster—a tiny, turbo-charged tribute to Elon Musk’s iconic space-faring sports car! Whether you’re a Tesla fanatic, a sci-fi lover, or just someone who enjoys crafting unexpected crochet creations, this pattern will help you stitch a miniature Roadster complete with smooth curves, a glossy finish, and even a cute little astronaut driver (optional, but highly recommended for maximum whimsy!). Perfect for tech enthusiasts, eco-conscious crafters, or anyone who wants to add a futuristic flair to their amigurumi collection. 🌌🧶
This design combines clean lines and clever shaping to capture the Roadster’s signature aerodynamic look while keeping it soft and cuddly. I’ve broken down each step to help you navigate the stitching process with ease—from the distinctive Tesla grille to the cherry red paint job (though you can customize the color to match your dream ride!). 🎨✨ So charge up your crochet hooks, pick out some shiny red (or space-gray!) yarn, and let’s crochet a pocket-sized piece of automotive—and interstellar—history! Who says you can’t yarn your way to Mars? 🚀💨
⚡ Amigurumi Tesla Roadster Crochet Pattern
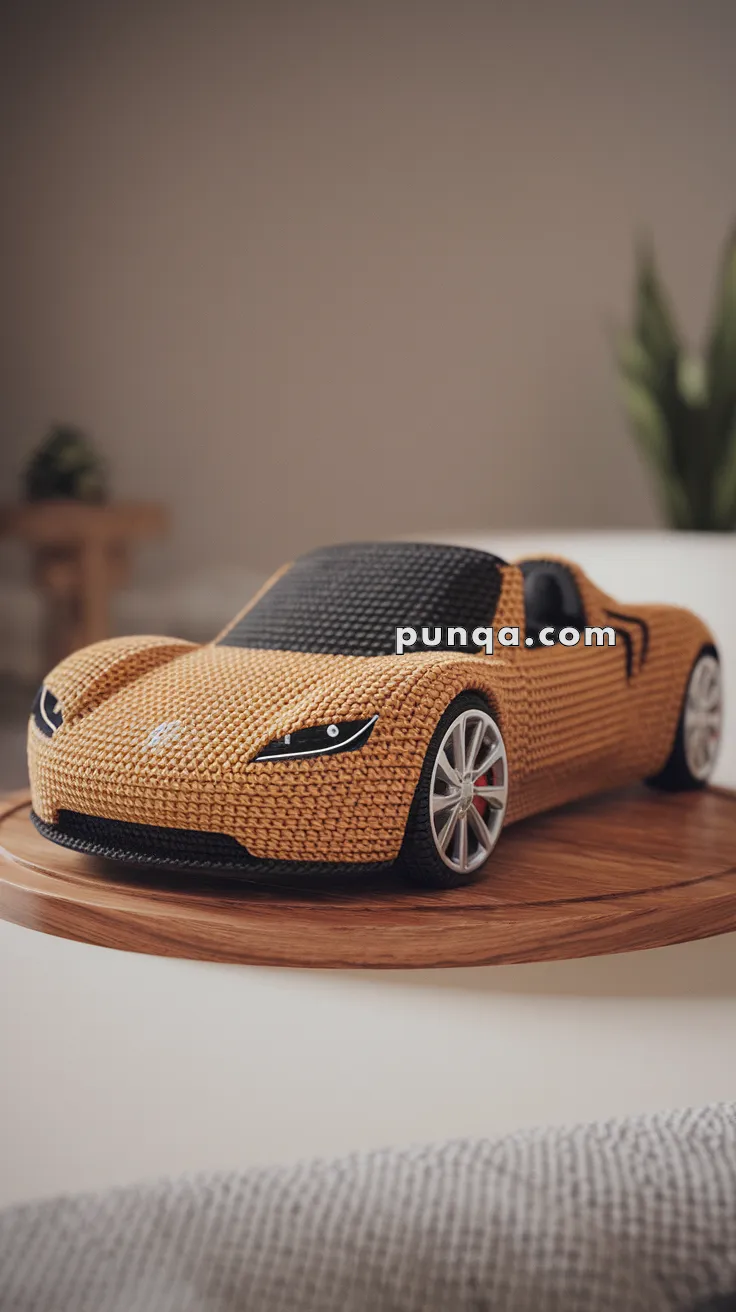
Bring high speed and high style into the handmade world with this ultra-sleek amigurumi Tesla Roadster! Designed with aerodynamic curves, signature headlights, and realistic non-yarn wheels, this electric sports car will electrify your crochet collection.
✨ Skill Level
Advanced – Features complex shaping, color detailing, and assembly of yarn + non-yarn parts.
📏 Finished Size
Approx. 12–14 inches (30–35 cm) long using worsted yarn and a 3.5 mm hook.
🧶 Materials
-
Worsted weight yarn:
-
Body: Burnt Orange or Mustard
-
Windshield/Roof: Black
-
Trim: Dark Gray or Black (for bumpers & grille)
-
White or light gray (for emblem)
-
-
3.5 mm crochet hook
-
Polyester fiberfill stuffing
-
Tapestry needle
-
Stitch marker
-
Scissors
-
4 Toy car wheels or DIY wheels (e.g., bottle caps, plastic lids, craft foam)
-
Stiff felt or plastic canvas (for internal shaping of base)
-
Black mesh fabric or felt (for windows/headlights)
-
Superglue or hot glue
🧵 Abbreviations (US Terms)
-
MR – Magic Ring
-
sc – Single Crochet
-
inc – Increase
-
dec – Decrease
-
ch – Chain
-
sl st – Slip Stitch
-
FO – Fasten Off
-
BLO – Back Loops Only
🧱 Main Car Body (Burnt Orange Yarn)
Start from the front bumper and shape backward:
-
MR, 6 sc (6)
-
inc x6 (12)
-
(1 sc, inc) x6 (18)
-
(2 sc, inc) x6 (24)
-
(3 sc, inc) x6 (30)
-
(4 sc, inc) x6 (36)
7–12. sc around (36) -
(5 sc, inc) x6 (42)
14–25. sc around (42)
Shape roof and cockpit area: -
sc 12, ch 10 (skip 10 sts for windshield), sc 20 (42 sts maintained)
27–30. sc around (42) -
(5 sc, dec) x6 (36)
-
(4 sc, dec) x6 (30)
Stuff firmly. -
(3 sc, dec) x6 (24)
-
(2 sc, dec) x6 (18)
-
(1 sc, dec) x6 (12)
-
dec x6 (6)
FO and weave closed.
🪟 Windshield & Roof (Black Yarn)
-
Join yarn to front cockpit edge.
-
Ch across gap, then sc along edge (approx. 20 sc)
3–6. sc in rows to form roof panel
FO, sew rear edge down.
🔘 Wheels (Make 4 or use real ones)
Option A: Crochet Wheels
-
MR, 6 sc (6)
-
inc x6 (12)
-
(1 sc, inc) x6 (18)
-
sc around (18)
FO, make 4, sew onto reinforced base.
Option B: Realistic Wheels (as pictured)
-
Use toy wheels (approx. 1.5–2 in diameter)
-
Attach securely with glue or stitch to the base
-
Reinforce with felt or plastic ring for even pressure
🔲 Bumpers & Trim (Black or Dark Gray)
Front Bumper:
Ch 12, sc across, shape into oval and sew on front.
Rear Bumper:
Ch 10, sc for 2 rows, sew along back end.
🔆 Headlights (Felt or Crochet)
Felt Method:
-
Cut teardrop shapes in black felt
-
Add a white accent circle or embroidery
-
Glue or sew to front corners of body
Crochet Method:
-
MR, 5 sc in black
-
inc x5 (10)
Flatten, sew/embroider details with white yarn.
⚡ Tesla Emblem (White Yarn)
Embroider or surface crochet a tiny Tesla “T” on the front hood with white yarn or fine embroidery thread.
✂️ Final Assembly
-
Attach wheels evenly using glue or stitches
-
Glue or stitch windshield and side windows
-
Sew on headlights, emblem, bumpers
-
Add internal support (felt/plastic canvas) if car body sags
-
Shape body edges with finger blocking for a sporty silhouette
💡 Customization Tips
-
Make a black or red version for an alternate Tesla colorway
-
Add LED lights or a sound module for a realistic twist
-
Create a license plate tag with your initials
This amigurumi Tesla Roadster brings power and precision to the crochet world—perfect for tech fans, car lovers, or your next epic handmade gift! 🚗⚡


Du har nogle fantastiske opskrifter