Celebrate the beauty of biology with the Amigurumi Anatomical Heart, a wonderfully quirky crochet project that’s equal parts educational and heartfelt! ❤️🧶 With its realistic shape, detailed chambers, and vibrant veins, this plush heart is a creative twist on traditional Valentine’s décor or a thoughtful gift for your favorite science lover. Whether it’s sitting proudly on a desk, tucked into a care package, or used as a teaching tool, this anatomical cutie is sure to spark curiosity and admiration.
This pattern is perfect for crocheters who love sculptural designs and clever conversation starters. You can play with color to highlight different parts of the heart, add embroidered labels, or even pair it with a brain or lungs for a full plush anatomy set. Whether you’re crafting for a med student, a biology buff, or simply stitching up something unique, the Amigurumi Anatomical Heart is a brilliant way to show love—one anatomically accurate loop at a time! 🧵🫀
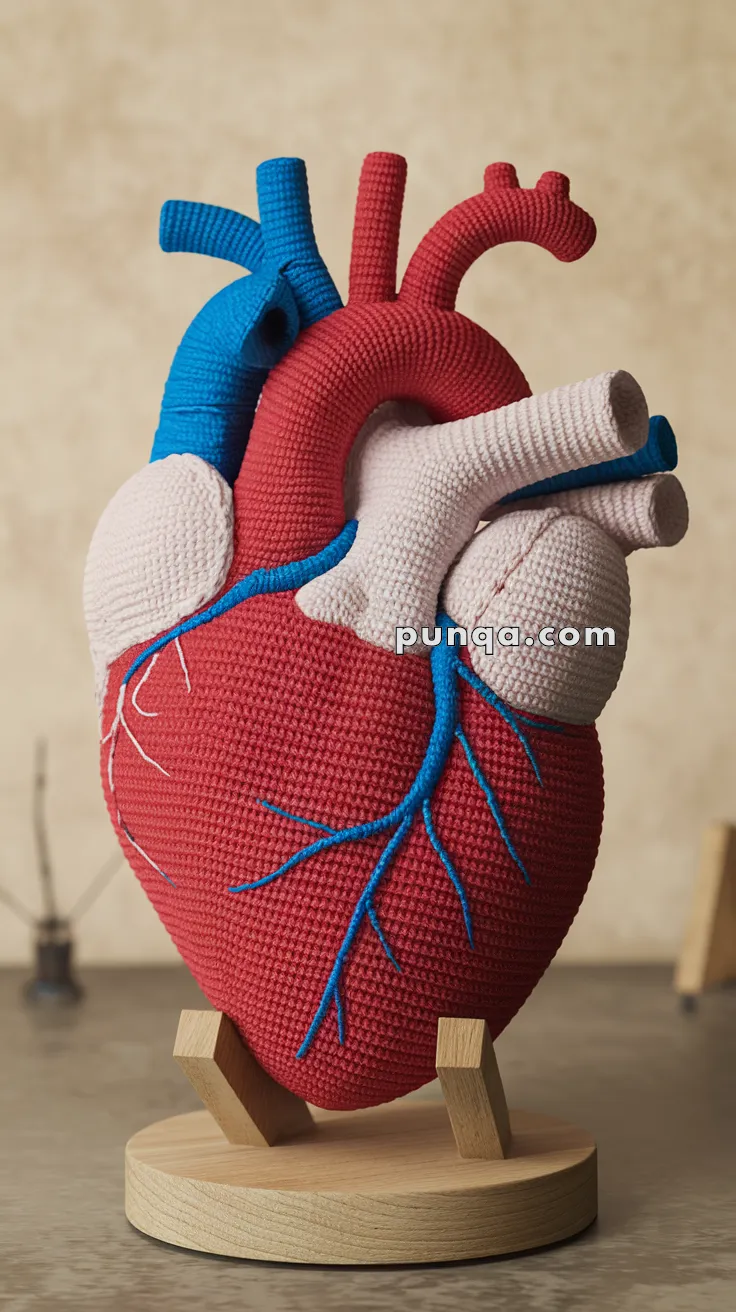
🫀 Amigurumi Anatomical Heart Crochet Pattern
This anatomical heart crochet pattern is a stunning blend of craft and science. With realistic ventricles, atria, arteries, and veins, it’s perfect as a display model, teaching tool, or a one-of-a-kind handmade gift.
✨ Skill Level
Advanced – requires 3D shaping, tube construction, color changes, and assembly.
📏 Finished Size
Approx. 12–14 in (30–35 cm) tall when using DK or worsted yarn with a 3.5–4 mm hook.
🧶 Materials
- Red yarn – ventricles & aorta
- Light pink/cream yarn – atria & pulmonary arteries
- Blue yarn – vena cavas & coronary veins
- Hook: 3.5–4 mm
- Fiberfill stuffing
- Tapestry needle
- Scissors
- Optional: wire (for shaping vessels), wooden display stand
🧵 Abbreviations (US Terms)
MR – Magic Ring
sc – Single crochet
inc – Increase (2 sc in same st)
dec – Decrease (sc2tog)
ch – Chain
sl st – Slip stitch
FO – Fasten off
BLO – Back loop only
🪡 Pattern Instructions
1. Main Heart Body (Red – Ventricles)
Goal: Tall, elongated, teardrop-shaped heart with pointed bottom.
- MR, 6 sc (6)
- inc × 6 (12)
- (sc, inc) × 6 (18)
- (2 sc, inc) × 6 (24)
- (3 sc, inc) × 6 (30)
- (4 sc, inc) × 6 (36)
- (5 sc, inc) × 6 (42)
- (6 sc, inc) × 6 (48)
9–25. sc around (48) → this forms tall sides - (6 sc, dec) × 6 (42)
27–32. sc around (42) - (5 sc, dec) × 6 (36)
34–36. sc around (36) - (4 sc, dec) × 6 (30)
- (3 sc, dec) × 6 (24)
- (2 sc, dec) × 6 (18)
- (sc, dec) × 6 (12)
- dec × 6 (6).
Stuff firmly. Shape into a tall, pointed teardrop.
2. Left & Right Atria (Light Pink – Make 2)
- MR, 6 sc (6)
- inc × 6 (12)
- (sc, inc) × 6 (18)
- (2 sc, inc) × 6 (24)
5–10. sc around (24)
FO, stuff lightly. Attach at top sides of heart.
3. Aorta (Red – Large Curved Vessel)
Goal: Thicker than other tubes, curves forward.
- MR, 12 sc (12)
- sc around for 25–28 rows (12)
Stuff lightly, curve into arc.
Branches (Make 2):
- MR, 8 sc (8), sc around for 10 rows. FO.
- Sew branching from top of aorta arch.
Attach main aorta at center-top of ventricles, curving forward.
4. Pulmonary Arteries (Light Pink – Make 2)
Goal: Thick, shorter, horizontal tubes.
- MR, 10 sc (10)
2–16. sc around (10)
Stuff lightly. Attach branching from atria region.
5. Vena Cava (Blue – Make 2)
Superior Vena Cava (Top):
- MR, 12 sc (12), sc around for 20 rows. FO.
Inferior Vena Cava (Bottom):
- MR, 10 sc (10), sc around for 12 rows. FO.
Stuff firmly. Attach one above right atrium, one at bottom right side.
6. Coronary Veins & Arteries (Blue – Raised Surface Detail)
- Make crocheted i-cords instead of embroidery for raised effect.
I-cord method (Blue):
- Ch 3.
- sc across, do not turn; slide stitches to right of hook.
- Repeat until cord is desired length (5–10 cm).
Make 6–8 cords in different lengths. Sew branching across ventricles as in photo.
7. Assembly Order
- Attach atria at upper sides.
- Position and sew aorta curving forward, then attach branches.
- Attach pulmonary arteries (pink) on both sides.
- Attach superior & inferior vena cavas (blue).
- Sew i-cord veins branching across red ventricles.
- Shape all tubes outward for anatomical realism.
- Mount on display stand if desired.
🌟 Finishing Touches
- Shape aorta so it arches clearly forward.
- Position pulmonary arteries thick and horizontal.
- Use extra stuffing inside vessels for a bold, raised look.
- Mount upright for scientific display.
Now you have an anatomical crochet heart – complete with ventricles, atria, curved aorta, thick pulmonary arteries, vena cavas, and bold branching veins. 🫀