Hop into a world of whimsy with the Amigurumi White Rabbit, a charming crochet project inspired by classic storybook magic! 🐇🕰️ With his dapper little waistcoat, twitchy nose, and ever-so-slightly worried expression, this pocket-sized rabbit is ready to lead you down a creative rabbit hole. Whether you’re crafting for an Alice in Wonderland fan, building a fantasy-themed collection, or simply indulging your love of quirky characters, this pattern is a delightful way to stitch up enchantment.
Perfect for crocheters who enjoy expressive details and playful storytelling, this project offers plenty of room for customization. Add a tiny pocket watch, embroider a name tag, or pair him with a teacup and top hat for a full Wonderland scene. Whether he’s late for a very important date or just lounging in your handmade menagerie, the Amigurumi White Rabbit is a magical way to bring your yarn to life—one curious loop at a time! 🧶✨
🐇 Amigurumi White Rabbit Crochet Pattern
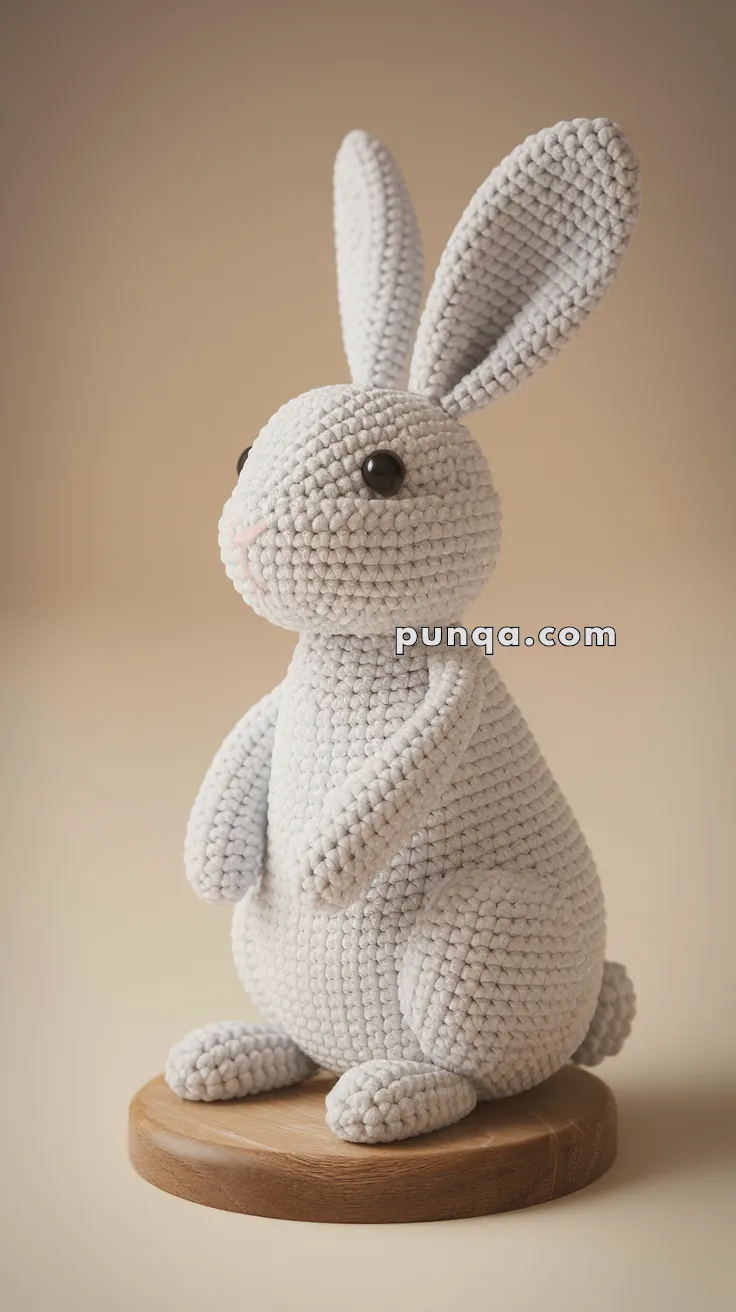
There’s something timeless and comforting about bunnies—soft, gentle, and oh-so-huggable. This crochet bunny brings that same charm to life with tall ears, a round belly, and a sweet little nose. Whether you’re making it as a cozy friend for a child, a whimsical piece of nursery decor, or a heartfelt handmade gift, this bunny is sure to hop straight into hearts. Using plush velvet yarn, the result is both cuddly and elegant, making it a project you’ll be proud to display.
✨ Skill Level
Beginner to Intermediate – simple shaping, sewing, and a bit of embroidery.
📏 Finished Size
Approx. 26–28 cm (10–11 inches) tall including ears
Using velvet / chenille yarn and 3.5 mm hook
🧶 Materials
Super bulky velvet or chenille yarn
• Light grey or white (main body)
• Soft pink (nose embroidery – optional)
3.5 mm crochet hook
12 mm safety eyes
Polyester fiberfill
Yarn needle
Stitch marker
🧵 Abbreviations (US)
MR – Magic Ring
sc – Single crochet
inc – Increase
dec – Decrease
FO – Fasten off
🧠 Head (Large & Round)
MR 6
inc x6 (12)
(1 sc, inc) x6 (18)
(2 sc, inc) x6 (24)
(3 sc, inc) x6 (30)
(4 sc, inc) x6 (36)
(5 sc, inc) x6 (42)
Rounds 8–14: sc around (42)
Insert eyes between rounds 10–11 about 9 stitches apart.
(5 sc, dec) x6 (36)
(4 sc, dec) x6 (30)
(3 sc, dec) x6 (24)
(2 sc, dec) x6 (18)
Stuff firmly
(1 sc, dec) x6 (12)
dec x6 (6)
FO and close.
🧍 Body (Big Round Belly)
MR 6
inc x6 (12)
(1 sc, inc) x6 (18)
(2 sc, inc) x6 (24)
(3 sc, inc) x6 (30)
(4 sc, inc) x6 (36)
(5 sc, inc) x6 (42)
Rounds 9–20: sc around (42)
(5 sc, dec) x6 (36)
(4 sc, dec) x6 (30)
(3 sc, dec) x6 (24)
Stuff firmly
(2 sc, dec) x6 (18)
(1 sc, dec) x6 (12)
dec x6 (6)
FO and close.
👂 Ears (Make 2 – Tall & Narrow)
MR 6
(1 sc, inc) x3 (9)
(2 sc, inc) x3 (12)
Rounds 4–28: sc around (12)
Do not stuff.
Flatten gently and curve slightly inward at top.
✋ Arms (Make 2 – Short & Plush)
MR 6
(1 sc, inc) x3 (9)
Rounds 3–10: sc around (9)
Lightly stuff bottom only.
Flatten and close with 4–5 sc.
FO and leave tail.
🦵 Legs (Make 2 – Chunky Feet)
MR 6
inc x6 (12)
(1 sc, inc) x6 (18)
Rounds 4–8: sc around (18)
(1 sc, dec) x6 (12)
Rounds 10–11: sc around (12)
Stuff firmly and flatten slightly.
🐇 Tail (Puff Ball)
MR 6
inc x6 (12)
Rounds 3–4: sc around (12)
dec x6 (6)
Stuff and close.
🧷 Assembly
• Sew head to body centered
• Attach legs to front base so bunny sits upright
• Sew arms slightly forward on body
• Attach ears high on head, angled slightly outward
• Sew tail low on back
🎀 Face
Embroider a tiny pink triangle nose between the eyes.
Optional tiny mouth stitch underneath.
🌟 Final Result
And there you have it—your very own handmade white rabbit, complete with tall ears, rounded cheeks, and a fluffy tail. This amigurumi is proof that even simple stitches can create something full of warmth and character. Imagine it perched on a shelf, tucked into a gift basket, or cherished in tiny arms—it’s bound to bring a smile wherever it goes. So grab your yarn, hook, and a dash of creativity—because this bunny isn’t just a project, it’s a keepsake waiting to be loved.
Happy crocheting! 🐇🧶✨


Thank You so Much for Sharing 💗
Amo fazer amigurumi e uma terapia