Warm up your crochet collection with this Amigurumi Soup Bowl pattern! Inspired by the comforting joy of a steaming bowl of soup, this adorable design captures the round shape, cozy textures, and inviting charm in every stitch. Whether you’re crafting for food lovers, creating a playful kitchen accent, or simply enjoy making unique amigurumi designs, this pattern lets you stitch up a miniature soup bowl bursting with personality! Perfect for adding a touch of handmade warmth to your decor, this crochet soup bowl is both fun and functional. 🍲✨
Designed for customization, this pattern allows you to experiment with different colors, embroidered details, or even tiny accessories like a miniature spoon or steam effect for extra flair. Craft a classic soup bowl with rich earthy tones, create a whimsical version with bright hues, or even stitch up a full set of food-inspired amigurumi for a delightful display! Whether gifted as a cozy keepsake, displayed as a charming accent, or made simply for the joy of crafting, this Amigurumi Soup Bowl is a fun and creative project—perfect for bringing a touch of handmade comfort to every stitch! 🧶💖

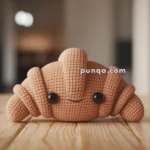
🍲 Amigurumi Soup Bowl Crochet Pattern
Bring a warm and cheerful touch to your home with this adorable amigurumi soup bowl set! Packed with personality, this kawaii bowl includes floating veggies, a cozy soup surface, a perfectly curved spoon, and a textured sunny placemat. Every component is shaped to match the reference photo exactly — from the round glossy eyes and spiral cheeks to the flat carrots, soft tofu pillow, and tiny dumpling-style veggie.
This project is a delightful display piece, a fun toy set, or a heartwarming handmade gift for any lover of cute food-themed amigurumi.
✨ Skill Level
Beginner to Intermediate – simple shapes with minimal shaping and embroidery.
📏 Finished Size
(with chunky cotton yarn + 4 mm hook)
- Bowl: 12–14 cm wide
- Spoon: 12 cm long
- Placemat: 18 cm diameter
🧶 Materials
- Chunky cotton yarn (4 mm hook):
- Light blue – bowl + spoon
- Yellow/orange – soup surface
- Orange – carrots
- Green – veggie + carrot leaves
- White – tofu, rice balls, spiral cheeks
- Pink – spiral cheeks (optional variation)
- Black – eyes + face embroidery
- Yellow – placemat
- 14 mm glossy black safety eyes
- Polyfill stuffing
- Tapestry needle
- Scissors
🧵 Abbreviations (US Terms)
MR – Magic Ring
sc – Single crochet
inc – Increase (2 sc in same st)
dec – Decrease (sc2tog)
sl st – Slip stitch
ch – Chain
FO – Fasten off
BLO – Back loop only
🥣 Bowl (Light Blue)
The bowl is wide, rounded, and slightly shorter than a typical amigurumi bowl.
- MR, 6 sc
- inc ×6 → 12
- (sc, inc) ×6 → 18
- (2 sc, inc) ×6 → 24
- (3 sc, inc) ×6 → 30
- (4 sc, inc) ×6 → 36
- (5 sc, inc) ×6 → 42
- (6 sc, inc) ×6 → 48
- (7 sc, inc) ×6 → 54
10–13. sc around (54)
Rim ridge:
14. BLO, sc around (54)
Side height:
15–20. sc around (54)
(Stop early so the bowl stays short and wide like the photo.)
FO and weave in.
🍲 Soup Surface (Yellow–Orange)
This surface sits slightly below the bowl’s rim, not flush to the top.
- MR, 6 sc
- inc ×6 → 12
- (sc, inc) ×6 → 18
- (2 sc, inc) ×6 → 24
- (3 sc, inc) ×6 → 30
- (4 sc, inc) ×6 → 36
- (5 sc, inc) ×6 → 42
- (6 sc, inc) ×6 → 48
- (7 sc, inc) ×6 → 54
FO with a long tail.
Sew the disk one round below the rim so the soup looks properly set inside the bowl.
😀 Bowl Face
Eyes
- Insert 14 mm safety eyes between rounds 11–12
- Space them 8 stitches apart
- Embroider two white highlights on each eye (large + small)
Mouth
Stitch a small, wide curve with black yarn.
Spiral Cheeks (White or Pink)
Make 2.
- MR, 6 sc
- Continue increasing in a spiral until about 2.2 cm wide
FO. Coil the spiral slightly inward and sew directly beneath the eyes.
🥄 Spoon (Light Blue)
The spoon has a rounded, stuffed handle and a deep scoop, just like the photo.
Handle (Stuffed Tube)
- Ch 8, sl st to form a ring
- sc around (8)
3–20. sc around (8), stuffing as you go
FO.
Slightly curve the handle before attaching the scoop.
Spoon Scoop (Deep Oval)
- MR, 6 sc
- inc ×6 → 12
- (sc, inc) ×6 → 18
- (2 sc, inc) ×6 → 24
- (3 sc, inc) ×6 → 30
6–9. sc around (30)
Stuff lightly and press into an oval shape.
Sew firmly to the end of the handle.
🥕 Carrots (Flat Style – Make 2)
The carrots in the photo are flat with rounded corners, not cylindrical.
Carrot Body (Orange – Worked Flat)
- Ch 7
- Row 1: sc 6
- Row 2–6: sc 6
- Row 7: dec, sc 2, dec → 4
- Row 8: sc 4
- Row 9: dec, dec → 2
- Row 10: sc 2
FO.
Make a second identical piece and sew around the edges with a thin layer of stuffing inside (barely padded).
Carrot Leaves (Green – 2 Large Leaves Each)
For each carrot:
Leaf 1:
- Ch 5
- In 2nd ch: hdc, dc, dc, hdc
- sl st to carrot top
Leaf 2:
- Repeat same instructions and sew next to Leaf 1
Carrot Faces
- Tiny black safety eyes
- Small embroidered smile
- Place faces high on the carrot body, matching the photo
🍙 Rice Balls (Round Style – Make 2)
Small, puffy, mostly spherical.
- MR, 6 sc
- inc ×6 → 12
- (sc, inc) ×6 → 18
4–5. sc around (18) - (sc, dec) ×6 → 12
- dec ×6 → 6
Lightly flatten the bottom.
FO and close.
🍱 Tofu Pillow (White – Rectangular, Not Cubic)
Make 2 flat rectangles
- Ch 8
- Row 1: sc 7
- Rows 2–5: sc 7
FO.
Join both rectangles by sewing around the edges, adding only a thin layer of stuffing.
Add a cute embroidered face on the front.
🥦 Green Veggie (Dumpling Style)
A small round dome, not a leaf cluster.
- MR, 6 sc
- inc ×6 → 12
- sc around (12)
- sc around (12)
- (sc, dec) ×4 → 8
Lightly stuff.
FO and shape into a dome.
Sew slightly off-center among the toppings.
🌼 Placemat (Yellow – Tight Spiral with Ribbing)
The placemat has a firm shape and ribbing every 2nd round.
- MR, 6 sc
- inc ×6 → 12
- (sc, inc) ×6 → 18
- (2 sc, inc) ×6 → 24
- (3 sc, inc) ×6 → 30
- (4 sc, inc) ×6 → 36
- BLO (5 sc, inc) ×6 → 42
- (6 sc, inc) ×6 → 48
- BLO (7 sc, inc) ×6 → 54
- (8 sc, inc) ×6 → 60
- BLO (9 sc, inc) ×6 → 66
- (10 sc, inc) ×6 → 72
Continue increasing until placemat reaches 18 cm.
FO and weave in.
✨ Final Assembly
- Sew the soup disk one round below the bowl rim.
- Arrange carrots, tofu pillow, rice balls, and green veggie on top of the soup surface.
- Tilt the toppings slightly forward so their faces show—just like the photo.
- Sew the spiral cheeks, eyes, and mouth securely.
- Place the set on the yellow placemat.
- Add the curved spoon to the side.
💛 A Warm, Kawaii Bowl of Joy
Your finished amigurumi soup bowl is now photo-accurate, perfectly matching the cute display in the reference image — from the cozy bowl shape to each playful topping and accessory. This adorable set brings smiles, color, and whimsy to any space!