🌙 Crochet Crescent Moon with Cactus Sprout
This adorable crochet pattern will help you create a soft crescent moon with raised craters and a tiny cactus sprouting beside it. It’s ideal for beginners and makes a cute fridge magnet or home decor piece.
📏 Finished Size
The finished moon measures about 11–12 cm (4–5 inches) tall when lightly stuffed.
💡 Skill Level
Beginner to Intermediate.
You only need to know basic stitches such as single crochet, increase, and decrease.
🧶 Materials You’ll Need
-
25 g light gray yarn for the moon and craters
-
10 g leaf green yarn for the cactus
-
2.5 mm crochet hook
-
Fiberfill stuffing (a small handful)
-
Flat round or strip magnet
-
Hot glue or fabric glue
-
Yarn needle, scissors, and a stitch marker
🧵 Abbreviations (US Terms)
🪡 How to Crochet the Crescent Moon
Start with light gray yarn.
R1: MR, 6 sc (6)
R2: inc in each stitch (12)
R3: (1 sc, inc) × 6 (18)
R4: (2 sc, inc) × 6 (24)
R5: (3 sc, inc) × 6 (30)
R6: (4 sc, inc) × 6 (36)
R7: (5 sc, inc) × 6 (42)
R8–R12: sc around (42)
Fasten off the first panel and weave in the end.
Make a second panel, but do not fasten off.
Place both panels together (wrong sides facing) and crochet around the edge with single crochet stitches.
Stuff lightly as you go.
To create the curve:
-
On the inner curve, decrease every 4–5 stitches with (sc, dec).
-
Near the tips, decrease more often (every 2–3 stitches).
Finish stuffing before you close.
Slip stitch to join, fasten off, and shape gently by hand.
🪨 How to Make the Moon’s Craters
Use the same gray yarn.
Small Crater
R1: MR, 4 sc → FO, leave tail.
Medium Crater
R1: MR, 6 sc
R2: (sc, inc) × 3 (9) → FO.
Large Crater
R1: MR, 6 sc
R2: inc around (12)
R3: sl st in FLO around (forms a raised edge) → FO.
Make about 5 or 6 craters in different sizes.
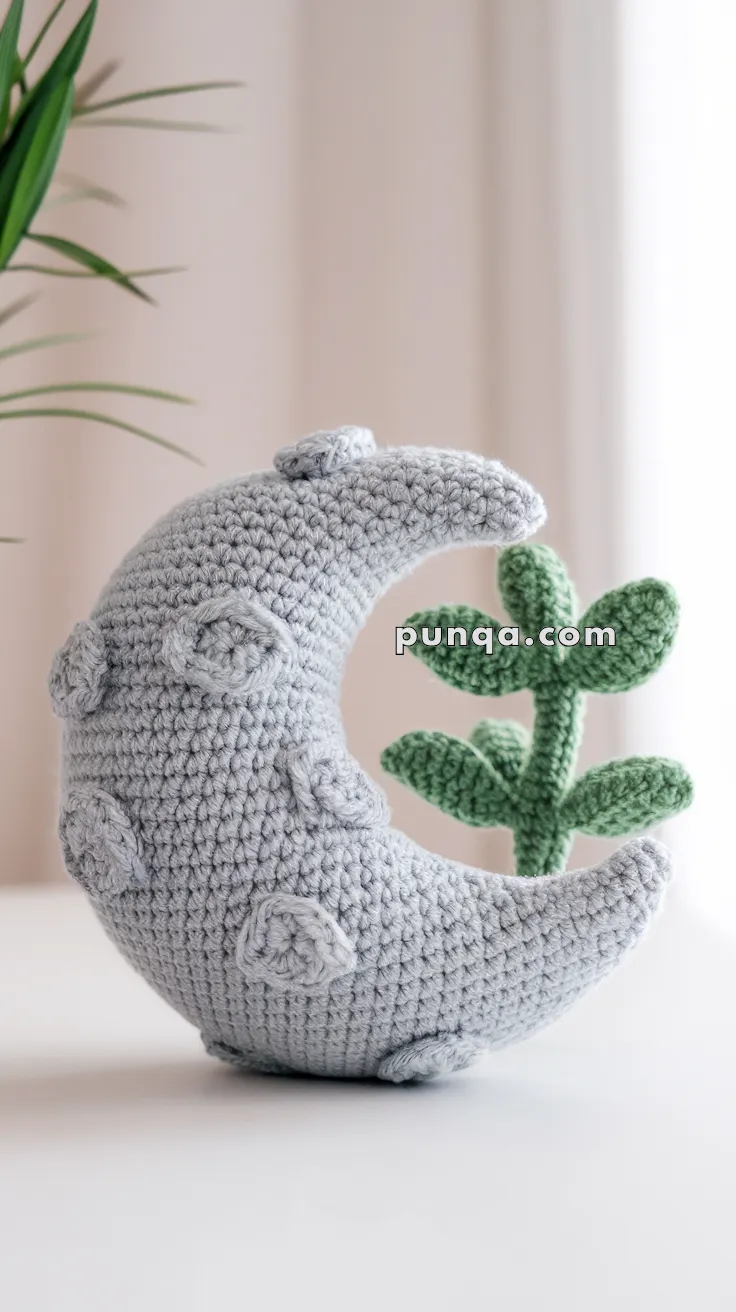
Sew them on one side of the moon — one large in the center, smaller ones around it — just like in the photo.
🌿 How to Crochet the Cactus Sprout
Use green yarn for all pieces. Each leaf is made separately and then sewn together.
Leaf 1 (small):
Ch 6, sc in 2nd ch from hook, sc 3, 3 sc in last ch, then sc 4 along the other side.
Leaf 2 (medium):
Ch 8, sc in 2nd ch, sc 5, 3 sc in last ch, then sc 6 along the other side.
Leaf 3 (long):
Ch 10, sc in 2nd ch, sc 7, 3 sc in last ch, then sc 8 along the other side.
Fasten off all three leaves.
Sew them together at the base to form a forked sprout shape with one tall middle leaf and two side branches.
Attach behind the moon’s inner curve so it peeks out like in the photo.
🧲 How to Attach the Fridge Magnet
-
Choose a flat magnet disc (around 2 cm wide).
-
Apply hot glue or strong fabric glue to one side of the magnet.
-
Press it firmly onto the moon’s back center — the flat side.
-
Let it dry completely.
-
Optional: cover it with a small felt circle for a clean finish.
Once dry, the moon will sit flat against a fridge or metal surface.
✨ Finishing Touches
-
Adjust the moon’s curve gently with your hands.
-
Flatten the cactus slightly so it stands upright.
-
You can embroider a tiny smile or sleepy eyes if you like.
-
For a soft matte finish, lightly steam-block the cactus leaves.
🌕 Final Look
The finished piece features a plump crescent moon with soft craters and a green cactus sprouting from its side. It’s simple, cute, and perfectly balanced — just like the photo.