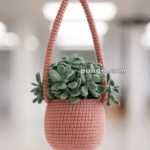
Add a touch of greenery to your crochet collection with this Amigurumi Hanging Planter pattern! Inspired by the beauty of cascading plants, this charming design captures the essence of a cozy, suspended planter in every stitch. With its soft textures, adorable pot, and delicate vines, this crochet hanging planter is perfect for adding a fresh and whimsical accent to your handmade projects. Whether you’re crafting for plant lovers, decorating a cozy space, or simply enjoy making nature-inspired amigurumi designs, this pattern lets you stitch up a delightful little planter bursting with charm! 🌿✨
Designed for customization, this pattern allows you to experiment with different shades of green, embroidered details, or even tiny accessories like miniature flowers or decorative beads for extra flair. Craft a classic hanging planter with natural tones, create a pastel version for a dreamy aesthetic, or even stitch up a full set of botanical-inspired amigurumi for a lush display! Whether gifted as a cherished keepsake, displayed as a cheerful accent, or made simply for the joy of crafting, this Amigurumi Hanging Planter is a fun and creative project—perfect for bringing a touch of handmade greenery to every stitch! 🧶💖
🌿 Amigurumi Hanging Planter Crochet Pattern
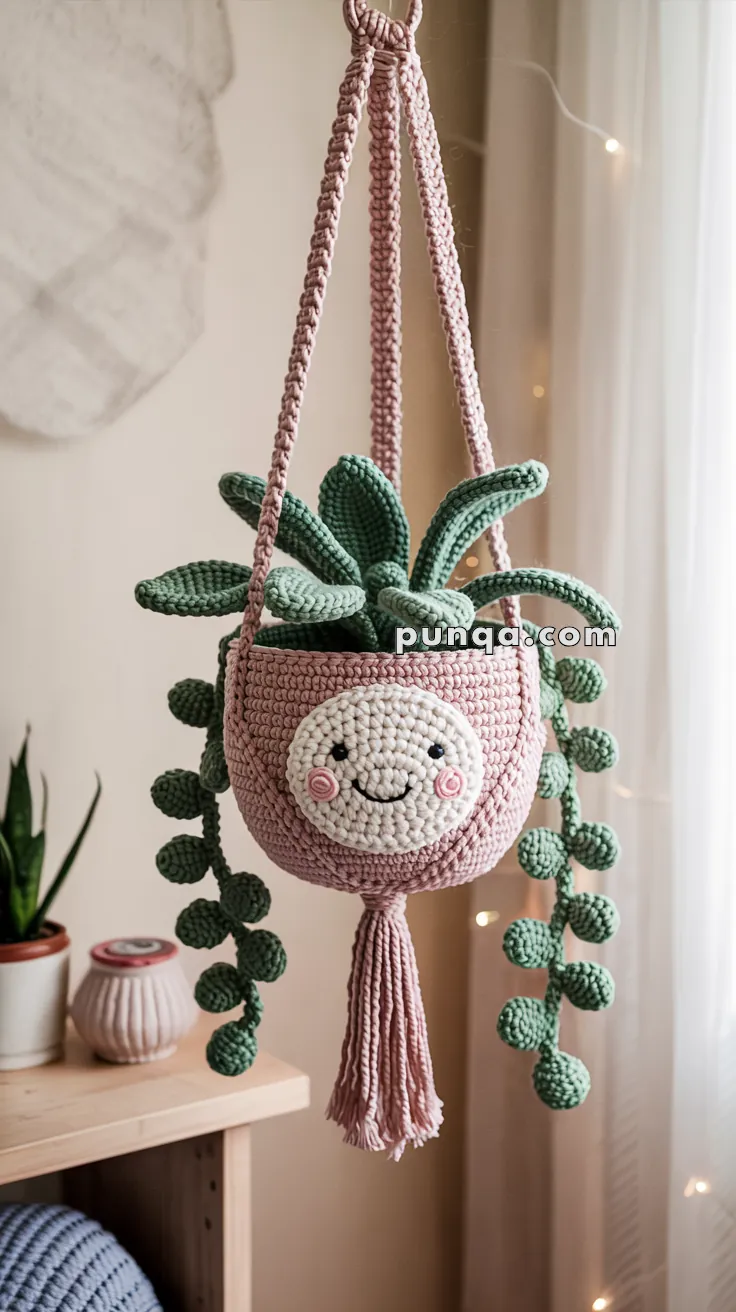
Add cheerful greenery to your space with this sweet hanging crochet planter. Featuring a friendly face, soft succulent leaves, and cascading string-of-pearls vines, it’s a perfect touch of handmade charm for walls, windows, or nursery decor.
✨ Skill Level
Beginner to Intermediate – Combines simple shaping, embroidery, and basic amigurumi construction.
📏 Finished Size
Approx. 8–10 in (20–25 cm) tall including tassel, 6–7 in wide (15–18 cm), using bulky yarn or two strands of worsted yarn and a 4.0–5.0 mm hook.
🧶 Materials
- Yarn (Bulky or 2 strands of worsted):
- Pink or pot color (Planter body)
- Green (Succulent leaves + vines)
- White (Face circle)
- Black & pink (Embroidery – face)
- Crochet hook: 4.0–5.0 mm
- Tapestry needle
- Stitch marker
- Scissors
- Polyfill stuffing
- Optional: macramé cord for hanging (or crochet your own)
🧵 Abbreviations (US Terms)
MR – Magic Ring
sc – Single Crochet
inc – Increase
dec – Decrease
sl st – Slip Stitch
ch – Chain
FO – Fasten Off
🪴 Planter Pot
With pink or pot color yarn:
- MR, 6 sc
- inc x6 (12)
- (1 sc, inc) x6 (18)
- (2 sc, inc) x6 (24)
- (3 sc, inc) x6 (30)
- (4 sc, inc) x6 (36)
- (5 sc, inc) x6 (42)
- (6 sc, inc) x6 (48)
- BLO sc around (48) – forms bottom edge
10–20. sc around (48) - sl st to even, FO and weave in ends
Optional Bottom Tassel:
- Cut 8–12 pieces of yarn (6–8″ long), thread through center of MR base, and knot.
😄 Face Patch
With white:
- MR, 6 sc
- inc x6 (12)
- (1 sc, inc) x6 (18)
- (2 sc, inc) x6 (24)
FO, leave tail for sewing
Embroidery:
- Eyes: 2 French knots or black safety eyes
- Mouth: Stitch with black yarn in a curve
- Cheeks: Pink spiral or blush circle using MR + 6 sc
Sew centered to planter body, about 2 rows below top.
🌿 Succulent Leaves (Make 8–10)
With green yarn:
- MR, 6 sc
2–3. sc around (6) - (1 sc, inc) x3 (9)
5–8. sc around (9) - (1 sc, dec) x3 (6)
- sc around (6)
Stuff lightly, pinch and sew closed
Sew in radial pattern at top of pot, overlapping slightly
🟢 String of Pearls Vines (Make 3–4)
With green yarn:
Bubbles (make in one piece):
- [Bead]:
MR, 6 sc
inc x6 (12)
(sc, dec) x4 (8)
dec x4 (4)
Do not FO – ch 5, repeat bubble instructions
Repeat 3–4 bubbles per vine with chains in between. Vary chain length for realism.
Sew to inside of pot rim to let them drape down the sides.
🪢 Hanging Straps
Option 1: Crochet
Make 3 long chains (ch 90–110), then sl st back for strength. Attach evenly spaced around rim and knot at top.
Option 2: Macramé
Cut 3 cords (24–30″), loop into rim with lark’s head knots, braid, then knot at top.
✂️ Final Assembly
- Attach leaves to center top
- Sew vines inside upper edge
- Add face and blush
- Attach hanger cords evenly
- Lightly stuff inside for structure or leave unstuffed for flatter shape
💡 Customization Ideas
- Change colors for a rainbow planter family
- Add a mini bee or butterfly appliqué
- Turn into a gift by adding a name tag
This happy hanging plant is perfect for nurseries, dorms, gifts, or adding joy to any space — it’s low maintenance and high on charm! 🌸🪴✨