Bring a touch of tranquility to your crochet collection with this Amigurumi Bonsai Tree pattern! Inspired by the timeless beauty of bonsai trees, this charming design captures their delicate branches, lush foliage, and elegant shape in every stitch. With its miniature size and intricate details, this crochet bonsai is perfect for adding a peaceful and artistic accent to your handmade projects. Whether you’re crafting for plant lovers, decorating a cozy space, or simply enjoy making nature-inspired amigurumi designs, this pattern lets you stitch up a delightful bonsai bursting with charm! 🌿✨
Designed for customization, this pattern allows you to experiment with different shades of green, embroidered details, or even tiny accessories like a miniature pot or decorative moss for extra flair. Craft a classic bonsai with natural tones, create a whimsical version with vibrant colors, or even stitch up a full set of botanical-inspired amigurumi for a serene display! Whether gifted as a cherished keepsake, displayed as a calming accent, or made simply for the joy of crafting, this Amigurumi Bonsai Tree is a fun and creative project—perfect for bringing a touch of handmade greenery to every stitch! 🧶💖
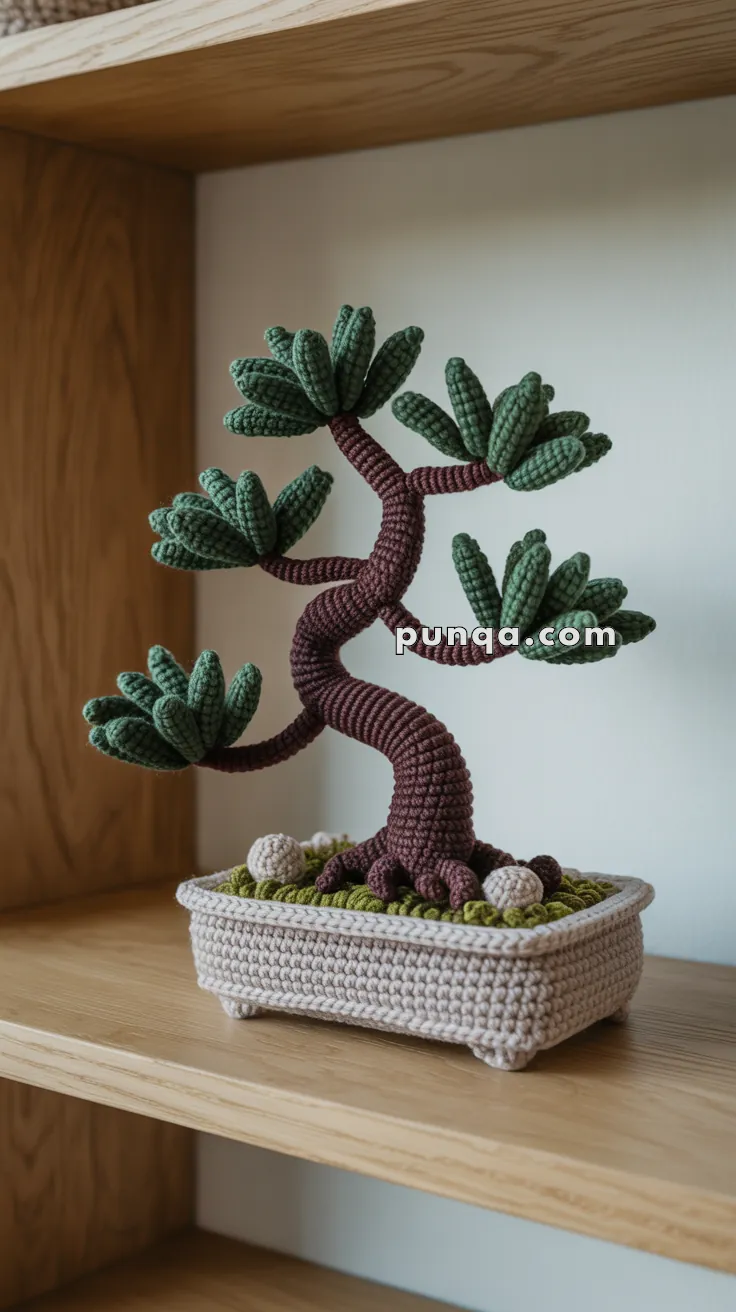
🌳 Amigurumi Bonsai Tree – FREE Crochet Pattern
Bring peace, harmony, and a touch of zen to your shelf with this sculptural amigurumi bonsai tree. With its elegant curves, leafy clusters, and stone-accented pot, this serene crochet project is perfect for plant lovers and decor enthusiasts.
✨ Skill Level
Intermediate – Basic shaping, wire reinforcement, and modular assembly involved.
📏 Finished Size
Approx. 10–12 in (25–30 cm) tall when assembled with DK yarn and a 2.5 mm hook.
🧶 Materials
- DK yarn:
- Brown (tree trunk & branches)
- Dark & light green (foliage)
- Beige or taupe (pot)
- Olive green (moss)
- Cream/gray (stones)
- 2.5 mm crochet hook
- Tapestry needle
- Stitch marker
- Polyfill stuffing
- Craft wire (18–20 gauge) for branch shaping
- Hot glue or craft glue (optional)
🧵 Abbreviations (US Terms)
MR – Magic Ring
sc – Single Crochet
inc – Increase
dec – Decrease
ch – Chain
sl st – Slip Stitch
BLO – Back Loop Only
FLO – Front Loop Only
FO – Fasten Off
🪴 Pot Base
With beige or taupe:
- MR, 6 sc
- inc x6 (12)
- (1 sc, inc) x6 (18)
- (2 sc, inc) x6 (24)
- (3 sc, inc) x6 (30)
- (4 sc, inc) x6 (36)
- (5 sc, inc) x6 (42)
- (6 sc, inc) x6 (48)
- (7 sc, inc) x6 (54)
- BLO sc around (54)
11–16. sc around (54) - (8 sc, inc) x6 (60)
- sc around (60)
- FLO sl st in each st for a decorative rim
FO, weave in ends.
🪨 Pot Feet (Make 4)
- MR, 6 sc
- sc around (6)
FO, sew under corners of pot base.
🌿 Moss Base
With olive green:
- Repeat pot base R1–9 (stop before BLO round)
- FO, place inside pot and glue or stitch down
You may lightly stuff it to make a mound
🪨 Decorative Stones (Make 3–5)
With cream or gray yarn:
- MR, 6 sc
- inc x6 (12)
- sc around (12)
- (1 sc, dec) x4 (8)
- dec x4 (4)
Stuff lightly, FO, sew to moss base
🌳 Trunk
With brown:
Start from base (larger root section):
- MR, 6 sc
- (1 sc, inc) x3 (9)
- (2 sc, inc) x3 (12)
4–8. sc around (12)
Start gentle shaping:
- (2 sc, dec) x3 (9)
- sc around
- inc, 8 sc (10)
12–14. sc (10) - dec, 8 sc (9)
16–18. sc (9) - inc x2, 7 sc (11)
20–24. sc (11)
Insert wire from bottom if desired, continue:
- inc, 10 sc (12)
26–30. sc (12) - (1 sc, dec) x4 (8)
FO, leave long tail for sewing
Shape trunk by twisting gently around wire. You may make smaller branch extensions by crocheting short tubes with same brown yarn and attaching them to the main trunk.
🌿 Leaf Clusters (Make 7–9)
Each leaf cluster has 5–6 leaves.
Each Leaf (Make 5–6 per cluster):
- MR, 4 sc
- (1 sc, inc) x2 (6)
- sc around (6)
- dec x3 (3)
- sl st, FO
Assembly:
Sew leaves together at base to form a circular rosette. Make 7–9 clusters.
Sew clusters to the tips of branches. Optional: use wire inside clusters for poseable foliage.
🪢 Tree Assembly
- Position tree trunk into center of moss base
- Use hot glue or securely stitch it in
- Attach branch offshoots and clusters symmetrically
- Stitch decorative rocks around base
- Gently bend trunk and branches into elegant bonsai curves
💡 Customization Tips
- Use gradient green yarns for foliage realism
- Add a tiny bird or butterfly for a whimsical touch
- Place your bonsai in a crocheted zen garden mat or tray
This handcrafted amigurumi bonsai will add a calming and elegant accent to your shelf or workspace — no watering required. 🌿✨