Oh, the joy of amigurumi! 🌟 There’s something truly magical about transforming a ball of yarn into a delightful, huggable creature. Creating an amigurumi selkie, inspired by those enchanting Celtic myths of seals who become humans, is an adventure all its own. These whimsical figures offer a perfect blend of creativity, craftsmanship, and storytelling. As you dive into the world of selkie amigurumi, you’ll find yourself swept away by the possibilities—choosing yarn colors that mimic the ocean’s hues and selecting the perfect eyes to capture that mysterious, otherworldly gaze. The process is a dance of imagination and skill, with each stitch bringing you closer to a charming, handmade creation.
Starting on an amigurumi project is like embarking on a crafty journey where each step brings its own satisfaction. 🧶 First things first: gather your tools. A trusty crochet hook, some plush yarn, and a tapestry needle are your companions on this adventure. Begin with the basics—single crochet stitches and the magic ring are your best friends. As the selkie takes shape in your hands, you’ll add details like flippers and a removable seal coat, weaving a story into every loop and knot. It’s a delightful puzzle, where the pieces come together to form not just a toy, but a piece of folklore that tells a tale of transformation and enchantment. Each amigurumi project is a reminder of the joy found in making something uniquely yours.
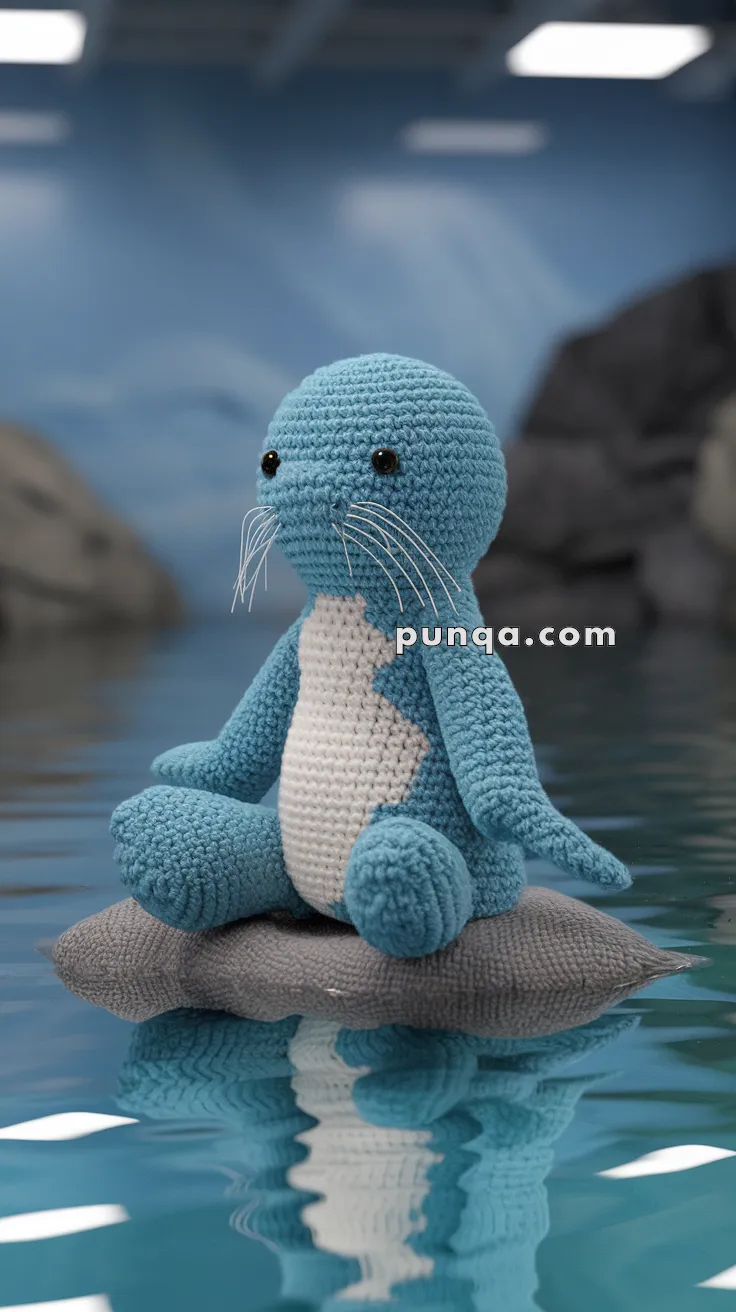
🦭 Amigurumi Selkie (Seal) Crochet Pattern
This sweet selkie plush is ready to lounge on its favorite rock or swim through imaginative oceans! With floppy flippers, a rounded muzzle, and soft curves, this project is fun for intermediate crafters who want a cuddly marine friend.
🧶 Skill Level
Intermediate – Involves shaping, sewing multiple parts, color changes, and fine detail (whiskers).
📏 Finished Size
Approx. 28 cm (11 in) from head to tail when using DK-weight yarn and a 3.0 mm hook.
✂️ Materials
-
DK-weight yarn or velvet yarn in:
-
Blue or teal (main body)
-
White or light cream (belly patch)
-
-
3.0 mm crochet hook (adjust if using thicker yarn)
-
8–10 mm safety eyes
-
Stitch marker
-
Yarn needle
-
Polyester fiberfill stuffing
-
Black embroidery thread (for nose)
-
Fishing line or thread (for whiskers)
-
Scissors
🧵 Abbreviations (US Terms)
-
MR – Magic Ring
-
sc – Single crochet
-
inc – Increase (2 sc in one stitch)
-
dec – Decrease (sc 2 together)
-
ch – Chain
-
sl st – Slip stitch
-
FO – Fasten off
-
st(s) – Stitch(es)
🐚 Pattern Instructions
🔹 Head & Body (worked in one piece, starting from the top)
With blue yarn:
-
MR, 6 sc (6)
-
inc x6 (12)
-
(sc, inc) x6 (18)
-
(2 sc, inc) x6 (24)
-
(3 sc, inc) x6 (30)
-
(4 sc, inc) x6 (36)
7–14. sc around (36) -
(4 sc, dec) x6 (30)
-
(3 sc, dec) x6 (24)
-
(2 sc, dec) x6 (18) – Insert safety eyes between Rnds 10–11, approx. 8 sts apart
-
(sc, dec) x6 (12)
-
inc x6 (18) – Begin body shaping
-
(2 sc, inc) x6 (24)
-
(3 sc, inc) x6 (30)
22–30. sc around (30) -
(3 sc, dec) x6 (24)
-
(2 sc, dec) x6 (18)
-
(sc, dec) x6 (12)
-
dec x6 (6)
FO and close.
⚪ Belly Patch (white)
-
MR, 6 sc (6)
-
inc x6 (12)
-
(sc, inc) x6 (18)
-
(2 sc, inc) x6 (24)
-
(3 sc, inc) x6 (30)
FO and leave a long tail for sewing.
🦭 Front Flippers (x2)
-
MR, 6 sc (6)
-
inc x6 (12)
-
(sc, inc) x6 (18)
4–6. sc around (18) -
(sc, dec) x6 (12)
8–10. sc around (12)
FO and stuff lightly. Flatten open end and sew to sides.
🦭 Back Flippers (x2)
-
MR, 6 sc (6)
-
inc x6 (12)
-
(sc, inc) x6 (18)
4–6. sc around (18) -
(2 sc, dec) x4, 2 sc (14)
-
(sc, dec) x4, 2 sc (10)
-
dec x5 (5)
FO and flatten to shape. Sew at slight angles to base of body.
👃 Nose & Whiskers
-
Embroider a small black oval nose centered between eyes.
-
Attach fine fishing line or thread whiskers by threading 3 strands per side and securing on the inside with a knot.
🔄 Assembly
-
Sew belly patch to the front of the body, aligning between flippers and just under the chin.
-
Attach flippers securely at sides and near back base.
-
Embroider smile if desired.
-
Weave in all ends and fluff up your plushie!
🧸 Optional Additions
-
Add a gray crocheted “rock” pillow as a base.
-
Use fuzzy or velvet yarn for a softer, realistic seal texture.
-
Adjust color for a harbor seal, gray seal, or fantasy ocean pal.
🌊 Final Notes
This selkie plush is perfect for sea life lovers, cozy decor, or imaginative play. With gentle shaping and sea-creature charm, it makes a wonderful handmade gift.