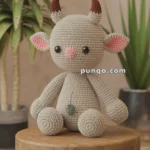
Creating an amigurumi wyvern is such a delightful journey that combines creativity and a sprinkle of magic! 🐉✨ There’s just something enchanting about crafting these mythical creatures out of yarn. Amigurumi, the Japanese art of knitting or crocheting small stuffed toys, offers endless possibilities, and wyverns, with their whimsical wings and charming dragon-like features, are no exception. They bring together the allure of fantasy and the comfort of handmade art, making them irresistible for both crafters and collectors alike. It’s like bringing a piece of a fairytale into your hands, stitch by stitch.
The process of designing a wyvern amigurumi pattern is an adventure in itself! 🎨🧶 First, I gather inspiration from myths, illustrations, or even my own imagination. Then, it’s all about sketching and selecting the perfect yarn colors that will bring the wyvern to life. As I crochet each piece, from the little horns to the majestic wings, there’s a sense of joy in seeing the creature gradually take shape. It’s a wonderful blend of technique and creativity, where each round and stitch contributes to the wyvern’s unique personality. By the end, holding the finished amigurumi feels like a personal triumph, a little guardian of fantasy crafted by my own hands.
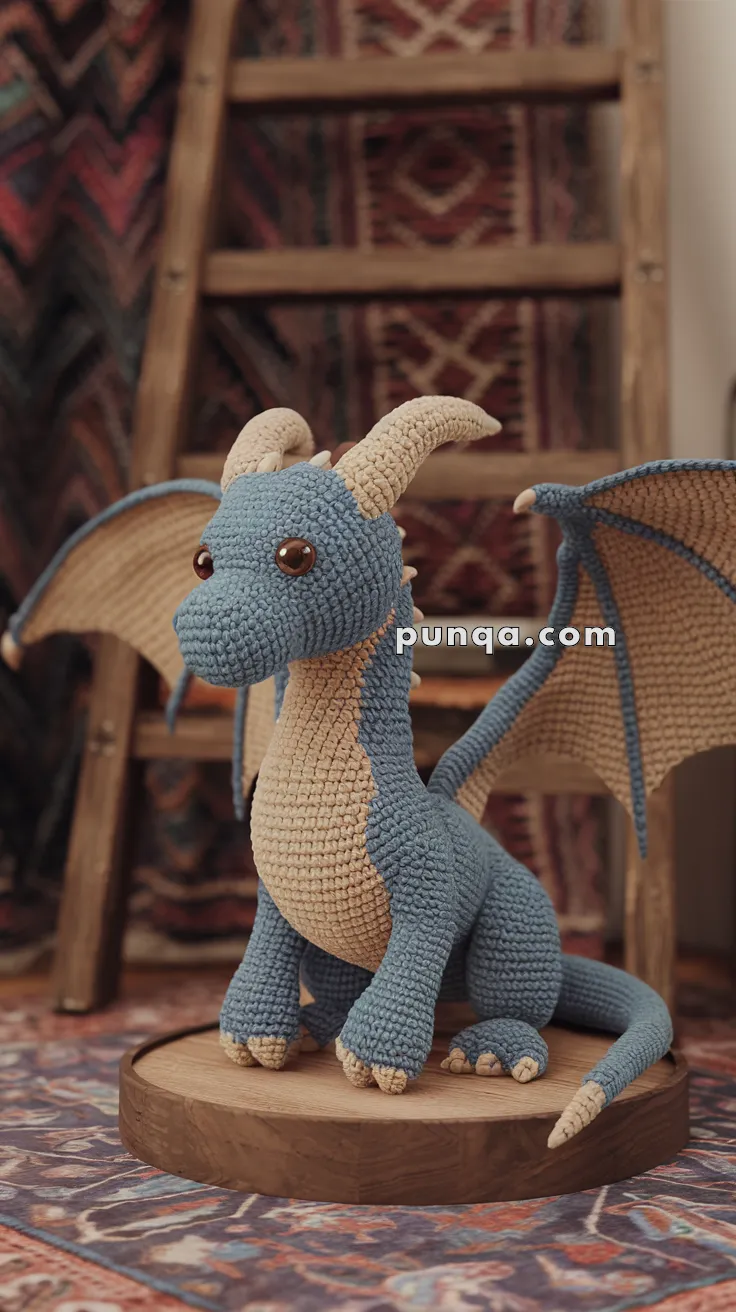
🐉 Amigurumi Wyvern Crochet Pattern
Graceful and majestic, this handmade dragon features curved horns, wire-supported wings, and soft two-tone coloring. It’s designed to sit upright just like the one in the photo.
✨ Skill Level
Advanced Intermediate — includes shaping, wire use, and sewing parts.
📏 Finished Size
Approx. 13–14 in (33–36 cm) tall when seated.
🧶 Materials & Yarn Amounts
-
Sky Blue – 120 g (body, outer wings, tail)
-
Sand Beige – 80 g (belly, horns, claws, wing membranes, tail tip)
-
Crochet hook 3.5 mm
-
14 mm safety eyes (amber/brown)
-
Aluminum craft wire 16–18 gauge ≈ 50 cm
-
Fiberfill stuffing
-
Floral or masking tape (wrap wire ends)
-
Yarn needle, stitch marker, pliers
🧵 Abbreviations (US Terms)
MR = Magic Ring
sc = single crochet
inc = 2 sc in same stitch
dec = sc2tog
ch = chain
sl st = slip stitch
BLO = back loop only
FO = fasten off
🐲 Head (Sky Blue)
R1 – MR 6 sc (6)
R2 – inc × 6 (12)
R3 – (1 sc, inc) × 6 (18)
R4 – (2 sc, inc) × 6 (24)
R5 – (3 sc, inc) × 6 (30)
R6–R12 – sc around (30)
R13 – (4 sc, inc) × 6 (36)
R14–R18 – sc around (36)
R19 – (4 sc, dec) × 6 (30)
R20 – (3 sc, dec) × 6 (24)
Insert eyes between R10–R11 (7 sts apart).
R21 – (2 sc, dec) × 6 (18)
R22 – (1 sc, dec) × 6 (12)
R23 – dec × 6 (6) → FO and close.
🦴 Neck & Body (Sky Blue + Sand Beige)
Start with Beige for belly stripe.
R1 – MR 6 sc (6)
R2 – inc × 6 (12)
R3 – (1 sc, inc) × 6 (18)
R4 – (2 sc, inc) × 6 (24)
R5–R7 – sc around (24)
Change to Blue.
R8–R13 – sc around (24)
R14 – (3 sc, inc) × 6 (30)
R15–R21 – sc around (30)
R22 – (4 sc, inc) × 6 (36)
R23–R33 – sc around (36)
R34 – (4 sc, dec) × 6 (30)
R35 – (3 sc, dec) × 6 (24)
R36 – (2 sc, dec) × 6 (18)
R37 – (1 sc, dec) × 6 (12) → FO.
Stuff firmly and sew neck to head aligning the beige front center.
🦶 Front Legs (×2)
Start Beige for claws.
R1 – MR 6 sc (6)
R2 – inc × 6 (12)
R3 – sc around (12)
Change to Blue.
R4–R9 – sc around (12)
R10 – dec × 6 (6) → FO.
Lightly stuff.
🦵 Back Legs (×2)
Beige MR 6 sc (6)
R2 – inc × 6 (12)
R3 – (1 sc, inc) × 6 (18)
R4–R5 – sc around (18)
Switch to Blue.
R6–R12 – sc around (18)
R13 – (1 sc, dec) × 6 (12)
R14 – dec × 6 (6) → FO and stuff firmly.
Attach front legs below chest, back legs at lower sides for a seated pose.
🐉 Tail (Sky Blue with Beige Tip)
R1 – MR 6 sc (6)
R2 – (1 sc, inc) × 3 (9)
R3–R6 – sc around (9)
R7 – (2 sc, inc) × 3 (12)
R8–R15 – sc around (12)
R16 – (3 sc, inc) × 3 (15)
R17–R25 – sc around (15)
Switch to Beige.
R26–R29 – sc around (15) → FO.
Stuff lightly and attach to back center.
🪶 Belly Plate (Sand Beige)
Ch 20.
R1 – sc in 2nd ch from hook and across (19).
R2 – ch 1, turn, inc, sc 17, inc (21).
R3 – ch 1, turn, sc across (21).
R4 – ch 1, turn, dec, sc 17, dec (19).
FO leaving long tail to sew from chin to belly base.
🦴 Horns (Sand Beige × 2)
R1 – MR 6 sc (6)
R2–R3 – sc around (6)
R4 – (1 sc, inc) × 3 (9)
R5–R7 – sc around (9)
R8 – (2 sc, inc) × 3 (12)
R9–R11 – sc around (12)
R12 – (3 sc, inc) × 3 (15)
R13–R16 – sc around (15) → FO.
Stuff lightly and bend slightly backward before sewing to head.
🪽 Wings (Sky Blue + Sand Beige + Wire)
Outer Frame (Blue)
Ch 38.
R1 – sc in 2nd ch from hook and across (37).
R2 – ch 1, turn, sc 9, inc, sc 9, inc, sc 9, inc, sc 8 → forms curve.
FO leaving long tail.
Inner Membrane (Beige)
Ch 35.
R1 – sc in 2nd ch from hook and across (34).
R2–R6 – ch 1, turn, sc across (34).
FO.
Place membrane inside frame and sew edges together, leaving top edge open for wire.
🪄 Adding Wire to Wings
Cut two pieces of wire ≈ 25 cm each.
Bend each into a V-shape matching wing curve.
Wrap ends in tape to blunt edges.
Slide wire between blue and beige layers through the open edge.
Sew the opening closed securely.
Insert wire base ≈ 2 cm into body just below neck and stitch through several rounds to anchor.
Shape wings to curve upward and back.
🪶 Optional Tail Spikes (Beige)
Ch 4, sl st back to make small spike.
Make 3–4 and sew along tail top.
✨ Finishing Touches
• Attach belly plate smoothly down center.
• Sew horns on top curving back.
• Position legs so dragon sits upright.
• Adjust wings and tail for balance.
• Optional: embroider nostrils or tiny mouth with blue thread.
• Gently bend wire to lift wings as shown in photo.
💫 Result
You’ll have a seated dragon with a blue body, beige underbelly and wing membranes, sculpted horns, curved claws, and graceful wired wings that hold their pose beautifully.